Setting up SDL2 in macOS (Xcode or CMake)Option 3
This step-by-step guide shows you how to set up SDL2 in an Xcode or CMake project on macOS
This legacy content uses SDL2
An updated version using SDL3 is available
In this lesson, we'll get SDL installed, along with two extensions which we'll need later in this chapter.
SDLis a cross-platform library that allows us to create windows, access input devices, and create graphics.SDL_imageis an extension that allows us to work with images in all the common formats (jpeg, png, etc)SDL_ttfis an extension that we can use to render text at run-time
This setup guide downloads the libraries that have been precompiled for use on a Mac, and then demonstrates how to add them to projects that use either Xcode or CMake
Downloading the Libraries
The libraries can be downloaded from the official GitHub release pages, here:
SDL: https://github.com/libsdl-org/SDL/releasesSDL_Image: https://github.com/libsdl-org/SDL_image/releasesSDL_TTF: https://github.com/libsdl-org/SDL_ttf/releases
Important Note: these release pages may include preview versions of SDL3. This course is using SDL2, so ensure the releases you download starts with 2 (for example, 2.30.2)
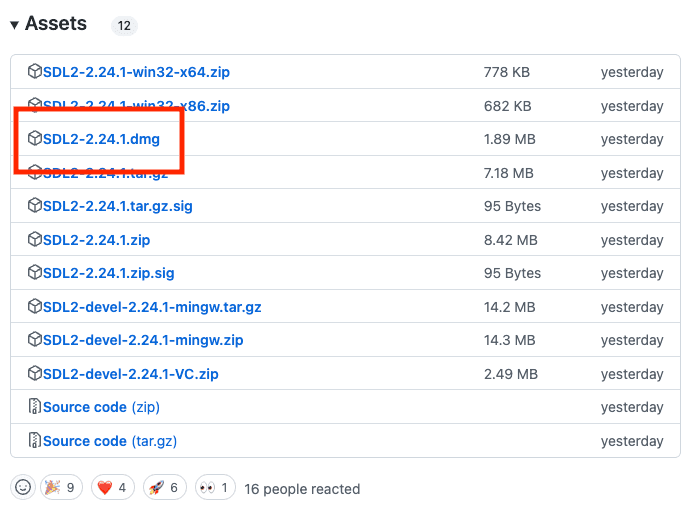
Once we've found the latest version 2 release, Mac users should download the .dmg package of each library:
Installing the Libraries
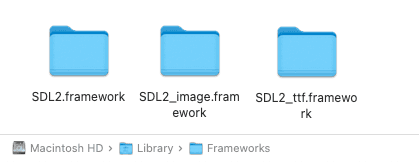
Once we have our three .dmg files, each one will contain a folder we need:
SDL2.frameworkSDL2_image.frameworkSDL2_ttf.framework
We need to copy all of these folders to the /Library/Frameworks location on our hard drive:
From here, we need to add SDL to our project. How we do that varies depending on our choice of IDE. Below, I've included guides for Xcode or, alternatively, any editor that supports CMake.
Option 1: Project Setup in Xcode
Let's walk through how we'd add these libraries to an Xcode project. Within the general settings of our project, under the "Frameworks and Libraries" section, we need to click the + icon to add each new framework.
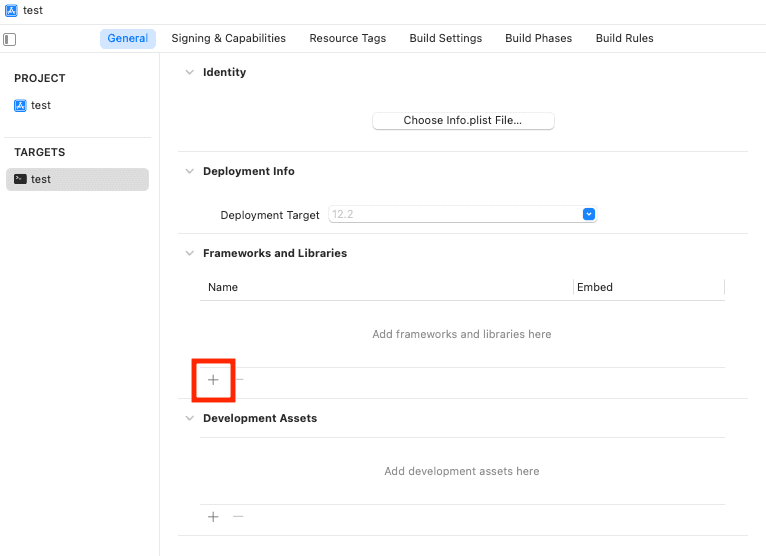
Within that window, under Add Other... click Add Files
Navigate to our frameworks directory under /Library/Frameworks/SDL.framework, and open the SDL2 alias.
This should add it to our Frameworks and Libraries section. Repeat these steps for SDL2_image and SDL2_ttf
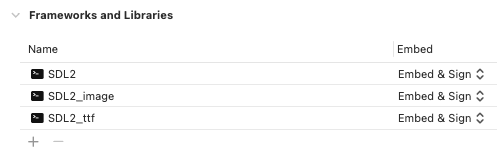
Our settings should look like this:
Next, within the Build Settings tab, we need to update our search paths to ensure Xcode and our compiled program can find all of our dependencies. These paths are split across four different configuration options:
- Framework Search Paths
- Runpath Search Paths
- Header Search Paths
- Library Search Paths
The search bar on the top right may help us find each one.
Note that some of these paths may have been prepopulated when we added the libraries, so we may not need to add all of these paths. Either way, we want our final configuration to include the following values:
Framework Search Paths
/Library/Frameworks
Runpath Search Paths
/Library/Frameworks
Header Search Paths
/Library/Frameworks/SDL2.framework/Headers/Library/Frameworks/SDL2_image.framework/Headers/Library/Frameworks/SDL2_ttf.framework/Headers
Library Search Paths
/Library/Frameworks/SDL2.framework/Versions/A/Library/Frameworks/SDL2_ttf.framework/Versions/A/Library/Frameworks/SDL2_image.framework/Versions/A
With that, everything should be set up and we're ready to get building!
We've included some test code at the bottom of this lesson which will let us verify everything was installed correctly.
Option 2: Project Setup using CMake
CMake is a cross-platform configuration management standard where we define what we want in plain text files. The CMake application can then use these text files to generate project files for a wide variety of IDEs, such as the .xcodeproj files used by Xcode, or the .vcxproj files used by Visual Studio.
Some IDEs directly use CMake files as their primary way of managing our project's configuration. An example that works on macOS is CLion.
If our IDE is compatible with CMake for configuration management, our setup is much simpler. CMake configurations use a CMakeLists.txt file. A minimalist example might look something like the following example:
# CMake uses # to denote comments, similar to how
# C++ uses //
# What is the minimum cmake version that is
# required to understand this file?
cmake_minimum_required(VERSION 3.16)
# What language are we using?
set(CMAKE_CXX_STANDARD 20) # C++20
# What is the name and version of our project
project(Sandbox VERSION 1.0.0)
# Our project has an executable that is generated
# from a single source file called main.cpp
add_executable(Sandbox main.cpp)This CMakeLists.txt file indicates we're making a C++23 project called "Sandbox", and it currently only has one source file - main.cpp
The most important line here is the call to project(). In my case, I called the project "Sandbox", but yours can be different.
Somewhere in our CMakeLists.txt, after the call to project(), we need to add the SDL libraries and include directories to the project we defined.
The completed file will look something like this:
cmake_minimum_required(VERSION 3.16)
set(CMAKE_CXX_STANDARD 23)
project(Sandbox VERSION 1.0.0)
add_executable(Sandbox main.cpp)
# Variables storing SDL framework locations
set(SDL2
/Library/Frameworks/SDL2.framework)
set(SDL2_image
/Library/Frameworks/SDL2_image.framework)
set(SDL2_ttf
/Library/Frameworks/SDL2_ttf.framework)
target_link_libraries(
Sandbox PRIVATE
${SDL2}/Versions/A/SDL2
${SDL2_image}/Versions/A/SDL2_image
${SDL2_ttf}/Versions/A/SDL2_ttf
)
target_include_directories(
Sandbox PRIVATE
${SDL2}/Versions/A/Headers
${SDL2_image}/Versions/A/Headers
${SDL2_ttf}/Versions/A/Headers
)Note that you will need to replace "Sandbox" with your project name. The name in project(), add_executable(), target_link_libraries(), and target_include_directories() must be identical in all 4 locations.
Verifying it Worked
We can validate everything is set up correctly by compiling and running the following program. We'll explain every line of this program soon but, for now, let's just confirm it compiles and runs:
#include <SDL.h>
#include <SDL_image.h>
#include <SDL_ttf.h>
int main(int argc, char** argv) {
SDL_Init(SDL_INIT_VIDEO);
IMG_Init(IMG_INIT_PNG);
TTF_Init();
SDL_CreateWindow(
"Hello Window",
100, 100, 800, 300, 0
);
while(true) {
SDL_PumpEvents();
}
return 0;
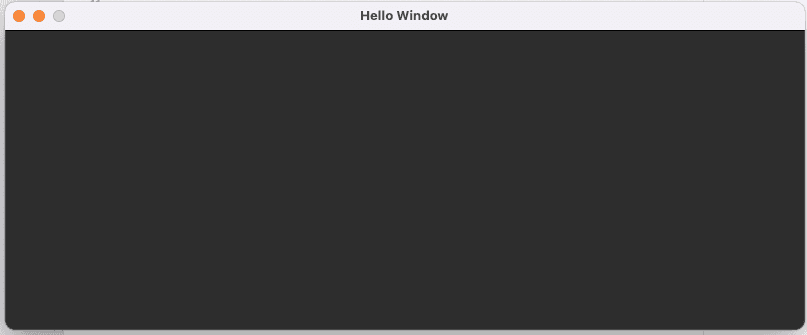
}If everything is working correctly, we'll see a window pop up when our program runs:
Note that this example program does not allow itself to be closed. We'll add that capability later in the course. For now, we can close it using our IDE if possible, or force it to close through our operating system (Ctrl + Alt + Del on Windows or Cmd + Option + Esc on macOS).
We'll update our program to support quitting early in the next chapter.
Summary
Setting up SDL2 on macOS involves downloading the precompiled framework files and integrating them into your C++ project.
Whether you use Xcode or CMake, a few configuration steps will get you ready to start building cross-platform applications with SDL2:
- Download the latest SDL2, SDL2_image and SDL2_ttf .dmg releases
- Copy the framework bundles to /Library/Frameworks
- Add the frameworks and set the search paths in your Xcode project
- Or use the find_package() and target_link_libraries() commands in CMake
- Verify your setup with a small program that initializes the SDL2 modules
Building SDL2 from a Subdirectory (CMake)
A step-by-step guide on setting up SDL2 and useful extensions in a project that uses CMake as its build system