Setting up SDL2 in Windows (Visual Studio)Option 2
A step-by-step tutorial on configuring SDL2, SDL_image and SDL_ttf in a Visual Studio C++ project on Windows
This legacy content uses SDL2
An updated version using SDL3 is available
In this lesson, we'll get SDL installed, along with two extensions which we'll need later in this chapter.
SDLis a cross-platform library that allows us to create windows, access input devices, and create graphics.SDL_imageis an extension that allows us to work with images in all the common formats, such as jpeg and pngSDL_ttfis an extension that we can use to render text at run-time
This setup guide downloads the libraries that have been precompiled for use on Windows, and then demonstrates how to add them to a project that uses Visual Studio
Downloading the Libraries
The libraries can be downloaded from the official GitHub release pages, here:
SDL: https://github.com/libsdl-org/SDL/releasesSDL_Image: https://github.com/libsdl-org/SDL_image/releasesSDL_TTF: https://github.com/libsdl-org/SDL_ttf/releases
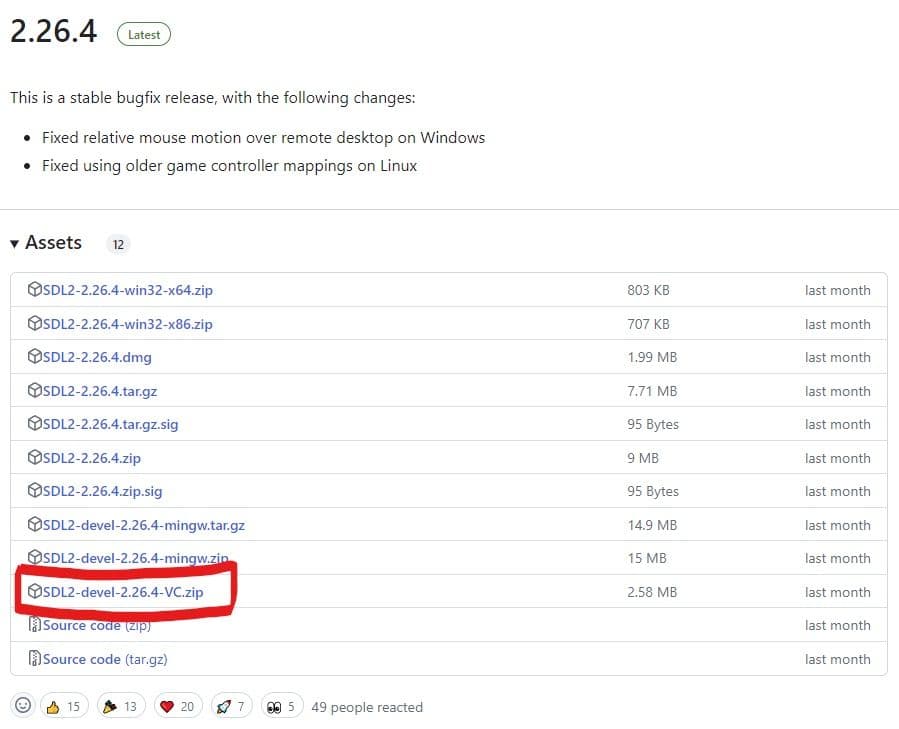
Important Note: these release pages may include preview versions of SDL3. This course is using SDL2, so ensure the release you download starts with 2 (for example, 2.26.4)
Once we've found the latest version 2 release, Windows users should download the -VC package of each library:
Installing the Libraries
Once we have our three zip files, we should extract them to a location on our hard drive. It can be helpful to add them to our project directory so that everything our project needs is in one place. However, for the sake of this demo, I have extracted them to c:\sdl:

Each of the folders includes 3 things we are interested in:
- Header files (.h) within an
includedirectory - Object Library files (.lib) within the
libdirectory - Dynamic Library files (.dll) within the
libdirectory
The lib directory includes both 32-bit (x86) and 64-bit (x64) versions of the libraries. In this guide we'll only be setting up the x64 version but, if your project needs 32-bit as well, the steps can be repeated for that configuration.
Project Setup in Visual Studio
Let's walk through how we'd add these libraries to our Visual Studio project. We can add the libraries to an existing project, or create a new project if needed.
Once we have our project open, we need to open the project properties window, available from the top menu under Project > Properties
Within our project properties, we need to change three things:
- Include Directories: This tells the preprocessor where the SDL header files are, so we can
#includethem in our own files. - Library Directories: This tells the linker where to find SDL libraries, once we declare that our project depends upon them.
- Dependencies: This tells the linker that our project depends on SDL. Specifically, it means some of the variables we'll be accessing and functions we'll be calling are defined in the SDL libraries, so it needs to link them into our project
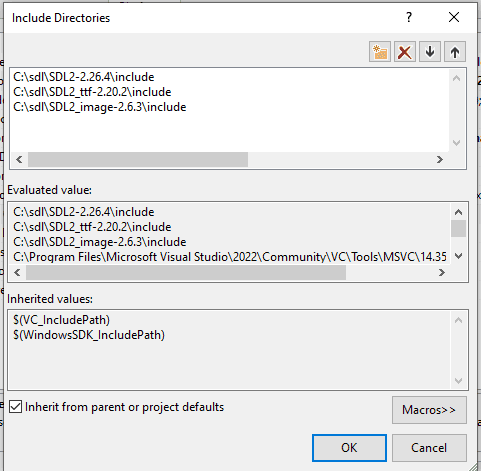
1. Adding SDL Include Directories
Under Configuration Properties > VC++ Directories, ensure we're configuring the x64 version of our project by looking at the Platform dropdown at the top. Then, open the Include Directories list, and click Edit:
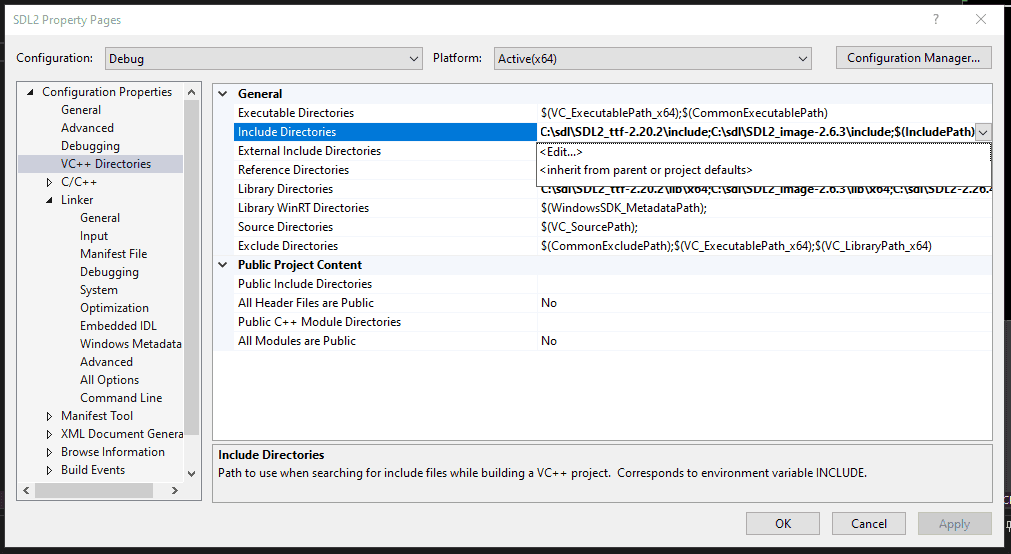
Here, we need to add the include directory of each of the three zips we extracted earlier:
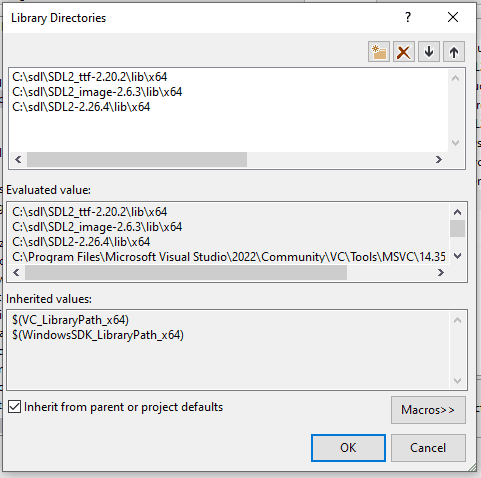
2. Adding SDL Library Directories
Under Configuration Properties > VC++ Directories, open the Library Directories list, and click Edit
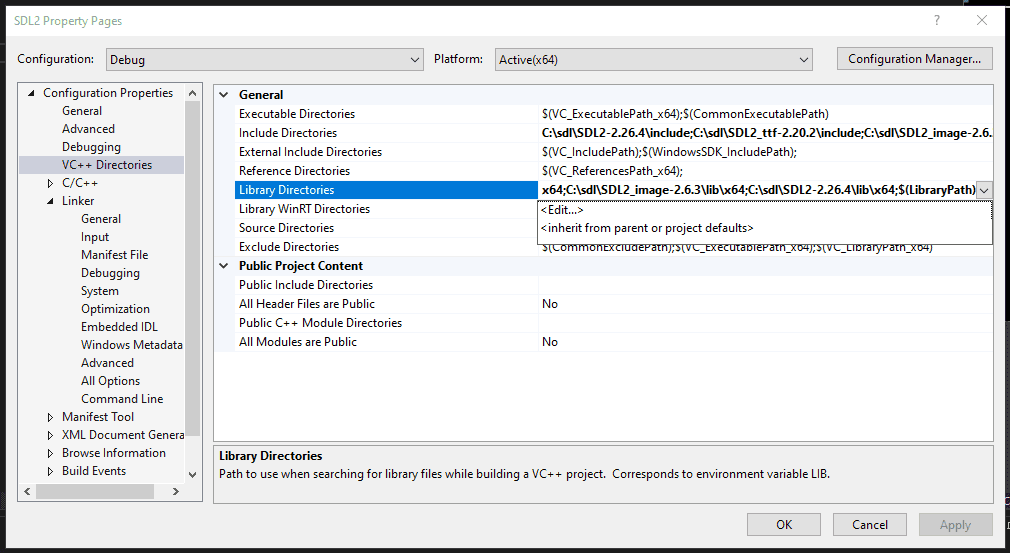
Here, we need to add the library directory from each of the three zips we extracted earlier. Because we're configuring the 64-bit version of our project (x64) we use the x64 directories:
3. Adding SDL Libraries as Dependencies
Under Configuration Properties > Linker > Input, open the Additional Dependencies list, and click Edit:
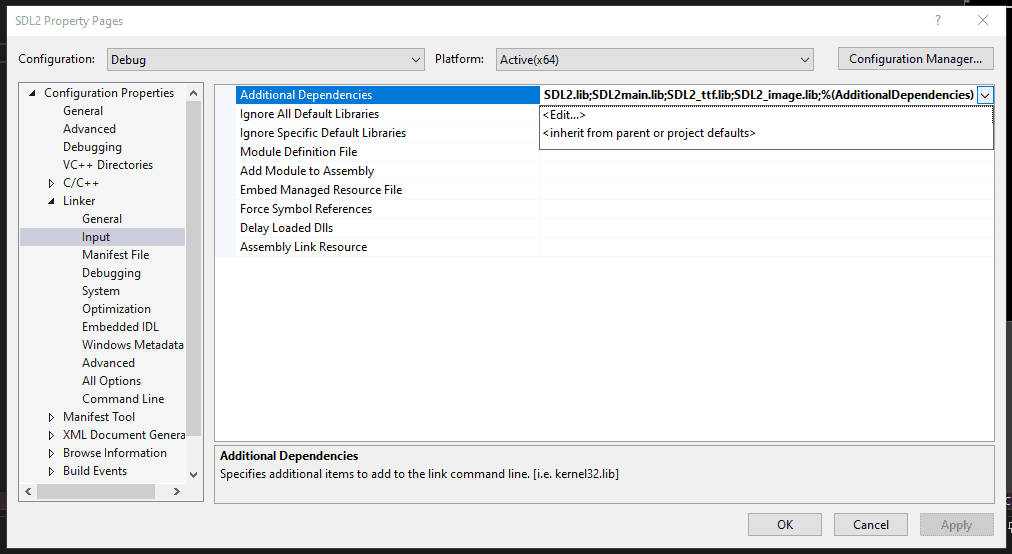
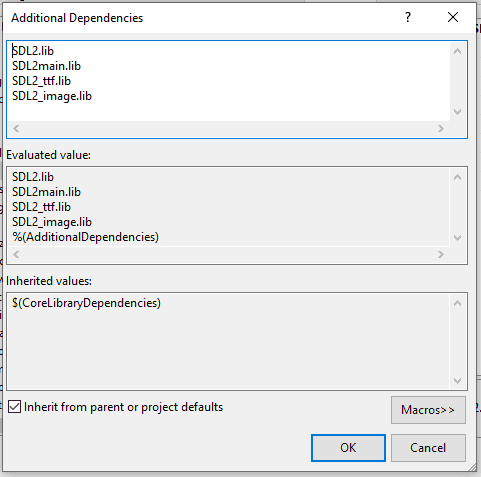
Here, we need to add a list of .lib files:
SDL2.lib
SDL2main.lib
SDL2_ttf.lib
SDL2_image.libThese are file names that should exist within the lib directories we added to our project in step 2
Compiling the Project
If everything is set up correctly, the following simple program should now compile successfully. Note that the program may not yet run successfully, but at this point, we just want to ensure it compiles:
#include <SDL.h>
#include <SDL_image.h>
#include <SDL_ttf.h>
int main(int argc, char** argv) {
SDL_Init(SDL_INIT_VIDEO);
IMG_Init(IMG_INIT_PNG);
TTF_Init();
return 0;
}Copying the SDL2 DLLs
Even though our program now compiles successfully, we may be getting errors when we try to run it. Our program may crash and report an error like:
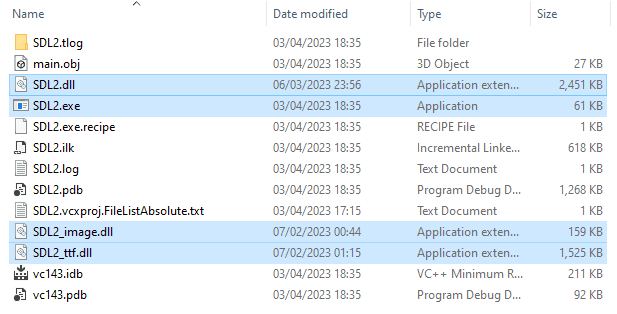
The code execution cannot proceed because SDL2.dll was not foundTo fix this, we need to ensure our system can find the SDL libraries our program is using. The three DLL files we need are:
SDL2.dll
SDL2_image.dll
SDL2_ttf.dllThese are included within the zips we downloaded earlier, within the /lib/x64 directory of each zip file. The easiest way we can help our system find these DLLs is to copy them to the same location as the executable that runs our program.
Note that in this image, my project is called SDL2, so the executable is called SDL2.exe. Yours will likely be different:
It's important to remember our compiled project is no longer a single .exe file - it now includes these .dll files. When we ship our program, we need to include all of the required .dll files so our users can run it.
Verifying it Worked
We can validate everything is set up correctly by compiling and running the following program. We'll explain every line of this program soon but, for now, let's just confirm it compiles and runs:
#include <SDL.h>
#include <SDL_image.h>
#include <SDL_ttf.h>
int main(int argc, char** argv) {
SDL_Init(SDL_INIT_VIDEO);
IMG_Init(IMG_INIT_PNG);
TTF_Init();
SDL_CreateWindow(
"Hello Window",
100, 100, 800, 300, 0
);
while(true) {
SDL_PumpEvents();
}
return 0;
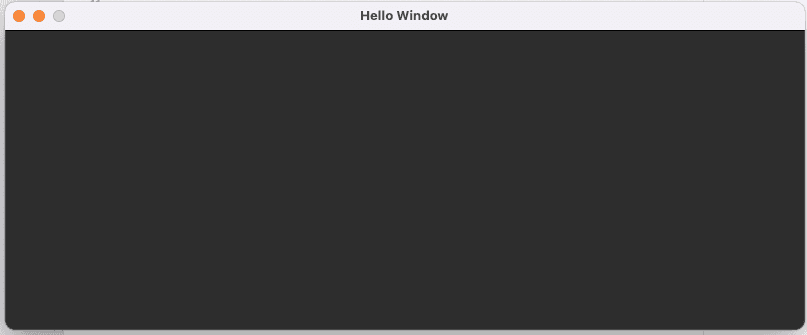
}If everything is working correctly, we'll see a window pop up when our program runs:
Note that this example program does not allow itself to be closed. We'll add that capability later in the course. For now, we can close it using our IDE if possible, or force it to close through our operating system (Ctrl + Alt + Del on Windows or Cmd + Option + Esc on macOS).
We'll update our program to support quitting early in the next chapter.
Summary
In this lesson, we covered how to set up the SDL2 library for Windows development using Visual Studio. The key steps are:
- Download the SDL, SDL_image and SDL_ttf libraries
- Add the include and library directories to your project settings
- Add the .lib files as additional dependencies
- Copy the .dll files to the same directory as your executable
With SDL2 set up, you're now ready to start using it in the next chapter!
Setting up SDL2 in macOS (Xcode or CMake)
This step-by-step guide shows you how to set up SDL2 in an Xcode or CMake project on macOS