Building SDL2 from a Subdirectory (CMake)Option 4
A step-by-step guide on setting up SDL2 and useful extensions in a project that uses CMake as its build system
This legacy content uses SDL2
An updated version using SDL3 is available
In this lesson, we'll get SDL installed, along with two extensions which we'll need later in this chapter.
SDLis a cross-platform library that allows us to create windows, access input devices, and create graphics.SDL_imageis an extension that allows us to work with images in all the common formats, such as jpeg and pngSDL_ttfis an extension that we can use to render text at run-time
This setup guide is designed for projects that use the CMake build system, where the SDL libraries will be stored in a subdirectory of our project.
Downloading the SDL2 Source Code
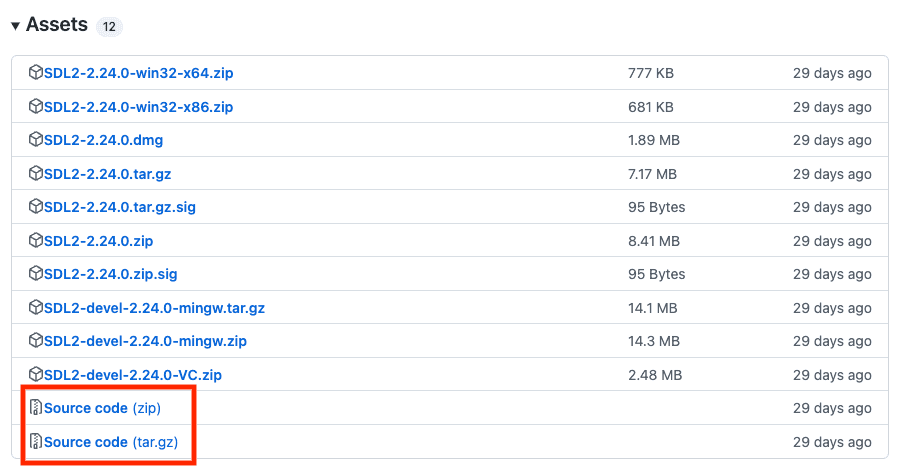
The first step is to acquire the source code for SDL2. The latest version is available from the releases page on the official GitHub repository.
Important Note: this release page may include preview versions of SDL3. This course is using SDL2, so ensure the release you download starts with 2 (for example, 2.30.2)
At the bottom of the latest version 2 release, we should see links to download the source code, as either a .zip or a .tar.gz file.
Once downloaded, we should extract the files somewhere on our hard drive where we can easily access them.
Creating the Subdirectory
The next step is to extract this downloaded source code into a subdirectory of our project. For organizational reasons, third-party code that our project relies on is often stored in a directory called external or vendor.
We'll use external in this example, and by the end of the lesson our folder structure will look like this:
my-project/
├─ CMakeLists.txt
├─ main.cpp
├─ external/
│ ├─ SDL-release-2.30.2/
│ ├─ SDL-image-release-2.8.2/
│ ├─ SDL_ttf-release-2.22.0/Updating CMakeLists.txt
Let's now update our CMake project to make use of this new subdirectory. In this example, we have a minimalist project called Sandbox, which has a single main.cpp file:
cmake_minimum_required(VERSION 3.16)
set(CMAKE_CXX_STANDARD 20)
project(Sandbox VERSION 1.0.0)
add_executable(Sandbox main.cpp)Note: In this example CMakeLists.txt file, we've called our executable Sandbox, but your name is likely to be different. Every time we use Sandbox in this lesson, you should replace it with the name you gave your project.
Using the add_subdirectory() function, we can tell CMake about our dependency:
add_subdirectory(external/SDL-release-2.30.2)Because the SDL library also uses CMake, the add_subdirectory() command can find its CMakeLists.txt file, and understand the project. We simply need to declare that our executable has a dependency on SDL2.
target_link_libraries(Sandbox PRIVATE SDL2)Simply using "SDL2" here works because SDL2 is the name of a project that is within SDL's CMakeLists.txt file, and CMake is aware of that file because of the add_subdirectory() command we used.
SDL2main
Note that if we're building our application for Windows, we should additionally add SDL2main as a dependency. CMake supports conditionals that can help us here:
if (WIN32)
target_link_libraries(
Sandbox PRIVATE SDL2main
)
endif()SDL needs to perform additional manipulation of our main function to make our program compatible with Windows, and this small additional library provides that functionality.
Our CMakeLists.txt file now looks like this:
cmake_minimum_required(VERSION 3.16)
set(CMAKE_CXX_STANDARD 20)
project(Sandbox VERSION 1.0.0)
add_executable(Sandbox main.cpp)
add_subdirectory(external/SDL-release-2.30.2)
target_link_libraries(Sandbox PRIVATE SDL2)
if (WIN32)
target_link_libraries(
Sandbox PRIVATE SDL2main
)
endif()Testing Compilation
With our project configured through CMake, we can now write a simple program to verify that it compiles:
#include <SDL.h>
int main(int argc, char** argv) {
SDL_Init(SDL_INIT_VIDEO);
SDL_Window* Window{SDL_CreateWindow(
"Hello Window", 0, 0, 800, 300, 0)};
SDL_Event event;
while (true) {
SDL_PollEvent(&event);
}
return 0;
}Note that this program should compile at this point, but it may not run successfully. We may get an error similar to the following, which we'll address next:
The code execution cannot proceed because SDL2.dll was not foundHandling DLLs
Our executable file now has a dependency on the SDL dynamically linked library, which may have a name like SDL2.dll on Windows or SDL2.dylib on macOS and Linux.
When we run our executable, the operating system searches for this library, and may not be able to find it.
One of the locations it searches is the same directory as the executable file that requested the library, so this is a common place where we'd put our dependencies. We could move our library files into this location manually, but we'd typically prefer to automate this, and CMake can help us.
In most operating systems, we can copy a file from one location to another using a terminal command, like the following:
copy "folder-a/file.txt" "folder-b"In our CMakeLists.txt, we can ask CMake to run this command after our Sandbox project builds:
add_custom_command(
TARGET Sandbox POST_BUILD COMMAND
copy "folder-a/file.txt" "folder-b"
)CMake comes with a range of built-in scripts that are generally useful when working on build automation tasks. These are available on the command line using cmake -E, for example:
add_custom_command(
TARGET Sandbox POST_BUILD COMMAND
cmake -E copy_if_different
"folder-a/file.txt"
"folder-b"
)There are two further benefits to using cmake -E over raw commands. First, the cmake -E scripts are platform agnostic. A command like copy will require a different syntax depending on whether the user is on Windows or Mac. But a command like cmake -E copy_if_different will work on any environment that has cmake.
Secondly, this approach also allows us to use generator expressions which can be used to dynamically generate information. We can identify generator expressions by the $<> syntax.
In this case, we can use generator expressions to figure out where the SDL library is located, and where it needs to be copied to.
$<TARGET_FILE:SDL2>generates the location of the main file produced by theSDL2project defined within theCMakeLists.txtfile of the subdirectory we added. That is, it generates the location of the.dllor.dylibfile we need to copy.$<TARGET_FILE_DIR:Sandbox>returns the directory where ourSandboxproject will output its executable. That is, generates the location where we need to copy the.dllor.dylibfile to
add_custom_command(
TARGET Sandbox POST_BUILD COMMAND
cmake -E copy_if_different
$<TARGET_FILE:SDL2>
$<TARGET_FILE_DIR:Sandbox>
)As a final step, we can replace cmake with ${CMAKE_COMMAND}. CMAKE_COMMAND is a variable that stores the fully resolved path to the cmake executable. Telling the terminal exactly where cmake is located makes our command more resilient across different environments.
We also added the VERBATIM flag, asking the platform to interpret the command exactly as we've written it, which further improves resilience across different environments:
add_custom_command(
TARGET Sandbox POST_BUILD COMMAND
${CMAKE_COMMAND} -E copy_if_different
$<TARGET_FILE:SDL2>
$<TARGET_FILE_DIR:Sandbox>
VERBATIM
)Our CMakeLists.txt file now looks like this:
cmake_minimum_required(VERSION 3.16)
set(CMAKE_CXX_STANDARD 20)
project(Sandbox VERSION 1.0.0)
add_executable(Sandbox main.cpp)
add_subdirectory(external/SDL-release-2.30.2)
target_link_libraries(Sandbox PRIVATE
SDL2
)
if (WIN32)
target_link_libraries(
Sandbox PRIVATE SDL2main
)
endif()
add_custom_command(
TARGET Sandbox POST_BUILD COMMAND
${CMAKE_COMMAND} -E copy_if_different
$<TARGET_FILE:SDL2>
$<TARGET_FILE_DIR:Sandbox>
VERBATIM
)Additionally, after rebuilding our application, the SDL library should be copied into the correct location, allowing our program to run successfully.
Building SDL_image and SDL_ttf
SDL2 has a collection of official extensions, that can add further capabilities to our project. In this course, we'll use SDL_image for handling images, and SDL_ttf for rendering text.
To add them to our project, we first retrieve the source code for the latest 2.x releases. These are available from GitHub:
SDL_Image: https://github.com/libsdl-org/SDL_image/releasesSDL_TTF: https://github.com/libsdl-org/SDL_ttf/releases
After downloading them, we can extract them into the same external directory we placed the base SDL2 library. After doing this, our directory structure might look something like this:
my-project/
├─ CMakeLists.txt
├─ main.cpp
├─ external/
│ ├─ SDL-release-2.30.2/
│ ├─ SDL-image-release-2.8.2/
│ ├─ SDL_ttf-release-2.22.0/Downloading Dependences
Unlike the main SDL2 library, the extensions like SDL_image and SDL_ttf have their own dependencies. These dependencies are not included in the main download - we have to acquire them separately, and place them in the external folder within each library:
my-project/
├─ CMakeLists.txt
├─ main.cpp
├─ external/
│ ├─ SDL-release-2.30.2/
│ ├─ SDL-image-release-2.8.2/
│ ├─ ├─ external/
│ ├─ SDL_ttf-release-2.22.0/
│ ├─ ├─ external/Within these directories, the SDL team has provided scripts that can automate this process for us.
macOS and Linux users can right-click the external folder, select Open Terminal Here, and then run the command:
./download.shWindows users can right-click the external folder, select Open in Terminal, and then run the command:
.\Get-GitModules.ps1Adding Extensions to CMakeLists.txt
Once we've downloaded all the extensions we need into subdirectories, and provided all their dependencies, we can now add them to our project by updating our CMakeLists.txt.
We follow the same three steps we did when installing the initial SDL library:
- We add the downloaded subdirectories using the
add_subdirectory()function - We declare the libraries as dependencies of our executable by expanding the
target_link_libraries()list - If we're using CMake to copy the libraries into the correct folder, we expand that command to also copy the SDL2_image and SDL2_ttf library files
Our complete CMakeLists.txt file might look something like this:
cmake_minimum_required(VERSION 3.16)
set(CMAKE_CXX_STANDARD 20)
project(Sandbox VERSION 1.0.0)
add_executable(Sandbox main.cpp)
add_subdirectory(external/SDL-release-2.30.2)
add_subdirectory(external/SDL_image-release-2.8.2)
add_subdirectory(external/SDL_ttf-release-2.22.0)
target_link_libraries(Sandbox PRIVATE
SDL2
SDL2_image
SDL2_ttf
)
if (WIN32)
target_link_libraries(
Sandbox PRIVATE SDL2main
)
endif()
add_custom_command(
TARGET Sandbox POST_BUILD COMMAND
${CMAKE_COMMAND} -E copy_if_different
"$<TARGET_FILE:SDL2>"
"$<TARGET_FILE:SDL2_image>"
"$<TARGET_FILE:SDL2_ttf>"
"$<TARGET_FILE_DIR:Sandbox>"
VERBATIM
)We can validate everything is set up correctly by compiling and running the following program. We'll explain every line of this program soon but, for now, let's just confirm it compiles and runs:
#include <SDL.h>
#include <SDL_image.h>
#include <SDL_ttf.h>
int main(int argc, char** argv) {
SDL_Init(SDL_INIT_VIDEO);
IMG_Init(IMG_INIT_PNG);
TTF_Init();
SDL_CreateWindow(
"Hello Window",
100, 100, 800, 300, 0
);
while(true) {
SDL_PumpEvents();
}
return 0;
}If everything is working correctly, we'll see a window pop up when our program runs:
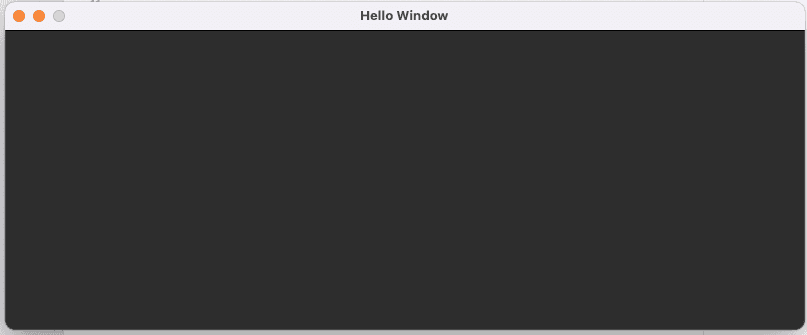
Note that this example program does not allow itself to be closed. We'll add that capability later in the course. For now, we can close it using our IDE if possible, or force it to close through our operating system (Ctrl + Alt + Del on Windows or Cmd + Option + Esc on macOS).
We'll update our program to support quitting early in the next chapter.
Summary
In this lesson, we covered how to integrate the SDL2 library and its extensions into a C++ project using CMake.
By downloading the SDL source code into a subdirectory and updating our CMakeLists.txt file, we can build SDL alongside our project and easily manage dependencies. Key takeaways:
- SDL2 source code should be downloaded and extracted into a subdirectory (e.g.,
external/) of our project - Extensions like SDL_image and SDL_ttf can be added in the same way, each in their own subdirectory
- CMakeLists.txt must be updated to reference the SDL subdirectories with
add_subdirectory()and link the libraries to our executable withtarget_link_libraries() - The compiled SDL dynamic libraries (DLLs) need to be accessible to our executable, which can be automated using CMake's
add_custom_command()and generator expressions - When using git, SDL and its extensions can be added as submodules for easier management
- On Windows, the additional
SDL2mainlibrary must be linked to our executable for compatibility
With SDL2 set up in our project, we're ready to start developing our project!
Building SDL2 from Source (GCC and Make)
This guide walks you through the process of compiling SDL2, SDL_image, and SDL_ttf libraries from source