Image Scaling and Aspect Ratios
Learn techniques for scaling images and working with aspect ratios
This legacy content uses SDL2
An updated version using SDL3 is available
In this lesson, we'll learn how to scale our images up and down during the blitting process. Here's what we'll cover:
- The
SDL_BlitScaled()function, and how it differs fromSDL_BlitSurface(). - What an aspect ratio is, why it matters, and how to calculate it.
- Using aspect ratios to prevent images being stretched and deformed during scaling.
We'll be building upon the basic application loop and surface-blitting concepts we covered earlier in the course:
It relies on an image called example.bmp being in the same location as our executable. The image we're using in these examples is available here.
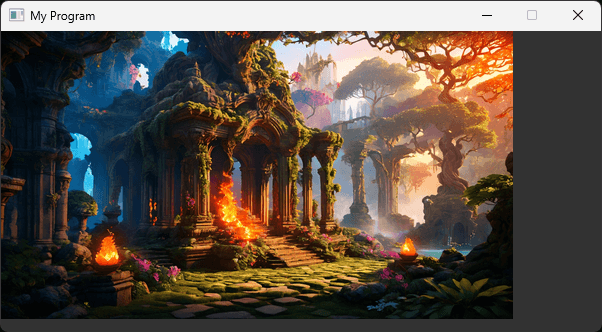
Our program currently renders the following window:
Using SDL_BlitScaled()
Previously, we've been using the SDL_BlitSurface() function to copy color information from one surface to another. This performs a pixel-by-pixel copy - the image data on the destination surface will be the same size it was on the source surface.
If we want our image to appear larger or smaller on the destination surface, we can call SDL_BlitScaled() instead. It receives the same arguments in the same order as SDL_BlitSurface():
// Image.h
class Image {
public:
// ...
void Render(SDL_Surface* DestinationSurface) {
SDL_BlitSurface(
ImageSurface, &SourceRectangle,
DestinationSurface, &DestinationRectangle
);
}
// ...
};Unlike SDL_BlitSurface(), the SDL_BlitScaled() function does use the w and h properties of the destination rectangle. These values will define the size of the image on the destination surface.
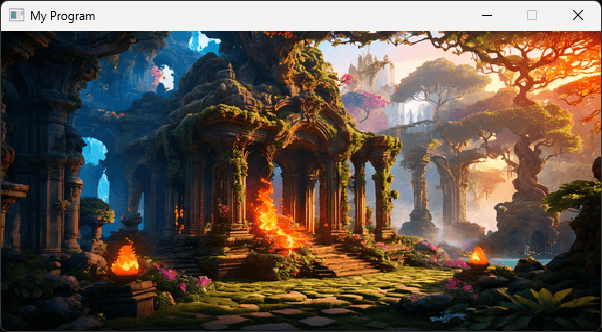
We'll build a more robust API for our Image class later in this chapter. For now, let's update our DestinationRectangle to cover the entire window surface, which is 600x300 in our example:
// Image.h
class Image {
// ...
private:
SDL_Surface* ImageSurface{nullptr};
SDL_Rect SourceRectangle{0, 0, 0, 0};
SDL_Rect DestinationRectangle{0, 0, 600, 300};
};
Positioning and Missized Rectangles
As before, we can position the image within the output surface by setting the x and y values. Additionally, if any clipping occurs, SDL_BlitScaled() will update the w and h values of our DestinationRectangle with the dimensions that were actually used for the blit.
In this example, we move the image 50 pixels from the left edge, and 100 pixels from the top edge. We have not reduced the destination rectangle's width and height, so it now extends beyond the bounds of the destination surface.
SDL_BlitScaled() positions our image accordingly, and updates our DestinationRectangle by reducing w and h to the correct values:
// Image.h
class Image {
public:
// ...
void Render(SDL_Surface* DestinationSurface) {
SDL_BlitScaled(
ImageSurface, &SourceRectangle,
DestinationSurface, &DestinationRectangle
);
std::cout << "\nDestination Rectangle: "
<< DestinationRectangle.w << 'x'
<< DestinationRectangle.h;
}
// ...
private:
// ...
SDL_Rect DestinationRectangle{50, 100, 600, 300};
};Destination Rectangle: 550x200
Destination Rectangle: 550x200
Destination Rectangle: 550x200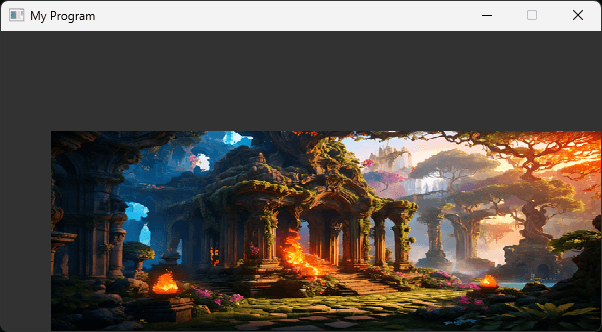
Aspect Ratio
In the previous examples, we can see the SDL_BlitScaled() algorithm will squash and stretch our images to make them fill the destination rectangle. This deformation may not be desired. Instead, we might want to respect the relative proportions of the original image, or the proportions of the SourceRectangle if it's smaller.
These proportions are often called the aspect ratio, which is the image's width divided by its height.
Width and height are typically integers, but aspect ratios are floating-point numbers, so we should cast at least one of the operands to a float before performing the division:
float SourceRatio{SourceRectangle.w
/ static_cast<float>(SourceRectangle.h)
};Let's move our DestinationRectangle initialization to a function so we can check our aspect ratios:
// Image.h
#pragma once
#include <SDL.h>
#include <iostream>
#include <string>
class Image {
public:
Image(std::string File) : ImageSurface{
SDL_LoadBMP(File.c_str())} {
if (!ImageSurface) {
std::cout << "Failed to load image: " <<
File << ":\n" << SDL_GetError();
}
SourceRectangle.w = ImageSurface->w;
SourceRectangle.h = ImageSurface->h;
SetDestinationRectangle({0, 0, 600, 300});
}
void SetDestinationRectangle(
SDL_Rect Destination
) {
float SourceRatio{SourceRectangle.w
/ static_cast<float>(SourceRectangle.h)
};
float DestinationRatio{Destination.w
/ static_cast<float>(Destination.h)
};
DestinationRectangle = Destination;
// Non-functional code for logging
std::cout << "\n[Aspect Ratio] Source: "
<< SourceRatio
<< ", Destination: " << DestinationRatio;
}
// ...
private:
SDL_Surface* ImageSurface{nullptr};
SDL_Rect SourceRectangle{0, 0, 0, 0};
SDL_Rect DestinationRectangle{0, 0, 0, 0};
};[Aspect Ratio] Source: 1.77778, Destination: 2When the aspect ratios of our source and destination rectangles are different, as they are here, our image will be deformed if rendered using SDL_BlitScaled().
Preventing Deformation
To prevent deformation, we should ensure our DestinationRectangle has the same aspect ratio as our SourceRectangle.
We'll rename our function parameter to be Requested, indicating it might not be the settings we end up using. If the aspect ratio of the SDL_Rect passed to SetDestinationRectangle is wrong, we'll use different values.
We'll also rename our SourceRatio to Target, indicating it contains the value we'd like the aspect ratio of our rectangle to be.
The most simple way to ensure a rectangle has a specific aspect ratio is to choose one of its dimensions (width, in this example) and set it to a value that gives us the target ratio:
// Image.h
class Image {
public:
//...
void SetDestinationRectangle(
SDL_Rect Requested
) {
float TargetRatio{SourceRectangle.w
/ static_cast<float>(SourceRectangle.h)
};
float RequestedRatio{Requested.w
/ static_cast<float>(Requested.h)
};
DestinationRectangle = Requested;
DestinationRectangle.w = static_cast<int>(
Requested.h * TargetRatio);
// Non-functional code for logging
float AppliedRatio{DestinationRectangle.w /
static_cast<float>(DestinationRectangle.h)};
std::cout << "\n[Aspect Ratio] Requested: "
<< RequestedRatio
<< ", Target:" << TargetRatio
<< ", Applied: " << AppliedRatio;
}
// ...
};[Aspect Ratio] Requested: 2, Target:1.77778, Applied: 1.77667The highlighted logic may be confusing here. It uses the equation:
This comes from the definition of aspect ratio:
If we multiply both sides of this equation by , we get:
So, if we know the height and aspect ratio, we multiply them together to get the width.
Scaling to Fit
We can improve this implementation slightly. By restricting our resizing option to only one dimension (the width, in the previous example) we don't know if hitting the target aspect ratio requires us to make the rectangle smaller or larger.
In most scenarios, we don't want to render an image larger than was requested. Therefore, to hit a target ratio, we should only reduce a dimension. If the rectangle's aspect ratio is too large (that is, the rectangle is "too landscape"), we want to reduce it's width.
However, the aspect ratio is too small (that is, the rectangle is "too portrait"), we don't want to increase it's width. Instead, we want to reduce its height.
Let's add an if statement to figure out what strategy we need:
// Image.h
class Image {
public:
//...
void SetDestinationRectangle(
SDL_Rect Requested
) {
float TargetRatio{SourceRectangle.w
/ static_cast<float>(SourceRectangle.h)
};
float RequestedRatio{Requested.w
/ static_cast<float>(Requested.h)
};
DestinationRectangle = Requested;
if (RequestedRatio < TargetRatio) {
// Reduce height
DestinationRectangle.h = static_cast<int>(
Requested.w / TargetRatio);
} else {
// Reduce width as before
DestinationRectangle.w = static_cast<int>(
Requested.h * TargetRatio);
}
// Non-functional code for logging
float AppliedRatio{DestinationRectangle.w /
static_cast<float>(DestinationRectangle.h)};
std::cout << "\n[Aspect Ratio] Requested: "
<< RequestedRatio
<< ", Target:" << TargetRatio
<< ", Applied: " << AppliedRatio;
}
// ...
};[Aspect Ratio] Requested: 2, Target:1.77778, Applied: 1.77667In this implementation, if the requested rectangle's aspect ratio is smaller than the target, that means it is "too portrait". Our previous implementation would address this by increasing the width, but now, we reduce the height instead.
The equation to calculate the height comes from the same process as before. We already worked out that:
Dividing both sides of the equation by , we get:
Summary
We've covered several important concepts in this lesson:
- Using
SDL_BlitScaled()for scaling images up or down during the blitting process - Calculating and maintaining aspect ratios
- Preventing image deformation during scaling
Later in this section, we'll expand our Image class to give external code access to these new capabilities. However, before we do that, we'll introduce SDL_Image, which allows us to load more advanced image formats than the basic bitmaps we've been using so far.
This will include image formats that include transparency information, so we'll also learn how our blitting operations can use that data. This will allow us to blend our surface colors together in more advanced ways.
Introduction to SDL_Image
Learn to load, manipulate, and save various image formats using SDL_Image.