Structuring SDL Programs
Discover how to organize SDL components using manager classes, inheritance, and polymorphism for cleaner code.
This legacy content uses SDL2
An updated version using SDL3 is available
In earlier lessons, we saw how to draw shapes and handle mouse events for individual elements in SDL. While this works for simple examples, managing dozens or hundreds of UI elements directly in our main function quickly becomes unmanageable.
This lesson introduces techniques for structuring larger SDL applications. We'll learn how to create "manager" classes that take responsibility for specific parts of the UI, keeping our main code clean and organized.
We will cover:
- Creating a UI manager class.
- Using
std::vectorto manage multiple components dynamically. - Applying inheritance to create specialized components.
- Leveraging polymorphism to handle different component types uniformly.
- Building hierarchies of managers for complex UIs.
Starting Point
We'll build upon the code from our previous lesson. This starting point includes an SDL application that initializes the library, creates a Window, and manages a single Rectangle object. The Rectangle handles its own rendering and responds to mouse hover and click events.
Manager Classes
In more complex projects, we're likely to find our game managing thousands or maybe millions of objects. We can't just orchestrate all of them from our main function - that would quickly get unmanagable.
To deal with this, we can introduce intermediate, manager classes that take ownership over some area of our program. For example, we might have a UI class, responsible for managing all the buttons and menus in our program.
That class would need to react to events and render the objects it manages, so let's add HandleEvent() and Render() functions:
// UI.h
#pragma once
#include <SDL.h>
class UI {
public:
void Render(SDL_Surface* Surface) const {
// ...
}
void HandleEvent(SDL_Event& E) {
// ...
}
};Now, in our main function, managing the entire UI only requires three lines of code. We construct a UI manager, we notify it of events, and we render it:
#include <SDL.h>
#include "Window.h"
#include "Rectangle.h"
#include "UI.h"
int main(int argc, char** argv) {
SDL_Init(SDL_INIT_VIDEO);
Window GameWindow;
Rectangle Rect{SDL_Rect{50, 50, 50, 50}};
UI UIManager;
SDL_Event E;
while (true) {
while (SDL_PollEvent(&E)) {
Rect.HandleEvent(E);
UIManager.HandleEvent(E);
if (E.type == SDL_QUIT) {
SDL_Quit();
return 0;
}
}
GameWindow.Render();
Rect.Render(GameWindow.GetSurface());
UIManager.Render(GameWindow.GetSurface());
GameWindow.Update();
}
return 0;
}Let's add some objects for our UI to manage. We'll create three rectangles and, every time our UI receives an event or a request to render, it forwards that request to all of its children:
// UI.h
#pragma once
#include <SDL.h>
#include "Rectangle.h"
class UI {
public:
void Render(SDL_Surface* Surface) const {
A.Render(Surface);
B.Render(Surface);
C.Render(Surface);
}
void HandleEvent(SDL_Event& E) {
A.HandleEvent(E);
B.HandleEvent(E);
C.HandleEvent(E);
}
private:
Rectangle A{SDL_Rect{50, 50, 50, 50}};
Rectangle B{SDL_Rect{150, 50, 50, 50}};
Rectangle C{SDL_Rect{250, 50, 50, 50}};
};Dynamic Children
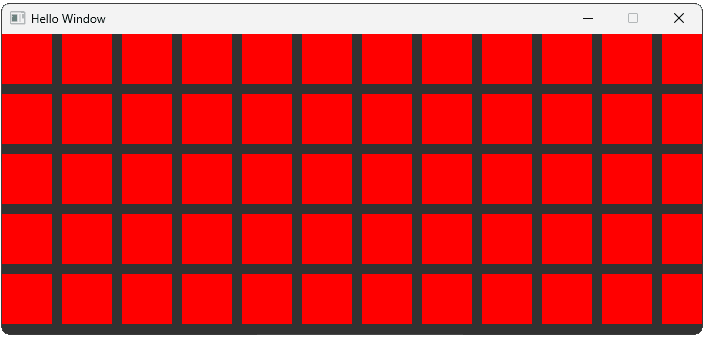
A manager class can have a dynamic number of children by storing them in a container such as a std::vector. Below, we update our UI class to manage 60 rectangles.
Our constructor uses some loops to create all of our rectangles, and some arithmetic to position them into a grid layout:
// UI.h
#pragma once
#include <SDL.h>
#include <vector>
#include "Rectangle.h"
class UI {
public:
UI() {
int RowCount{5}, ColCount{12};{
Rectangles.reserve(RowCount * ColCount);{
for (int Row{0}; Row < RowCount; ++Row) {
for (int Col{0}; Col < ColCount; ++Col) {
Rectangles.emplace_back(SDL_Rect{
60 * Col, 60 * Row, 50, 50
});
}
}
}
void Render(SDL_Surface* Surface) const {
// ...
}
void HandleEvent(SDL_Event& E) {
// ...
}
private:
std::vector<Rectangle> Rectangles;
};When a UI receives a Render() or HandleEvent() request, it now iterates over all of the elements in it's array, forwarding the request to each of them:
// UI.h
// ...
class UI {
public:
// ...
void Render(SDL_Surface* Surface) const {
for (auto& Rectangle : Rectangles) {
Rectangle.Render(Surface);
}
}
void HandleEvent(SDL_Event& E) {
for (auto& Rectangle : Rectangles) {
Rectangle.HandleEvent(E);
}
}
// ...
};
Inheritance
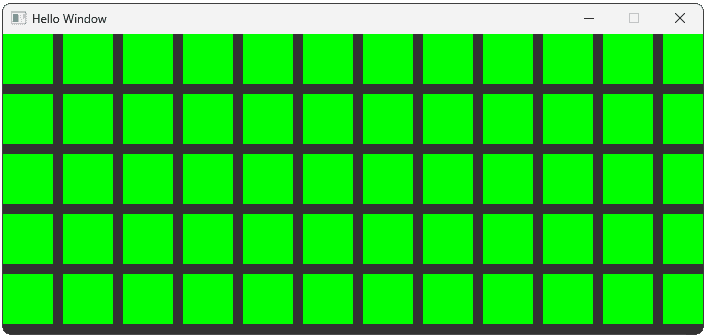
Remember, once we have a class set up, we can use inheritance to extend that class, or provide variations. Let's create a GreenRectangle class that inherits from our Rectangle.
We'll just forward the SDL_Rect to the inherited constructor and then, from the constructor body, set our color to green:
// GreenRectangle.h
#pragma once
#include <SDL.h>
#include "Rectangle.h"
class GreenRectangle : public Rectangle {
public:
GreenRectangle(const SDL_Rect& Rect)
: Rectangle{Rect} {
SetColor({0, 255, 0, 255});
}
};In our UI class, we can switch to using green rectangles by updating the type of our array:
// UI.h
#pragma once
#include <SDL.h>
#include <vector>
#include "Rectangle.h"
#include "GreenRectangle.h"
class UI {
// ...
private:
std::vector<GreenRectangle> Rectangles;
};
Polymorphism
When we're using inheritance, our UI class can store objects of varying types within the same collection. They just need to share the same base class, such as Rectangle.
To use polymorphism, our UI needs to store its children as pointers. We'll use std::unique_ptr to implement a model here, as the UI should conceptually "own" the objects that it is managing:
// UI.h
// ...
#include <memory> // For std::unique_ptr
class UI {
public:
// ...
private:
std::vector<std::unique_ptr<
Rectangle>> Rectangles;
};As our Rectangles array is now storing pointers rather than Rectangle values, we need to update our Render() and HandleEvent() functions to use the -> operator instead of .:
// UI.h
// ...
class UI {
public:
// ...
void Render(SDL_Surface* Surface) const {
for (auto& Rectangle : Rectangles) {
Rectangle.Render(Surface);
Rectangle->Render(Surface);
}
}
void HandleEvent(SDL_Event& E) {
for (auto& Rectangle : Rectangles) {
Rectangle.HandleEvent(E);
Rectangle->HandleEvent(E);
}
}
// ...
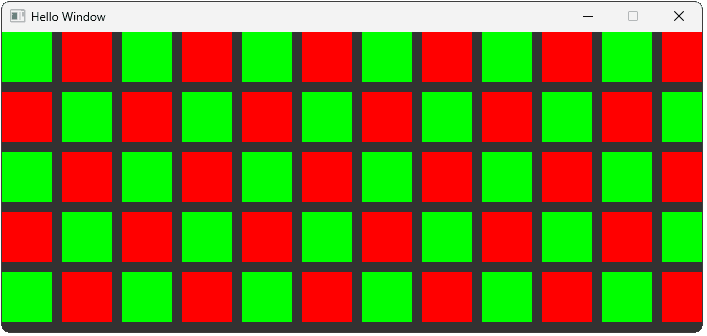
};Let's update our constructor to create an alternating grid of red and green rectangles using the modulus operator:
// UI.h
#pragma once
#include <SDL.h>
#include <vector>
#include <memory>
#include "Rectangle.h"
#include "GreenRectangle.h"
class UI {
public:
UI() {
int RowCount{5}, ColCount{12};
Rectangles.reserve(RowCount * ColCount);
for (int Row{0}; Row < RowCount; ++Row) {
for (int Col{0}; Col < ColCount; ++Col) {
bool useGreen{(Row + Col) % 2 == 0};
Rectangles.emplace_back(useGreen
? std::make_unique<GreenRectangle>(SDL_Rect{
60 * Col, 60 * Row, 50, 50})
: std::make_unique<Rectangle>(SDL_Rect{
60 * Col, 60 * Row, 50, 50})
);
}
}
}
// ...
};
Hierarchy
Our UI class successfully abstracts complexity away from main. However, in a large application with multiple distinct UI areas (like a header, main content area, and footer), the UI class itself could become overly complex, managing dozens or hundreds of disparate components.
We can address this simply by repeating the pattern again, introducing another layer of manager-style classes. We can do this as many times as needed, thereby creating a hierarchy of managers.
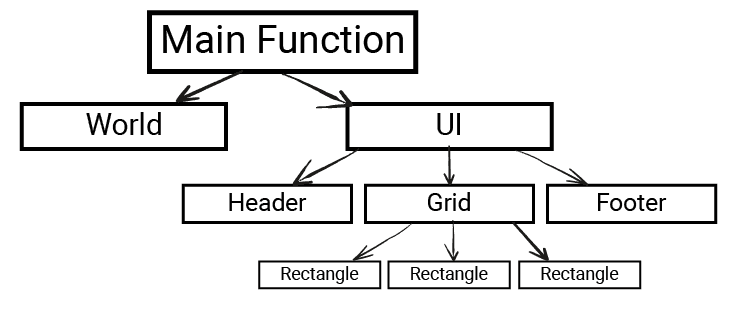
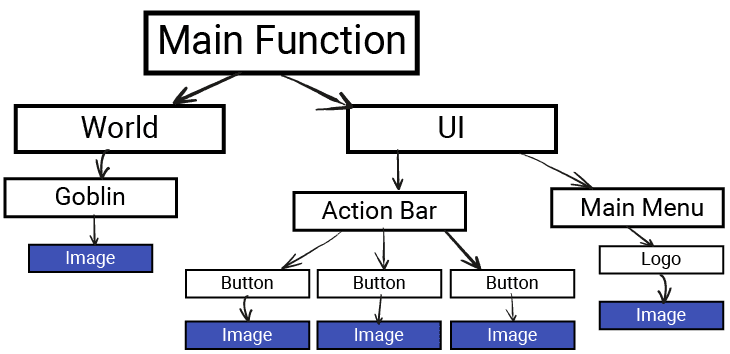
For example, instead of the main UI class managing every single rectangle, it can manage a few higher-level manager objects, each responsible for a specific section of the UI. For example, UI could own instances of Header, Footer, and Grid classes.
The Header class would manage components specific to the header, the Footer class would manage its components, and the Grid class would manage the grid of rectangles.
The top-level UI class then simply delegates tasks: UI::Render() calls Render() on Header, Grid, and Footer, and UI::HandleEvent() forwards events similarly:
// UI.h
#pragma once
#include <SDL.h>
#include "Header.h"
#include "Footer.h"
#include "Grid.h"
class UI {
public:
void Render(SDL_Surface* Surface) const {
TopMenu.Render(Surface);
Rectangles.Render(Surface);
BottomMenu.Render(Surface);
}
void HandleEvent(SDL_Event& E) {
TopMenu.HandleEvent(E);
Rectangles.HandleEvent(E);
BottomMenu.HandleEvent(E);
}
private:
Header TopMenu;
Grid Rectangles;
Footer BottomMenu;
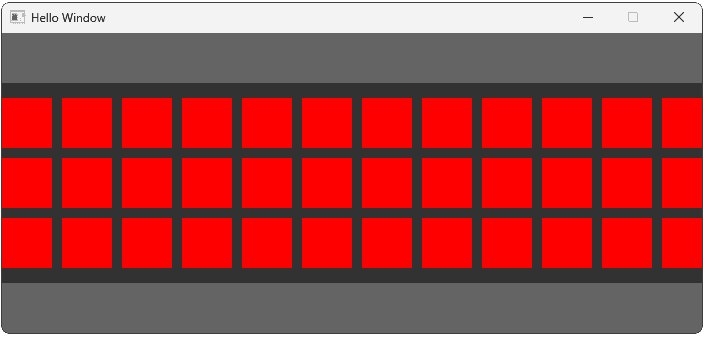
};In this example program, the Header and Footer class both render a simple gray rectangle, whilst the Grid renders a grid of red rectangles:
For reference, the Header, Grid, and Footer classes used for this example are provided below:
Component Reuse
Beyond managing complexity, building UIs from components also enables code reuse.
For example, let's imagine we wanted to add the ability to load and render an image in our Header class. Even if we can add the required logic without making the Header code excessively complex, it's probably a good idea to create a separate Image component anyway.
This is because the ability to render an image is likely to be useful in many parts of our application, not just the Header class. By creating a separate Image component for this purpose, our work can be reused across other parts of our application that require an image.
We'll learn how to render images in the next chapter.
Complete Code
We'll reuse the concepts we covered in this lesson later in the course but, for now, we'll go back to a minimalist UI class that just renders two rectangles.
In the next lesson, we'll continue developing on this framework as we learn techniques that allow our components to communicate with their parents, and each other.
Summary
This lesson focused on structuring SDL programs to help manage complexity. We introduced the UI manager class to simplify main, used std::vector for dynamic component lists, created specialized components like GreenRectangle via inheritance, and managed mixed types using polymorphism and std::unique_ptr.
Key Takeaways:
- Manager classes improve organization by encapsulating UI sections.
- Use
std::vectorto manage variable numbers of components. - Inheritance allows extending base component functionality.
- Polymorphism provides flexibility in handling different component types via base pointers.
- Build UI hierarchies to manage complexity by delegating responsibility.
- Component reuse and locality are important design goals.
Creating SDL2 Buttons
Learn to create interactive buttons in SDL2 and manage communication between different UI components.