Setting Up a CMake Environment
A step-by-step guide to installing CMake. We'll explore command-line, GUI, and IDE workflows, and how to configure your compiler.
In the last lesson, we made the case for CMake. We saw how it rises above the limitations of traditional build tools by acting as a meta-build system, providing a single, portable source of truth that generates native build files for any platform.
The theory is promising, but now it's time to put it into practice. Before we can write our first CMakeLists.txt file, we need to get the tools installed and our environment configured. This lesson is all about that initial setup.
We'll walk through installing CMake on Windows, macOS, and Linux. Then, we'll explore the different ways you can interact with it - from the command line to a graphical interface to IDE integrations. Finally, we'll make sure CMake knows how to find the C++ compiler we set up in the first chapter.
Installing CMake on Windows
CMake is a prerequisite for the rest of this course, so let's get it installed. The process is straightforward, and you have several options on each platform.
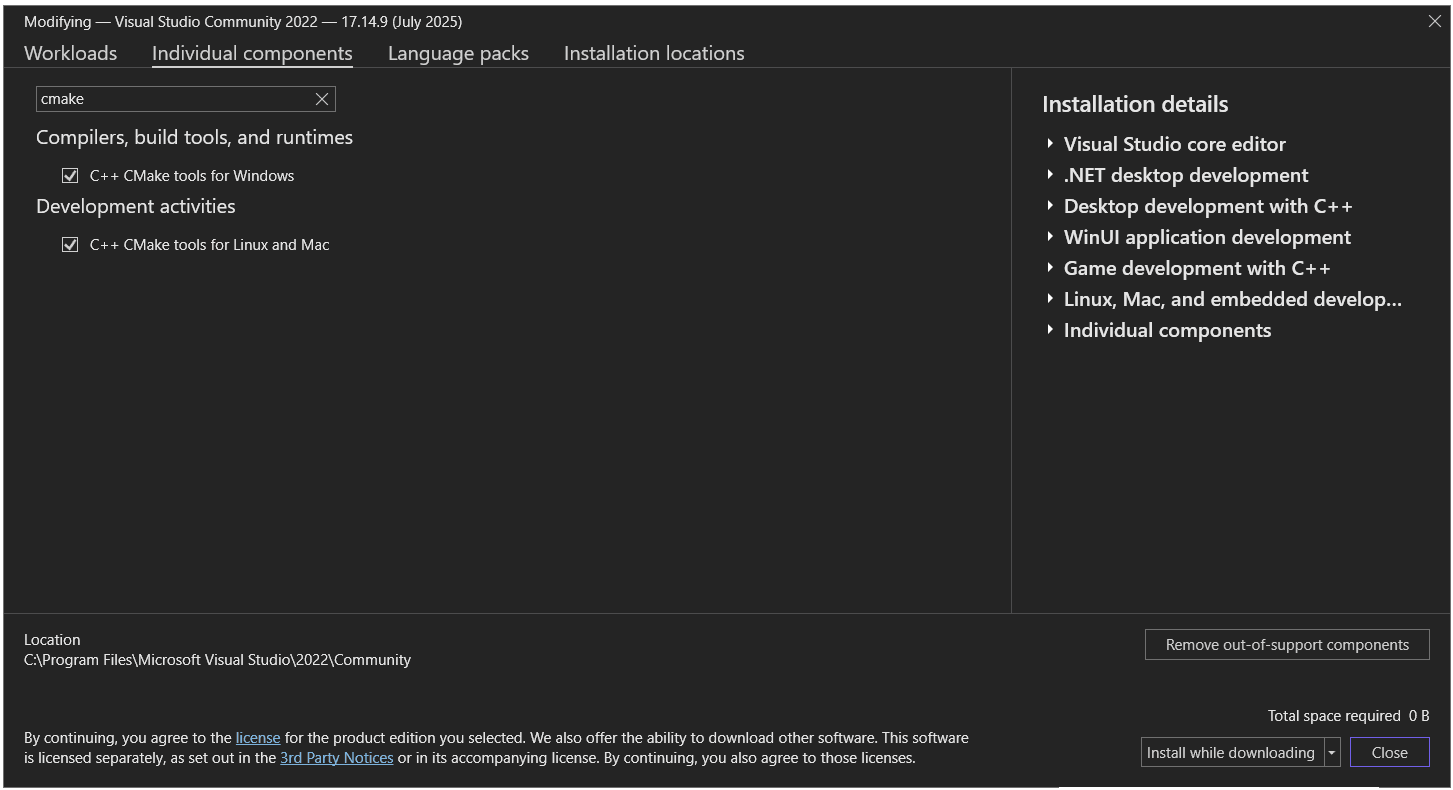
Visual Studio Installer: If you've installed Visual Studio as your C++ development environment, you likely already have CMake. You can check if CMake is installed (and install it if it isn't) by running the Visual Studio Installer, clicking "Modify", and then searching for CMake in the components list:
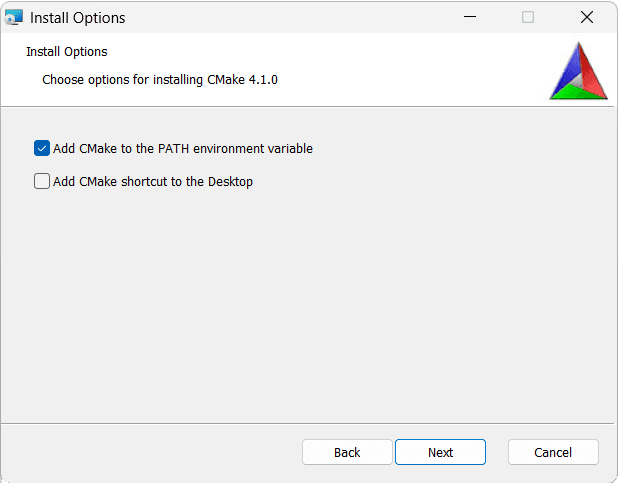
Official Installer: You can download the official Windows installer (.msi) from the CMake download page. During installation, make sure to select the option "Add CMake to the system PATH for all users" or "for current user". This makes the cmake command available in any Command Prompt or PowerShell terminal.
Package Managers: If you use a package manager like Chocolatey or Winget, they're likely to have CMake available. This will allow you to install it with a command such as winget install cmake or choco install cmake.
MSYS2: If you're using the MSYS2 UCRT64 terminal, you can install CMake using the command:
pacman -S mingw-w64-ucrt-x86_64-cmakeInstalling CMake on macOS
Homebrew: If you use the Homebrew package manager, installing CMake is a one-liner:
brew install cmakeOfficial Installer: You can download a .dmg disk image from the CMake download page. This provides a graphical installer similar to other macOS applications.
Installing CMake on Linux (Debian/Ubuntu)
APT (Recommended): The simplest way to install CMake on Debian-based systems is with apt.
The version in the standard repositories might be slightly older than the latest release, but it is generally stable and sufficient for most projects.
sudo apt update
sudo apt install cmakeSnap: For a more up-to-date version, you can use Snap: sudo snap install cmake --classic.
Verify Your Installation
Once the installation is complete, open a new terminal (or Command Prompt on Windows) and run the following command:
cmake --versionIf the installation was successful, you'll see output that includes the installed version number, something like this:
cmake version 4.0.3
CMake suite maintained and supported by Kitware (kitware.com/cmake).If you get an error like "command not found", it likely means CMake's installation directory was not added to your system's PATH environment variable.
At the time of writing, the latest stable version is 4.0.3, with a preview version of 4.1.0 also being available. Yours may be older, particularly if you're using the version of CMake bundled with Visual Studio or some other IDE. Any version from 3.16 onwards will work with this course.
Command Line vs. GUI vs. IDE Integration
CMake isn't a single program; it's a suite of tools. You can interact with it in several ways, and the best one often depends on the task at hand.
The Command Line (cmake)
This is the core of CMake and the method we will focus on for this course. The cmake executable is the fundamental tool that parses your CMakeLists.txt files and generates the native build system.
It's what gets called by IDEs behind the scenes and what you'll use in automated build scripts for continuous integration, which we'll cover later in the course.
The Graphical User Interface (cmake-gui)
CMake also provides a GUI application, cmake-gui, which is particularly useful for exploring a project for the first time or for managing complex configurations without memorizing command-line flags.

The GUI lets you:
- Visually set the source code directory and the directory for the build artifacts.
- Select the generator from a dropdown list.
- Interactively view and edit all the cached variables. We'll cover these variables and the CMake cache behaviour process later in the course.
- Click "Generate" to create the native build files.
It performs the exact same actions as the command-line tool, but in a more visual way.
IDE Integration
This is how most developers use CMake day-to-day. Modern C++ IDEs have embraced CMake as a first-class project model.
- Visual Studio: Has native support for opening a folder containing a
CMakeLists.txtfile. It will automatically configure the project, let you select build targets, and provide full IntelliSense and debugging. - VS Code: The CMake Tools extension provides a popular workflow. It gives you a status bar to switch configurations, a side panel to view targets, and buttons to configure, build, and debug your project.
- CLion: This IDE uses CMake as it's primary method of managing builds. Its entire project model is a CMake project, offering deep integration, code completion for CMake commands, and easy management of profiles and configurations.
Even when using an IDE, remember that the IDE is simply calling the cmake executable for you. Your CMakeLists.txt file remains the single source of truth.
Configuring Compilers and Environment
This is a critical point: CMake does not come with a compiler. CMake is a build system generator; it finds and uses the C++ toolchain that's already installed on your system.
We went through the process of installing a compiler in Chapter 1. Now, we need to ensure CMake can find it.
How CMake Finds Compilers
When you first configure a project, CMake searches your system for a working C++ compiler. Its search follows a specific order of precedence:
- CMake Variables: If you explicitly tell CMake which compiler to use with a command-line flag. This is an advanced technique we'll touch on later.
- Environment Variables: It checks for the
CXXenvironment variable. Many developers setCXXandCCto point to their preferred C++ and C compilers. - System Path: If the above are not set, CMake searches the directories listed in your system's
PATHenvironment variable for common compiler executable names (likeg++,clang++,cl.exe, etc.). We'll mostly rely on this approach.
If you've followed along since chapter 1 and are already able to compile C++ projects from your terminal of choice, you're all set and can move on to the next lesson. Otherwise, we'll quickly review the key configuration steps to ensure your compiler is installed and accessible in the terminal.
Windows-Specific Configuration
For MSVC: The easiest way to ensure CMake finds the Microsoft Visual C++ compiler (cl.exe) is to run your CMake commands from the Developer Command Prompt for Visual Studio.
This special terminal, which you can find in your Start Menu, automatically configures the PATH, INCLUDE, and LIB environment variables needed by the MSVC toolchain.
If you try to run CMake from a standard command prompt without this setup, it won't be able to find cl.exe.
For MinGW/GCC: If you installed a GCC toolchain via a tool like MSYS2, you must ensure that the bin directory of your compiler (e.g., C:\msys64\ucrt64\bin) is added to your Windows PATH environment variable. This allows CMake to find g++.exe when it searches the system path.
Linux and macOS Configuration
On Unix-like systems, this process is typically much simpler. When you install GCC or Clang using a package manager like apt or Homebrew, the installer automatically places the compiler executables in a standard location that is already in the system PATH (like /usr/bin).
As a result, CMake usually finds the compiler without any extra configuration required.
Verifying your Configuration
You can ensure your compiler is discoverable from your preferred command line using a command like gcc --version for GCC, clang++ --version for Clang, or cl for MSVC.
If your chosen compiler responds to the command, we're all set. For example:
gcc --versiongcc.exe (Rev6, Built by MSYS2 project) 15.1.0
Copyright (C) 2025 Free Software Foundation, Inc.Writing a CMakeLists File
Creating the bare minimum CMakeLists.txt file and build up to a project with an executable and a library, learning the fundamental commands along the way.