Source Control with Git
An introduction to Git, the version control system that underpins modern collaborative software development and automated build pipelines.
In the previous chapters, we've mastered the art of building projects on our local machine. But modern software development is rarely a solo activity performed on a single computer. It's a collaborative effort, with code shared among team members.
The foundation of this entire collaborative and automated world is source control.
A source control management (SCM) system, also known as a version control system (VCS), is a tool that tracks and manages changes to files over time. It allows multiple developers to work on the same codebase simultaneously, keeps a complete history of every change, and enables automated systems to react to new code submissions. We'll build that automated system in the next lesson.
In this lesson, we'll introduce the most popular verson control system: Git.
We walked through the installation of Git . You can check whether git is installed and accessible using the command:
git --versiongit version 2.45.1.windows.1Initializing a Repository
The first step in putting a project under source control is to initialize a Git repository. A repository (or "repo") is the database that Git uses to store the entire history of your project.
To create one, navigate your terminal to the root directory of your Greeter project and run the git init command.
git initThis command creates a new, hidden subdirectory named .git. This single folder contains all the information Git needs: its configuration, the log of all changes, and the snapshots of your files. You almost never need to touch the contents of this folder directly.
Initialized empty Git repository in D:/Projects/Greeter/.git/Our project is now a Git repository.
Git GUIs
We're interacting with Git on the command line here as it works across all platforms. However, for day-to-day usage, most people prefer interacting with source control through a graphical user interface.
Most IDEs include Git integrations, or support plugins that include that capability. There are also free standalone tools for working with Git - the official Git site lists most of the popular options.
Committing and Ignoring Files
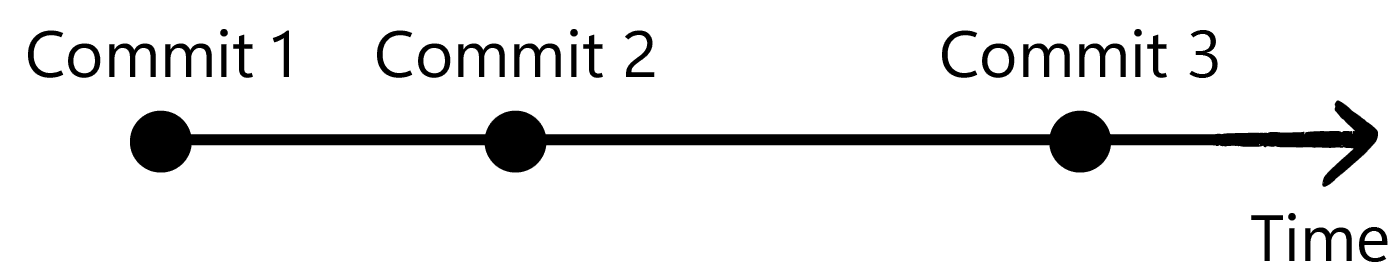
The core foundation of source control is the ability to create "snapshots" of our code at any given time. As we make changes, we can "save" our changes at key points. Git remembers the state of our code at every snapshot, and allows us to revert to that state as needed.
These snapshots are called "commits"
Creating a commit involves two steps:
- We specify which changes should be included in the commit (this is called "staging").
- We commit the staged changes, providing a description of what our changes do. This might be a description of the new feature we added, or the bug we fixed.
Git can automatically detect which changes have been made since the last commit. To see this list, we can use the git status command.
git statusSince we haven't committed anything yet, from git's perspective, everything in our project represents new changes. As such, git status will list every file in our directory:
On branch master
No commits yet
Untracked files:
CMakeLists.txt
app/
build/
greeter/
install/
...Ignoring Files
In almost all cases, we don't want everything in our project directory to be included in source control. For example, we typically exclude files that are automatically generated, and can easily be regenerated. Our /build and /install folders are perfect examples of this.
When using source control collaboratively or to share our project, we'd also exclude:
- Things that are specific just to us, or to our machine. This might include files for tracking preferences for tools we use, or the
CMakeUserPresets.jsonfile which includes our personal presets. - Things that are sensitive. For example, our project might be using some third party service requiring a license key or API key that we have saved in our project files. We want others to supply their own key, so we make sure not to commit ours.
We could ignore these files manually, simply by never adding them to a commit, but Git provides an easier and safer method in the form of a .gitignore file - note that the . at the start of the file name is important.
This file, placed in the root of our project, contains a list of file and directory patterns that we want Git to always ignore. For example:
.gitignore
build/
install/
CMakeUserPresets.jsonAdding Files
Once our .gitignore is set up, we can tell Git which of the remaining changes we want to include in our first commit. This is called staging the changes, and we do it with the git add command.
One option is to add changes one by one. Let's add our .gitignore:
git add CMakeLists.txtIf we run git status again, we'll now see that our .gitignore is "staged" and ready to be committed.
Git is now also ignoring all of the paths we specified in our .gitignore, so we should see our output updated to only include the files that we want Git to be considering.
For a typical project, this should include all of our source files, our CMakeLists.txt and CMakePresets.json, and usually some configuration files for tools we're using, such as vcpkg.json and .clang-format:
git statusChanges to be committed:
new file: .gitignore
Untracked files:
.clang-format
.clang-tidy
CMakeLists.txt
CMakePresets.json
Doxyfile
app/
benchmarks/
cmake/
greeter/
tests/
vcpkg.jsonCommonly, we'll want Git to stage all of the changes we've made to all files, excluding those in .gitignore. We can do this by passing . to git add:
git add .This command looks at all untracked files, filters out anything that matches a pattern in .gitignore, and moves the rest into the staging area, ready for the next commit.
If we run git status one last time, we'll see that all of our non-ignored files should be staged:
git statusNo commits yet
Changes to be committed:
new file: .gitignore
new file: CMakeLists.txt
new file: app/CMakeLists.txt
new file: app/src/main.cpp
new file: greeter/CMakeLists.txt
...Creating a Commit
With our files staged, we're ready to create our first snapshot using the git commit command. Every commit should have a message, which we provide with the -m flag. This message should be a short, descriptive summary of the changes we made:
git commit -m "Initial commit of Greeter project"The commit is now saved to your local repository's history. The output will confirm the commit was created and list a summary of the files included.
[master (root-commit) f36aa31] Initial commit of the Greeter project
33 files changed, 565 insertions(+)
create mode 100644 .clang-format
create mode 100644 .clang-tidy
...Remote Repositories
Currently, our Git repository and history are stored only on our machine. To share our code and collaborate with others, it needs to be stored somewhere they can access it. This is the job of a remote repository.
Most teams use third-party services like GitHub, GitLab, or Bitbucket for hosting their remote repositories. For this course, we'll use GitHub, the most popular choice.
Authenticating with GitHub
After creating a free GitHub account, you need to authenticate your computer or development environment with your GitHub profile.
This means that, when your computer attempts to upload code, GitHub can verify that the request is coming from you.
The typical way of setting this up is to create and upload an SSH key to your profile. The GitHub documentation walks you through the process.
Pushing Code
Once our account is set up and authenticated, we can create the remote version of our repository by completing the form at https://github.com/new
Once it's created, GitHub will provide you with a URL for your new repository (e.g., https://github.com/Username/Greeter.git).
We need to "link" our local repository to this remote repository. Most services, including GitHub, will provide the exact command for this after you create the repository on their site. It will be something like this:
git remote add origin git@github.com:username/Greeter.gitIt's possible for a single local repository to have multiple remote repositories so, to tell them apart, we are required to name our remotes.
Most projects have only a single remote, and the universal convention is to call this remote origin. This is what we did in the previous command.
Pushing Code
With the remote configured, we can upload (or "push") our local commits to GitHub using the git push command. Before pushing our changes, GitHub also recommends renaming our branch from the default name of "master" to "main", and our repository page provides the command to do this:
git branch -M mainWe cover branches in more detail later. For now, after renaming our branch, we can push our code for the first time. GitHub also provides the command for this in our repository page:
git push -u origin mainThe first time we push, we use the -u flag to tell Git to link your local main branch with the main branch on the origin remote.
If everything is set up and authenticated correctly, we should get confirmation that our changes have been pushed:
Enumerating objects: 15, done.
Counting objects: 100%, done.
Compressing objects: 100%, done.
Writing objects: 100%, done.
To https://github.com/Username/Greeter.git
* [new branch] main -> main
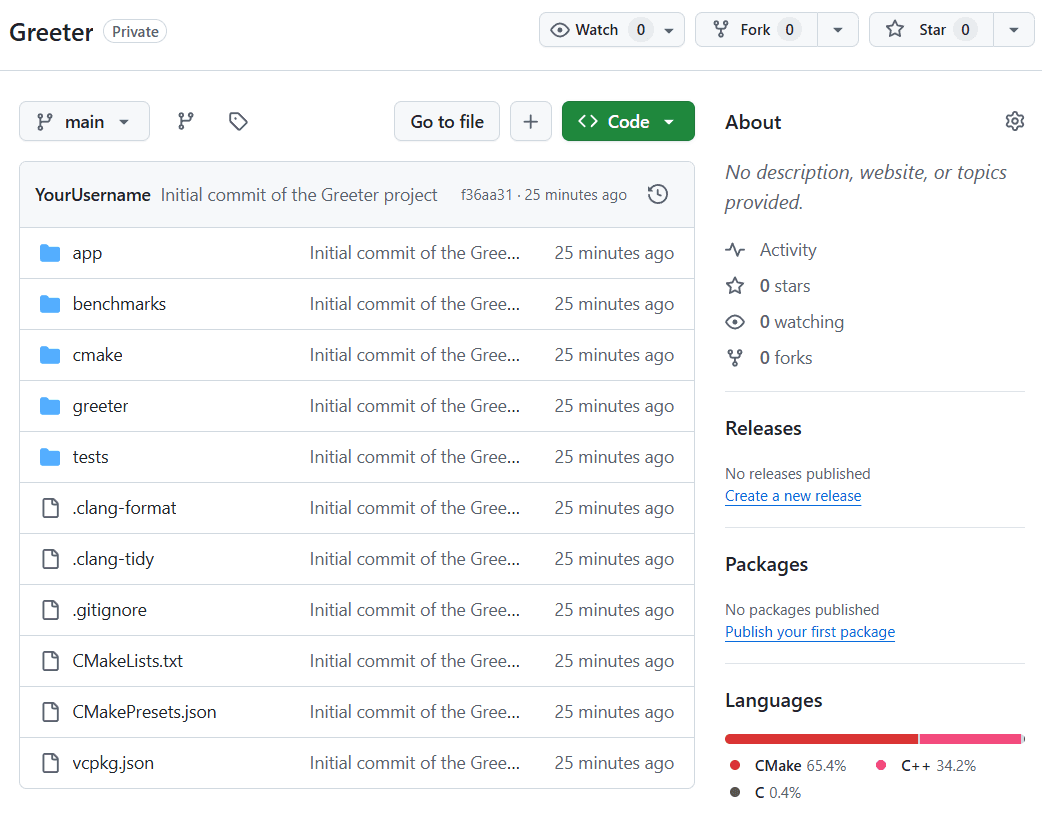
Branch 'main' set up to track remote branch 'main' from 'origin'.If you now refresh your repository's page on GitHub, you'll see all your code has been uploaded and is available to anyone with access to your repository.
Branches
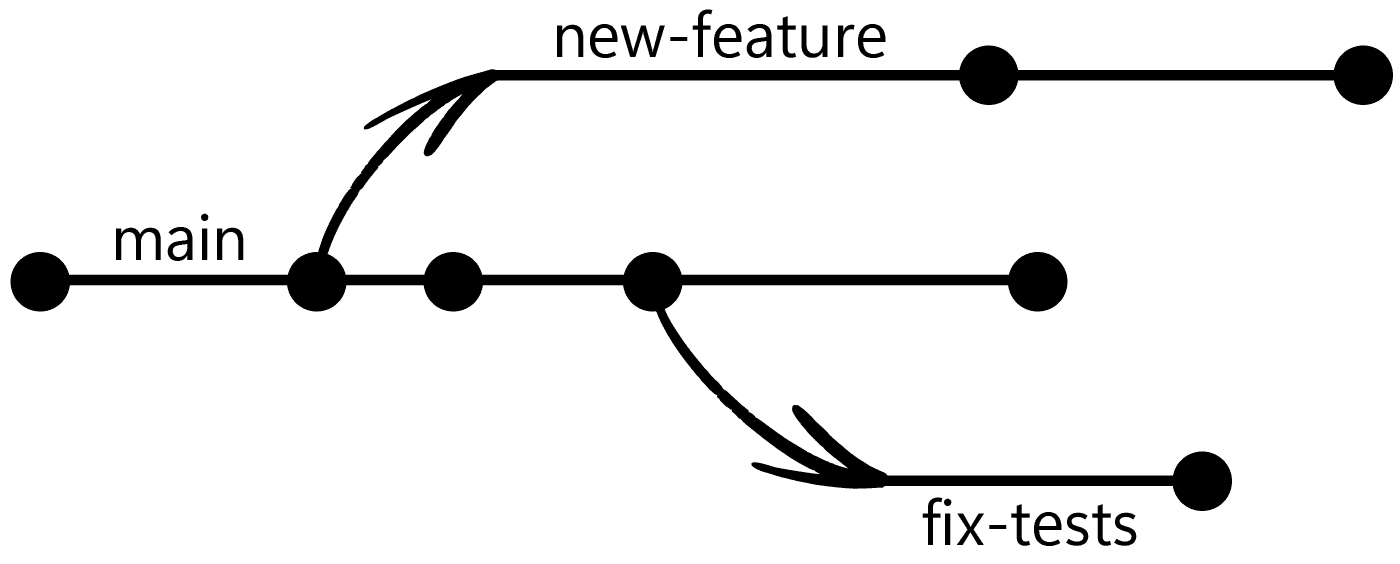
One of Git's most important features is branching. A branch is an independent line of development. When you want to work on a new feature or fix a bug, you create a new branch. This allows each developer to make commits and experiment in isolation in their own branches, without affecting anyone else on the team.
For example, one developer might be working on some new feature, whilst another developer can work on fixing some broken tests:
Once their work is complete and tested, they can merge it back into main. The simplest form of this involves creating a new "merge commit" on the destination branch:
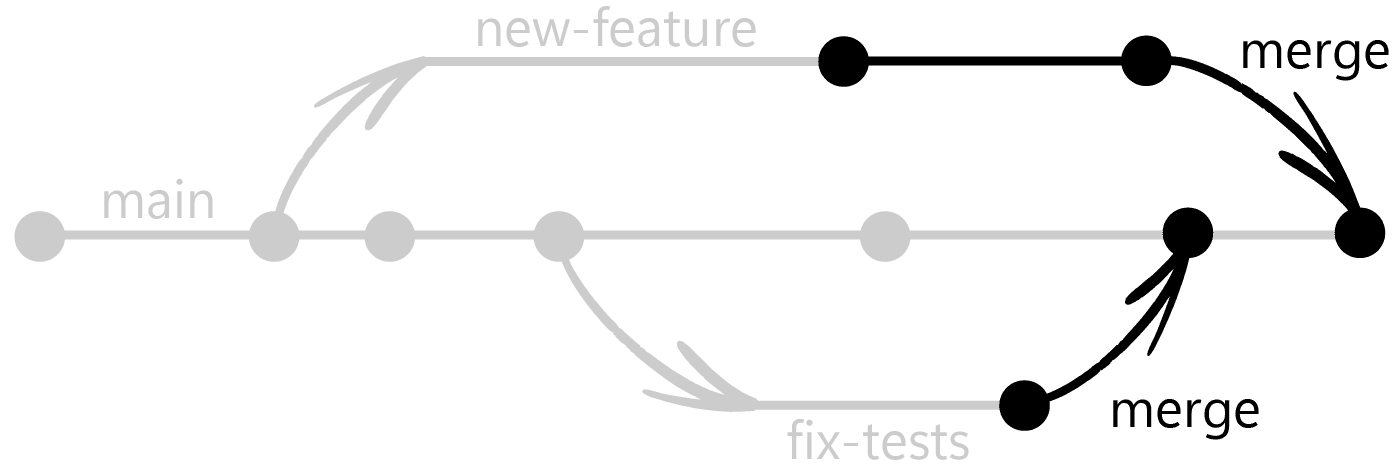
Git can almost always automate this merging process for us, creating a merge commit that will apply all of the changes we made in our source branch to the destination branch.
Situations where this cannot be automated are called merge conflicts. This would happen if, for example, we updated a line of code in our branch, and the branch we're trying to merge to deleted that same line. Git doesn't know what the resulting code should look like in such scenarios, so it will ask us to manually intervene.
We cover this merging process later in the lesson.
Creating Branches
As we've seen, the default branch is usually named main or master.
Let's create a new branch to work on our next feature. In this case, we'll use GoogleTest to add a new test.
To create a new branch, we use git checkout -b command, passing a name for our branch:
git checkout -b improve-testsSwitched to a new branch 'improve-tests'This both creates a new branch, and "checks it out". Any commits we make are to the branch we currently have checked out. We can find out which branch that is by using git status again:
git statusOn branch improve-tests
nothing to commit, working tree cleanCommiting to our Branch
In our previous lesson, we updated our Greeter library to return an empty string if the user's name was "Bob".
We didn't add a test for this change, so let's do that now. With our parameterized testing setup, we can add this test with a single line of code:
tests/greeter/test_greeter.cpp
#include <gtest/gtest.h>
#include <greeter/Greeter.h>
#include <tuple>
class GreeterNameTest :
public testing::TestWithParam<
std::tuple<std::string, std::string>
> {};
TEST_P(GreeterNameTest, GreetsCorrectlyForName) {
auto [name, expected_greeting] = GetParam();
Greeter greeter = name.empty() ? Greeter() : Greeter(name);
EXPECT_EQ(greeter.greet(), expected_greeting);
}
INSTANTIATE_TEST_SUITE_P(
NamedGreetings,
GreeterNameTest,
testing::Values(
std::make_tuple("", "Hello, User!"),
std::make_tuple("John", "Hello, John!"),
std::make_tuple("Jane", "Hello, Jane!"),
std::make_tuple("Bob", "")
)
);If we save our file, Git should notice the change, but it hasn't yet been staged for commit:
git statusOn branch improve-tests
Changes not staged for commit:
modified: tests/greeter/test_greeter.cppWe can stage our changes and create a commit as before:
git add .git commit -m "Add test to ensure Bob is ignored"We can push this new branch to the remote repository, just as we did before:
git push origin improve-testsIf we now visit our repository on GitHub, we should see both branches saved to our remote:
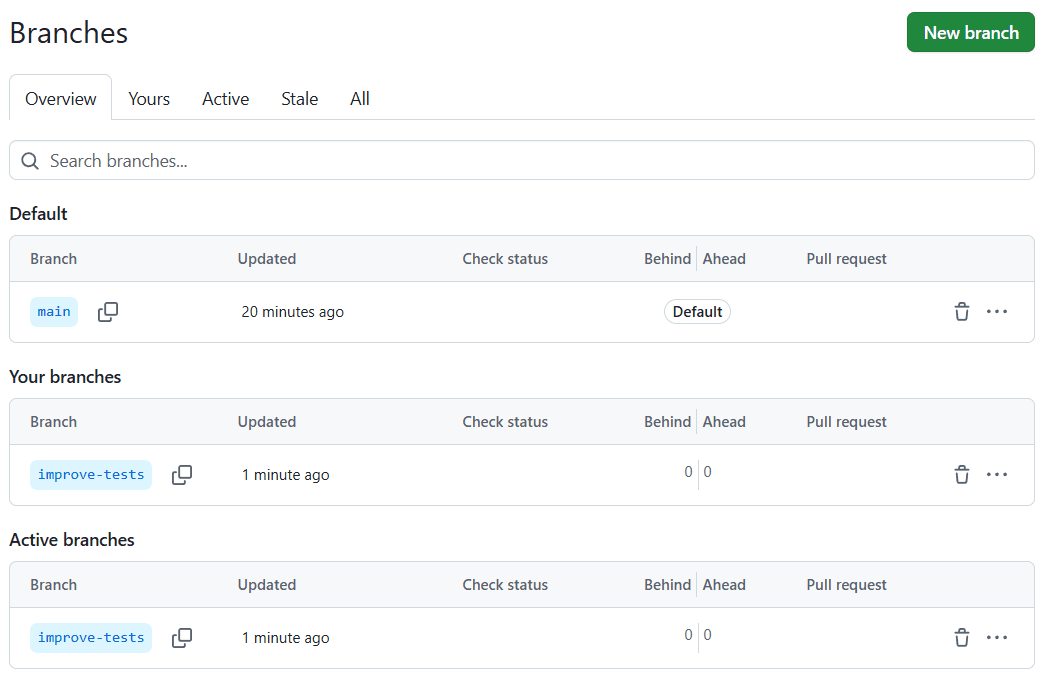
Protected Branches
In most teams, you are not allowed to push your changes directly to the main branch. This branch is usually assigned particular importance. Since all new feature development begins by branching off from main, we want to keep that trunk in a stable and high-quality state.
To enforce this, repository administrators will configure main as a protected branch. This blocks direct pushes and forces all changes that will affect this branch to go through a formal process.
These restrictions are set up on the remote repository. On GitHub, for example, these rules are set up in the Settings > Rules page for the repository.
Pull Requests
The formal review process of getting changes into an important, protected branch is a pull request (or "merge request" on platforms like GitLab). A pull request (PR) is a proposal to merge the changes from one branch (usually the branch you made for your specific feature) into another branch (usually a protected branch like main).
Once we've pushed the changes in our branch, it should show up on the Branches list in our GitHub repository and, from there, we can create a pull request to merge the changes of that branch into some other branch, such as main.
Once we create a PR, it will be available on GitHub's UI. This lets us create a title and description for our request, whilst GitHub will automatically show all of the changes that are in our branch. Our colleagues will visit this page, review and approve our changes, ask questions, or make suggestions on what could be improved.
When our changes are approved, a button to merge our pull request becomes available, which will integrate our changes into the target branch, such as main:
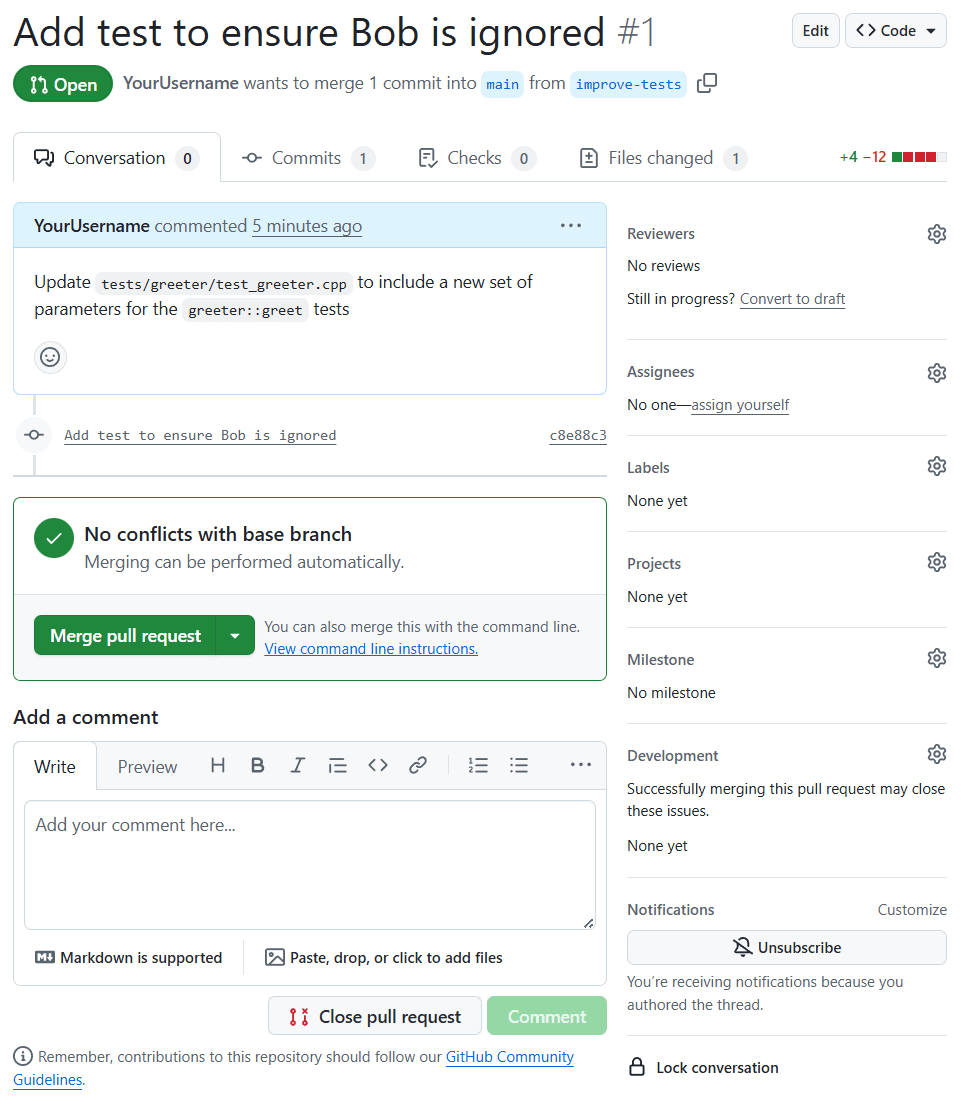
For a pull request to be approved and merged, most teams require two forms of checks:
- Manual Checks: One or more of our colleagues need to check our proposed changes and approve them.
- Automated Checks: Some checks can be automated. For example, when a PR is opened, we can set up a script that downloads the code in the branch, compiles it, and ensures all the automated tests pass.
Setting up automated checks will be the focus of our next lesson. For now, we can just merge our changes on our remote, using the Merge pull request button.
Deleting Branches
With our changed merged into our main branch, we usually no longer need the branch we created for this feature. After the merge is complete, GitHub's UI gives us a button to delete the branch in our remote repository.
We can also delete the branch in our local environment if we want. First, though, we should switch back to using the main branch locally. We can do that using the checkout command:
git checkout mainSwitched to branch 'main'We can then delete our previous branch, if we want:
git branch -D improve-testsDeleted branch improve-tests (was c8e88c3).Pulling Changes
On our remote repository, the main branch has now been updated with the changes that were merged in through the pull request.
This means that our local repository is out of date, as we haven't downloaded and integrated those changes yet. We can check this using the git status command:
git statusOn branch main
Your branch is behind 'origin/main' by 2 commits.
(use "git pull" to update your local branch)As the output suggests, we can pull the latest changes into our local repository using git pull, which will get everything back in sync:
git pullThe output will confirm that the changes have been downloaded successfully, and which of our local file(s) have been updated with the incoming changes:
Updating f36aa31..1247998
tests/greeter/test_greeter.cpp | 16 ++++------------
1 file changed, 4 insertions(+), 12 deletions(-)Working on the Next Feature
From there, we simply repeat the process. We create a new branch for our next feature or improvement:
git checkout -b some-new-featureWe implement the changes in our code editor, making commits as we reach key steps in the process:
git add .git commit -m "Added the basic structure"When we're done and want to create a PR, or when we want to back up our progress to the remote in case something goes wrong with our computer, we push our branch:
git push origin some-new-featureAnd finally, we navigate to our repository on GitHub and open a pull request through the UI
Summary
In this lesson, we covered the Git fundamentals that are useful for collaborating on projects.
- Repository: A project's history is stored in a Git repository, initialized with
git init. - The Commit Cycle: You stage changes with
git add ., save them as a snapshot withgit commit -m "message", and upload them to a remote server withgit push. - Ignoring Files: The
.gitignorefile is used to keep your repository clean of generated files and local configuration. - Branching: Branches (
git checkout -b ...) allow for parallel development, enabling you to work on new features without destabilizing the main codebase. - The PR Workflow: Protected branches and pull requests are the standard mechanism for ensuring code quality and triggering automated builds before changes are merged into the main line of development.
Build Servers and Continuous Integration
Learn how to automate your build and test process with Continuous Integration (CI) and a build server. This lesson provides a guide to creating a GitHub Actions workflow for a CMake project.