Breakout: The Ball
This lesson focuses on creating the Ball class, customizing our physics engine, and launching the ball.
This legacy content uses SDL2
An updated version using SDL3 is available
Now that our project is running, we can start building the game itself. The first element we need is the ball. This lesson is dedicated to bringing our game's ball to life, from its visual representation to its movement.
We will begin by creating a new Ball class. This class will use our existing entity-component system to manage its properties. We'll add components for its position, image, and collision bounds. We'll also add a physics component and learn how to customize it for our game by disabling gravity.
Our key goals for this lesson are to:
- Create a
Ballentity class. - Add and configure the necessary components.
- Modify the engine's
PhysicsComponentto support zero-gravity movement. - Set an initial velocity to get the ball moving.
Adding a Ball Class
Let's start by adding a class to manage our ball. It'll inherit from our engine's Entity class and, like any Entity, it needs a reference to the scene it is part of.
We'll also give our Ball a transform component and image component so we can see it, and we'll position it somewhere near the middle of the scene for now.
We'll also save the pointer to the TransformComponent as we'll need it later:
Breakout/Ball.h
#pragma once
#include "Engine/ECS/Entity.h"
#include "Engine/ECS/ImageComponent.h"
#include "Engine/ECS/TransformComponent.h"
#include "Breakout/BreakoutScene.h"
class Ball : public Entity {
public:
Ball(BreakoutScene& Scene) : Entity{Scene} {
Transform = AddComponent<TransformComponent>();
Transform->SetPosition({6, 7});
AddComponent<ImageComponent>("Assets/Grey.png");
}
private:
TransformComponent* Transform;
};Let's add a Ball to our scene. Loading levels will be quite a complex process eventually, especially once we start deserializing data from our editor files.
So, let's proactively break it out into a standalone function called Load(), which will take the level we want to load as an argument. From our constructor, we'll Load() level 1:
Breakout/BreakoutScene.h
#pragma once
#include <SDL.h>
#include "Engine/Scene.h"
class BreakoutScene : public Scene {
public:
BreakoutScene(Window& ParentWindow)
: Scene{ParentWindow} {
Load(1);
}
void Load(int Level);
};As a reminder, the entities of our scene is in a std::vector called Entities, which our BreakoutScene is inheriting from the base Scene class in our engine.
Every time we call Load(), we will clear all the entities in the scene, and load our new set of entities. For now, the only thing we have to load is our Ball:
Breakout/Source/BreakoutScene.cpp
#include "Breakout/BreakoutScene.h"
#include "Breakout/Ball.h"
void BreakoutScene::Load(int Level) {
Entities.clear();
Entities.emplace_back(
std::make_unique<Ball>(*this));
}With these changes, we should now see our ball rendered in the scene:

Configuring Size and Colliders
For our ball to bounce around and collide with stuff, we need to give it a collider. Let's add a CollisionComponent, and save a pointer to this component as a member variable as we'll need it later.
We also need to set the size of the collider to be around the same size as the ball, using the SetSize() method. In our example, the correct size seems to be a width of around 1.1 and a height of 1.7, but yours may be different:
Breakout/Ball.h
#pragma once
#include "Engine/ECS/Entity.h"
#include "Engine/ECS/ImageComponent.h"
#include "Engine/ECS/TransformComponent.h"
#include "Engine/ECS/CollisionComponent.h"
#include "Breakout/BreakoutScene.h"
class Ball : public Entity {
public:
Ball(BreakoutScene& Scene) : Entity{Scene} {
Transform = AddComponent<TransformComponent>();
Transform->SetPosition({6, 7});
Collision = AddComponent<CollisionComponent>();
Collision->SetSize(1.1, 1.7);
AddComponent<ImageComponent>("Assets/Grey.png");
}
private:
TransformComponent* Transform;
CollisionComponent* Collision;
};Remember, if you enable the DRAW_DEBUG_HELPERS preprocessor definition, the collider will draw a yellow rectangle showing its position and size:
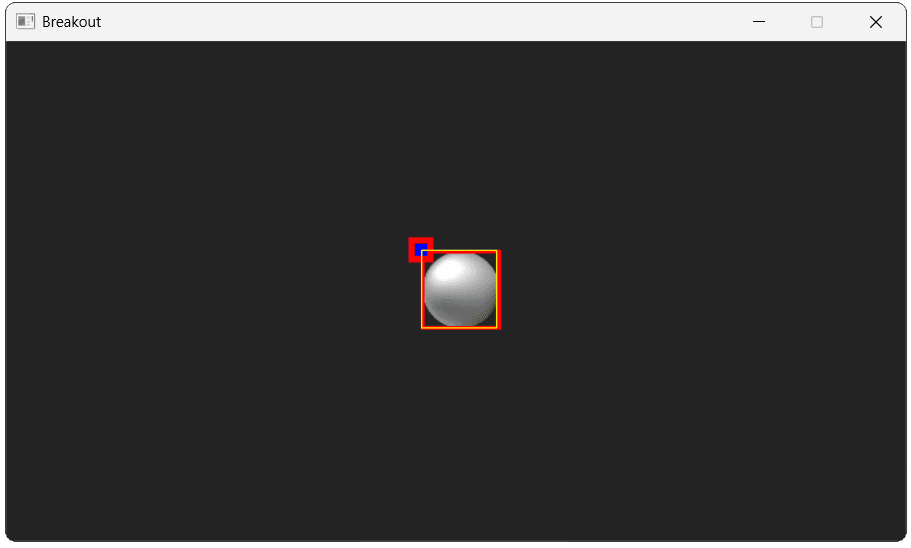
If you also need to change the position of the collider, you can use the SetOffset() method on the CollisionComponent.
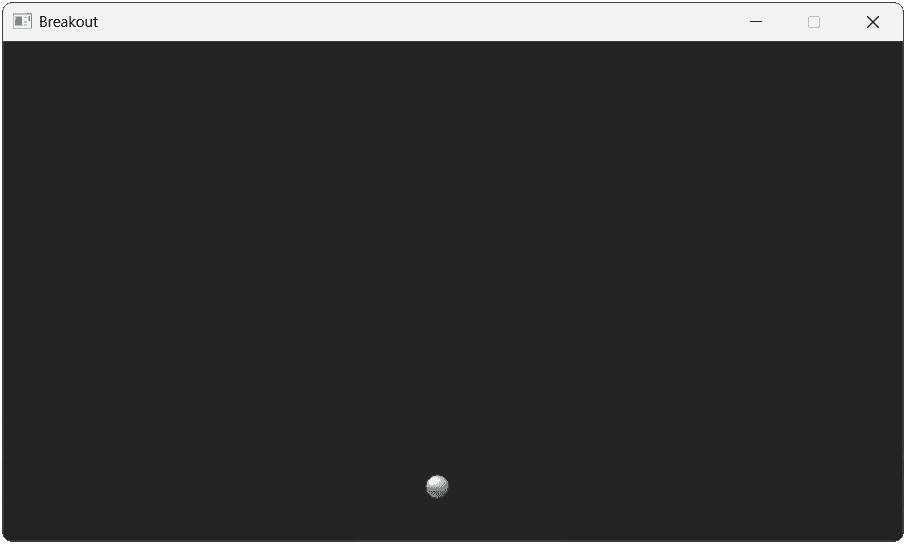
Our ball is too large at the minute, so we'll also use the SetScale() method on the transform component to scale it down.
We'll also update the starting position to near the bottom of the scene, with enough space to put the paddle underneath it in the future:
Breakout/Ball.h
// ...
class Ball : public Entity {
public:
Ball(BreakoutScene& Scene) : Entity{Scene} {
Transform = AddComponent<TransformComponent>();
Transform->SetPosition({6.1, 1.6});
Transform->SetScale(0.3);
Collision = AddComponent<CollisionComponent>();
Collision->SetSize(1.1, 1.7);
AddComponent<ImageComponent>("Assets/Grey.png");
}
// ...
};
Disabling Gravity
To get our ball moving, we can add a PhysicsComponent, but we need to make a small enhancement to it first. Our PhysicsComponent assumes we always want to simulate gravity, but that's not the case in our game.
Let's update the component with a new Vec2 to store the desired gravity effect, as well as a getter and setter to access it:
Engine/ECS/PhysicsComponent.h
// ...
class PhysicsComponent : public Component {
public:
// ...
Vec2 GetGravity() const {
return Gravity;
}
void SetGravity(Vec2 NewGravity) {
Gravity = NewGravity;
}
private:
// ...
Vec2 Gravity{0.0, -9.8}; // m/s^2
};In the physics component's Tick() function, we can now use this value, rather than the fixed local variable we were using previously:
Engine/ECS/Source/PhysicsComponent.cpp
// ...
void PhysicsComponent::Tick(float DeltaTime) {
const Vec2 GRAVITY{0.0f, -9.8f};
ApplyForce(GRAVITY * Mass);
ApplyForce(GetGravity() * Mass);
Velocity += Acceleration * DeltaTime;
SetOwnerPosition(
GetOwnerPosition() + Velocity * DeltaTime
);
Acceleration = {0.0, 0.0};
}Adding Movement
Now that we can control gravity, let's add a PhysicsComponent to our Ball, and disable the effects of gravity by setting it to {0, 0}.
We'll also need to use our physics component in other Ball methods in the future, so we'll store its pointer as a member variable:
Breakout/Ball.h
// ...
#include "Engine/ECS/PhysicsComponent.h"
class Ball : public Entity {
public:
Ball(BreakoutScene& Scene) : Entity{Scene} {
// ...
Physics = AddComponent<PhysicsComponent>();
Physics->SetGravity({0, 0});
AddComponent<ImageComponent>("Assets/Grey.png");
}
private:
// ...
PhysicsComponent* Physics;
};To get our ball moving, let's first add a configuration variable that lets us easily change the speed in the future:
Config.h
// ...
namespace Config::Breakout {
inline const float BALL_SPEED{10};
}
// ...Back in our Ball class, we can set the velocity in three steps:
- We'll create a vector to set the initial direction of our ball. You can use any value you prefer here - we'll use
{1, 2}, meaning the ball will move up and to the right. - We'll normalize this vector, thereby ensuring it has a length of
1. - We'll multiply this normalized vector by the
BALL_SPEEDconfiguration value.
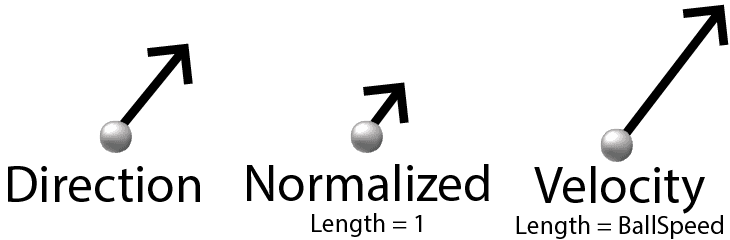
These steps ensure our velocity matches both the direction ({1, 2}) and speed (10) that we configured.
Breakout/Ball.h
// ...
#include "Config.h"
class Ball : public Entity {
public:
Ball(BreakoutScene& Scene) : Entity{Scene} {
// ...
Physics = AddComponent<PhysicsComponent>();
Physics->SetGravity({0, 0});
Physics->SetVelocity(Vec2{1, 2}.Normalize()
* Config::Breakout::BALL_SPEED);
}
private:
TransformComponent* Transform;
PhysicsComponent* Physics;
CollisionComponent* Collision;
};With those changes, our ball should now start moving, eventually leaving our screen entirely. We've enabled DRAW_DEBUG_HELPERS again for this screenshot, which causes our movement trajectories to be drawn as blue lines:
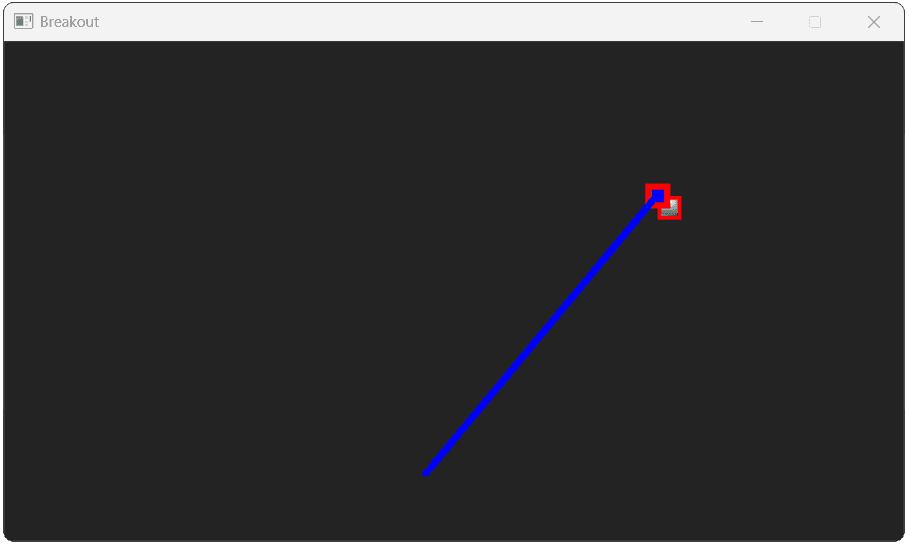
In the next part, we'll add some walls around the edges of the window that our ball will bounce off.
Complete Code
Complete versions of the files we updated in this section are available below:
Files
Summary
In this lesson, we successfully added the first interactive element to our Breakout game: the ball. We created a dedicated Ball class, equipped it with transform, image, collision, and physics components, and set it in motion. We also enhanced our engine's PhysicsComponent to allow for zero-gravity environments.
Here are the key takeaways:
- Game-specific objects are created as
Entitysubclasses that compose generic components. - The order in which components are added can affect behavior, particularly between physics, collision, and rendering.
- It's often necessary to adapt generic engine features (like gravity in
PhysicsComponent) to suit the specific needs of a game. - Vector normalization is a useful technique for setting an object's velocity, allowing us to define a direction and speed independently.
Breakout: Walls and Collision
We'll add invisible walls around the play area and write the collision response code to make the ball bounce.