Breakout: Project Setup
Begin building a Breakout clone by integrating our level editor and engine into a new game project.
This legacy content uses SDL2
An updated version using SDL3 is available
In this project, we'll build a complete clone of the classic arcade game, Breakout. We'll implement all the core mechanics, including a paddle, a ball, breakable bricks, scoring, and multiple levels.
To get started, we'll set up our project structure. We will be reusing a lot of code from our previous projects, including the component-based game engine and the level editor. This allows us to hit the ground running and focus on game-specific logic rather than rebuilding foundational systems.
This first lesson will walk you through all the starting files, highlighting the minor changes we've made to our engine since we last worked on it. By the end, you'll have a running application that shows both our editor window and a new, empty window for our Breakout game.
Starting Point
Our starting point for this project is provided below, which primarily is split across three directories:
Editor/contains the files we built in the map editor project, which we can use to build levels for our game.Engine/contains the code we wrote in the previous few chapters, covering the scene management as well as our entity and component system. We've made some minor changes to these files since the previous chapter, which we'll walk through later in this section.Breakout/is where we'll add our new, game-specific functionality.
All of these starting files are available as a zip file:
This file includes some sample levels in the "/Assets" directory if you don't have any from our earlier level editor project.
Files
Editor
The files in our editor directory haven't been changed since our previous project. The main.cpp and Config.h files are also from our editor project, with a few additions we'll note later in the section.
When WITH_EDITOR is defined, our program loads our editor, which can be used to create and modify levels for our game.
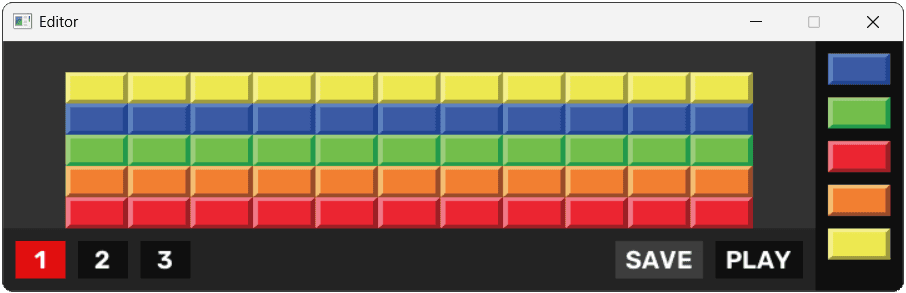
We'll load the files created by this editor into our breakout game later in the project.
Note that, for now, we'll assume that WITH_EDITOR is always defined. Our project may not compile correctly if WITH_EDITOR is not defined. At the end of the project, we'll update our project to allow the editor to be fully excluded, and for our game to ship without it.
Engine
Most of our starting code is in the Engine/ directory, which includes all the code we wrote in the previous few chapters. It matches the code we finished in our previous chapter, but with a few small changes. We'll highlight those changes below.
Include Directories
Our engine files are now stored within Engine/ and Engine/ECS/ directories. Therefore, we need to either update our project's include directories within our build configuration, or update all of our #include directives to reflect this new location.
The starting code we provided above has chosen the latter approach, prepending Engine/ or Engine/ECS/ as appropriate. For example:
Engine/ECS/ImageComponent.h
// ...
// Before:
#include "Component.h"
#include "Vec2.h"
// After:
#include "Engine/ECS/Component.h"
#include "Engine/Vec2.h"
// ...The Config::Engine Namespace
The Engine/Window.h class is loading its title, size, and background color from variables defined within the Config::Engine namespace.
We've added these values to our Config.h file:
Config.h
// ...
namespace Config::Engine {
inline const std::string WINDOW_TITLE{"Breakout"};
inline const int WINDOW_WIDTH{720};
inline const int WINDOW_HEIGHT{400};
inline const SDL_Color WINDOW_BACKGROUND{
35, 35, 35, 255};
}
// ...Adding Scene::GetWidth() and Scene::GetHeight()
To help with the positioning of our elements, our Scene class has added getters to provide access to the private WorldSpaceWidth and WorldSpaceHeight variables:
Engine/Scene.h
// ...
class Scene {
public:
// ...
float GetWidth() { return WorldSpaceWidth; }
float GetHeight() { return WorldSpaceHeight; }
// ...
};Adding Entity::AddComponent<>() and Entity::GetComponent<>()
In our component chapters, we mentioned that our approach to defining functions like GetTransformComponent() and GetPhysicsComponent() was problematic. Every time we added a new component type, or a new constructor to an existing component type, we needed to update our Entity class with more functions.
We proposed a more advanced technique involving templates to circumvent that limitation, which we've now implemented:
Engine/ECS/Entity.h
// ...
class Entity {
public:
// ...
template <typename CType, typename... CArgs>
requires std::derived_from<CType, Component>
CType* AddComponent(CArgs&&... ConstructorArgs) {
ComponentPtr& NewComponent{
Components.emplace_back(
std::make_unique<CType>(
this,
std::forward<CArgs>(ConstructorArgs)...
)
)
};
NewComponent->Initialize();
return static_cast<CType*>(NewComponent.get());
}
template <typename CType>
requires std::derived_from<CType, Component>
CType* GetComponent() {
for (const ComponentPtr& C : Components) {
if (auto Ptr{dynamic_cast<CType*>(
C.get()
)}) {
return Ptr;
}
}
return nullptr;
}
// ...
};To add a component to an entity, we now use AddComponent<>(), passing the component type within < and >, and constructor arguments for that component within the ( and ). For a hypothetical AudioComponent, that might look like this:
// Before:
AddAudioComponent(42, 9.8, true);
// After:
AddComponent<AudioComponent>(42, 9.8, true);To retrieve a component, we use GetComponent<>(), passing the component type within < and >, and an empty set of brackets - ( and )
// Before:
GetAudioComponent();
// After:
GetComponent<AudioComponent>();This allows us to simplify our Entity class significantly by removing a lot of GetSomeComponent() and AddSomeComponent()-style functions.
Note that, after removing those functions, some of our existing code will need to be updated to use the new API. For example:
Engine/ECS/Entity.h
// ...
// Additional #include directives may also be needed
#include "TransformComponent.h"
Vec2 Component::GetOwnerPosition() const {
TransformComponent* Transform{
// Before:
GetOwner()->GetTransformComponent()
// After:
GetOwner()->GetComponent<TransformComponent>()
};
if (!Transform) {
std::cerr << "Error: attempted to get position"
" of an entity with no transform component\n";
return {0, 0};
}
return Transform->GetPosition();
}Our starting code provided above includes these changes
Fixing the Vec2 Forward Declaration
An earlier version of a previous lesson was incorrectly forward-declaring our Vec2 type as a class when it was actually a struct. This error was in the Component.h header file.
That has now been corrected in the lesson and the starting code above, but if following on using your own version of the files, you may still have that issue:
Engine/ECS/Component.h
#pragma once
#include <SDL.h>
class Entity;
class Scene;
class AssetManager;
class Vec2;
struct Vec2;
// ...
class Component {
// ...
};Breakout Files
Finally, we have the Breakout/ directory, which is where we'll store classes that are specific to our game. However, not all of our work in this project will be within this directory - we'll be adding new capabilities to classes within the Engine/ directory too.
This separation is useful as, if we keep our engine code generic, we can reuse those components over and over again, across multiple projects. Capabilities we add to our engine during the process of making one game can make the next game better, or quicker to build.
The BreakoutScene Class
For now, the only breakout-specific code we'll add is a BreakoutScene class, which will eventually orchestrate our game flow. For now, it just inherits from the base Scene class in our Engine, and forwards the window to the base constructor.
We'll connect this BreakoutScene to our main loop in the next section:
Breakout/BreakoutScene.h
#pragma once
#include <SDL.h>
#include "Engine/Scene.h"
class BreakoutScene : public Scene {
public:
BreakoutScene(Window& ParentWindow)
: Scene{ParentWindow} {}
};Updates to main.cpp
Our main.cpp primarily uses the same code from our level editor project. We've just added a new Window for our game, a BreakoutScene instance to manage it, and we've connected both to the event and application loops:
main.cpp
#include <SDL.h>
#include <SDL_image.h>
#include <SDL_ttf.h>
#include "Config.h"
#include "Engine/Window.h"
#include "Breakout/BreakoutScene.h"
#ifdef WITH_EDITOR
#include "Editor/Scene.h"
#include "Editor/Window.h"
#endif
int main(int argc, char** argv) {
SDL_Init(SDL_INIT_VIDEO);
CheckSDLError("SDL_Init");
IMG_Init(IMG_INIT_PNG);
CheckSDLError("IMG_Init");
TTF_Init();
CheckSDLError("TTF_Init");
#ifdef WITH_EDITOR
Editor::Window EditorWindow;
Editor::Scene EditorScene{EditorWindow};
#endif
Window GameWindow;
BreakoutScene GameScene{GameWindow};
Uint64 LastTick{SDL_GetPerformanceCounter()};
SDL_Event E;
while (true) {
while (SDL_PollEvent(&E)) {
#ifdef WITH_EDITOR
EditorScene.HandleEvent(E);
#endif
GameScene.HandleEvent(E);
if (
E.type == SDL_QUIT ||
E.type == SDL_WINDOWEVENT &&
E.window.event == SDL_WINDOWEVENT_CLOSE
) {
TTF_Quit();
IMG_Quit();
SDL_Quit();
return 0;
}
}
Uint64 CurrentTick{SDL_GetPerformanceCounter()};
float DeltaTime{
static_cast<float>(CurrentTick - LastTick) /
SDL_GetPerformanceFrequency()
};
LastTick = CurrentTick;
#ifdef WITH_EDITOR
EditorScene.Tick(DeltaTime);
EditorWindow.Render();
EditorScene.Render(EditorWindow.GetSurface());
EditorWindow.Update();
#endif
GameScene.Tick(DeltaTime);
GameWindow.Render();
GameScene.Render(GameWindow.GetSurface());
GameWindow.Update();
}
return 0;
}Mouse Focus Clickthrough
By default, SDL will not report a mouse click event on a window that did not have input focus. This is a sensible default for single-window applications but can be a bit unintuitive for multi-window programs.
For example, if we wanted to click the "Play" button in our editor, but the editor does not have input focus, we'd have to click it twice. The first click would make the window active, but not provide a click event to which our button can react.
We can change this behaviour by setting the SDL_HINT_MOUSE_FOCUS_CLICKTHROUGH hint to "1", rather than its default value of "0":
main.cpp
// ...
int main(int argc, char** argv) {
// ...
#ifdef WITH_EDITOR
Editor::Window EditorWindow;
Editor::Scene EditorScene{EditorWindow};
SDL_SetHint(
SDL_HINT_MOUSE_FOCUS_CLICKTHROUGH, "1"
);
#endif
// ...
return 0;
}Assets
As usual, we should ensure the SDL DLL files are provided alongside our executable file. Any font and image files we reference should also be stored alongside the executable file.
In our code examples, we reference images and fonts using paths like "Assets/Rubik-SemiBold.ttf" and "Assets/Brick_Blue_A.png". That means that an "Assets" directory should exist in the same location as our executable, and that "Assets" directory should include files like "Rubik-SemiBold.ttf" and "Brick_Blue_A.png"
The assets used in our examples are provided below, but feel free to substitute your own if preferred:
All of the code we introduced in this lesson, in addition to three example levels serialized from the map editor, are available here:
The CMakeLists.txt File
If you're using CMake, a CMakeLists.txt file is provided below that includes all the source files our build needs. It will also automatically copy the DLL files to the same location as the executable.
Files stored in an "Assets" directory within the project folder will also be copied to an "Assets" directory in the same location as the executable.
CMakeLists.txt
cmake_minimum_required(VERSION 3.16)
set(CMAKE_CXX_STANDARD 20)
project(Breakout VERSION 1.0.0)
add_executable(Breakout
"main.cpp"
"Editor/Source/Button.cpp"
"Editor/Source/Blocks.cpp"
"Editor/Source/Actor.cpp"
"Editor/Source/ActorTooltip.cpp"
"Editor/Source/Level.cpp"
"Engine/Source/Scene.cpp"
"Engine/ECS/Source/Component.cpp"
"Engine/ECS/Source/CollisionComponent.cpp"
"Engine/ECS/Source/ImageComponent.cpp"
"Engine/ECS/Source/PhysicsComponent.cpp"
"Engine/ECS/Source/InputComponent.cpp"
"Engine/ECS/Source/Commands.cpp"
# These will be added later
# "Breakout/Source/BreakoutScene.cpp"
# "Breakout/Source/Ball.cpp"
)
target_compile_definitions(
Breakout PUBLIC
WITH_EDITOR
CHECK_ERRORS
# We'll use these later
# DRAW_DEBUG_HELPERS
# ENABLE_CHEATS
)
target_include_directories(
Breakout PUBLIC
${PROJECT_SOURCE_DIR}
)
add_subdirectory(external/SDL)
add_subdirectory(external/SDL_image)
add_subdirectory(external/SDL_ttf)
target_link_libraries(Breakout PRIVATE
SDL2
SDL2_image
SDL2_ttf
)
if (WIN32)
target_link_libraries(
Breakout PRIVATE SDL2main
)
endif()
set(AssetDirectory "${PROJECT_SOURCE_DIR}/Assets")
add_custom_command(
TARGET Breakout POST_BUILD
COMMAND
${CMAKE_COMMAND} -E copy_if_different
"$<TARGET_FILE:SDL2>"
"$<TARGET_FILE:SDL2_image>"
"$<TARGET_FILE:SDL2_ttf>"
"$<TARGET_FILE_DIR:Breakout>"
COMMAND
${CMAKE_COMMAND} -E copy_directory_if_different
"${AssetDirectory}"
"$<TARGET_FILE_DIR:Breakout>/Assets"
VERBATIM
)Summary
Our starting point should compile successfully, showing our Editor window and a currently-empty Breakout window:
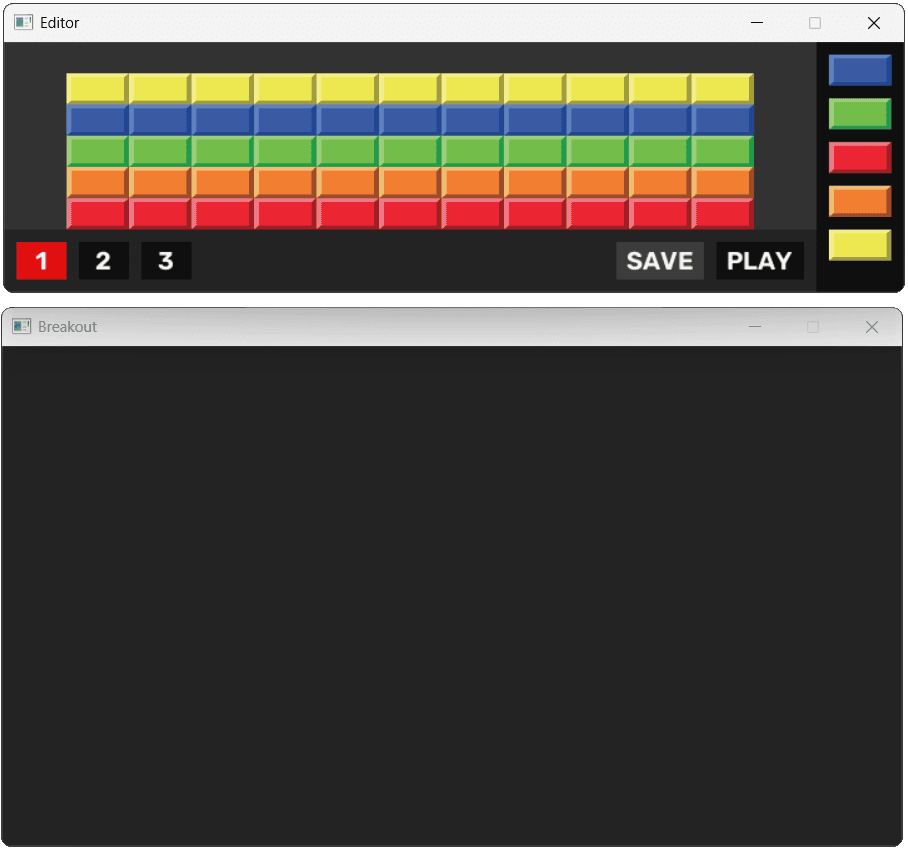
We've successfully established the foundation for our Breakout clone. This lesson involved gathering all our previous work on the level editor and game engine, organizing it into a coherent project structure, and creating the initial BreakoutScene class for our game.
Our application now compiles and runs, displaying both the editor and an empty game window, ready for us to start adding gameplay elements.
Here's what we've accomplished:
- We created a project structure that separates game-specific code (
Breakout/) from reusable code (Engine/,Editor/). - We upgraded our
Entityclass to use generic, templated functions for adding and retrieving components, making our engine more flexible. - We configured
main.cppto run both the editor and the game loop simultaneously. - We learned how the
SDL_HINT_MOUSE_FOCUS_CLICKTHROUGHhint makes multi-window interactions smoother.
Breakout: The Ball
This lesson focuses on creating the Ball class, customizing our physics engine, and launching the ball.