Grid-Based Placement
Convert the freeform placement to a grid-based system with snapping and single-actor cell limits
In the previous lessons, we built the core functionality for dragging, dropping, selecting, and deleting actors in our level editor. Currently, actors can be placed anywhere on the level canvas, overlapping freely. While this works for some game styles, many benefit from more structured placement.
This lesson introduces grid-based positioning. First, we'll implement grid snapping. When dragging or dropping an actor within the level, its position will automatically "snap" to the nearest grid line. This helps designers align objects precisely without tedious manual adjustments.
Then, we'll take it a step further and transform our editor into a true cell-based system. We'll modify the logic so that only one actor can occupy any given grid cell at a time. Dropping an actor onto an already occupied cell will replace the existing actor.
By the end, you'll understand:
- How to define and configure a grid system.
- The math behind snapping coordinates to a grid.
- Modifying tooltip and actor placement logic for snapping.
- Enforcing single occupancy per grid cell.
Snapping to Grid Positions
Our first step towards a grid-based system is configuring the grid itself. In Config.h, inside the Config::Editor namespace, we'll add constants defining the snapping distances. HORIZONTAL_GRID_SNAP will be 50, and VERTICAL_GRID_SNAP will be 25, reflecting the horizontal rectangle shape of our game's blocks.
We also need to define how many grid cells make up our level. We'll add GRID_WIDTH and GRID_HEIGHT constants to keep track of this. We'll set them to 13 and 6 for our examples, but our program will scale to any values we prefer here.
We'll use the Uint8 type for these. This is an 8-bit unsigned integer, meaning it can hold values from 0 to 255. Using a fixed-size type like Uint8 is important because we intend to serialize these dimensions to a file later; it ensures the data size is predictable. If we needed larger levels, Uint16 would be the next choice.
We'll also update the level's rendering size - LEVEL_WIDTH and LEVEL_HEIGHT - to be based on these new values. This ensures that the level's rendering area in the editor always matches the space required by the defined grid. Any changes to the grid configuration (number of cells or snap size) will automatically propagate to the level's dimensions.
src/Config.h
// ...
namespace Config::Editor {
// Level
inline const int HORIZONTAL_GRID_SNAP{50};
inline const int VERTICAL_GRID_SNAP{25};
inline const Uint8 GRID_WIDTH{13};
inline const Uint8 GRID_HEIGHT{6};
inline const int LEVEL_WIDTH{
HORIZONTAL_GRID_SNAP * GRID_WIDTH};
inline const int LEVEL_HEIGHT{
VERTICAL_GRID_SNAP * GRID_HEIGHT};
inline constexpr SDL_Color LEVEL_BACKGROUND{
50, 50, 50, 255};
// ...
}
// ...Now that we have the grid dimensions configured, we need a function within our Level class to perform the actual snapping calculation. This function will take an arbitrary coordinate (x, y) and return the coordinates of the top-left corner of the grid cell that contains it.
Let's declare this function in Level.h. We'll add a public member function SnapToGridPosition() that accepts two int parameters (x and y) and returns an SDL_Point, which holds the resulting snapped x and y coordinates.
src/Editor/Level.h
// ...
namespace Editor {
// ...
class Level {
public:
// ...
SDL_Point SnapToGridPosition(int x, int y);
// ...
};
}Now let's implement SnapToGridPosition() in Level.cpp.
The logic relies on integer division. When we divide the input coordinate (e.g., x) by the corresponding grid snap size (sx), integer division automatically truncates any remainder, effectively rounding down to the nearest whole number of grid steps.
Multiplying this result back by the snap size (sx) gives us the coordinate of the grid line just below or at the input coordinate. We do this for both x and y using HORIZONTAL_GRID_SNAP and VERTICAL_GRID_SNAP from our configuration, and return the result as an SDL_Point.
src/Editor/Level.cpp
// ...
SDL_Point Level::SnapToGridPosition(
int x, int y
) {
using namespace Config::Editor;
int sx{HORIZONTAL_GRID_SNAP};
int sy{VERTICAL_GRID_SNAP};
return {
(x / sx) * sx,
(y / sy) * sy,
};
}Why does this Logic Snap to a Grid?
The formula (x / sx) * sx works because of how integer division behaves in C++ (and many other languages). When you divide two integers, the result is also an integer, and any fractional part is simply discarded (truncated towards zero).
For example, let's imagine x is 20 and our horizontal snapping value sx is 50. In that scenario, (x / sx) * sx becomes (20 / 50) * 50). The (20 / 50) part of this expression returns 0, and then 0 * 50 returns 0.
So, if our original x value was 20, then the x returned from SnapToGridPosition() will be 0. Here are some more examples, so we can see the grid snapping behaviour where values are returned in multiples of 50:
- If
xis49, then49 / 50is0, and0 * 50returns0 - If
xis51, then51 / 50is1, and1 * 50returns50 - If
xis75, then75 / 50is1, and1 * 50returns50 - If
xis124, then124 / 50is2, and2 * 50returns100
As you can see, this process finds the largest multiple of the snap size (sx) that is less than or equal to the input coordinate (x).
And vertical snapping works in much the same way, except the results are multiples of VERTICAL_GRID_SNAP, which is 25 in our example.
Snapping the Tooltip to the Grid
Now that our Level can calculate snapped positions, let's apply this to the ActorTooltip. We want the tooltip to snap to the grid, but only when the mouse cursor is actually hovering over the level area.
We can achieve this conditional behavior in PositionWindow(). We already have an if statement checking if the Level has mouse focus.
The logic for smooth, non-snapped positioning (using the DragOffset) belongs in the else block - the case where the mouse is not over the level.
Let's refactor the code. We'll move the lines that calculate the position using DragOffset and the corresponding SDL_SetWindowPosition() call inside the else block.
src/Editor/ActorTooltip.cpp
// ...
void ActorTooltip::PositionWindow() {
float x, y;
SDL_GetMouseState(&x, &y);
auto [DragOffsetX, DragOffsetY]{
DragActor->GetDragOffset()
};
SDL_SetWindowPosition(
SDLWindow,
int(x) - DragOffsetX,
int(y) - DragOffsetY
);
if (ParentScene.GetLevel().HasMouseFocus()) {
SDL_SetWindowOpacity(SDLWindow, 1.0f);
SDL_SetCursor(SDL_GetDefaultCursor());
} else {
auto [DragOffsetX, DragOffsetY]{
DragActor->GetDragOffset()
};
SDL_SetWindowPosition(
SDLWindow,
int(x) - DragOffsetX,
int(y) - DragOffsetY
);
SDL_SetWindowOpacity(SDLWindow, 0.5f);
SDL_SetCursor(DenyCursor);
}
}Now, let's add the code to the if block for when the tooltip should snap.
Because our tooltip was created using SDL_CreatePopupWindow(), its position is always set relative to its parent window. This makes our math very simple: SDL_GetMouseState() returns the mouse position relative to that same parent window.
We can simply pass these mouse coordinates to SnapToGridPosition(), and then pass the result directly to SDL_SetWindowPosition().
src/Editor/ActorTooltip.cpp
// ...
void ActorTooltip::PositionWindow() {
float x, y;
SDL_GetMouseState(&x, &y);
if (ParentScene.GetLevel().HasMouseFocus()) {
SDL_SetWindowOpacity(SDLWindow, 1.0f);
SDL_SetCursor(SDL_GetDefaultCursor());
auto [GridX, GridY]{
ParentScene.GetLevel().SnapToGridPosition(
int(x), int(y)
)
};
SDL_SetWindowPosition(SDLWindow, GridX, GridY);
} else {
}
}If we run our program now, we should see our tooltip snapping to grid positions as we drag our actor over the level. However, once we drop the actor, its position in the level is not snapped to that same grid, so let's address that next.
Snapping Actors to the Grid
Our final step for snapping is to ensure the actors themselves land on the grid coordinates when dropped. This requires updating the Level::HandleDrop() function.
We previously used the mouse position and a drag offset to determine the drop location. Now, we want to ignore the drag offset and use only the snapped grid position.
We'll modify HandleDrop() to delete the code that gets DragOffset. After getting the window-relative MouseX and MouseY (casting them to int), we'll call SnapToGridPosition() to calculate GridX and GridY.
We'll then update both SetPosition() calls (inside the if for cloned actors and the else for moved actors) to use GridX, GridY as the target coordinates.
src/Editor/Level.cpp
// ...
void Level::HandleDrop(Actor* DragActor) {
DragActor->SetIsVisible(true);
if (!HasMouseFocus()) {
return;
}
float MouseX, MouseY;
SDL_GetMouseState(&MouseX, &MouseY);
auto [GridX, GridY]{
SnapToGridPosition(
int(MouseX), int(MouseY)
)
};
using enum ActorLocation;
if (DragActor->GetLocation() == Menu) {
ActorPtr NewActor{DragActor->Clone()};
NewActor->SetPosition(GridX, GridY);
SelectedActor = NewActor.get();
AddToLevel(std::move(NewActor));
} else {
DragActor->SetPosition(GridX, GridY);
SelectedActor = DragActor;
}
}
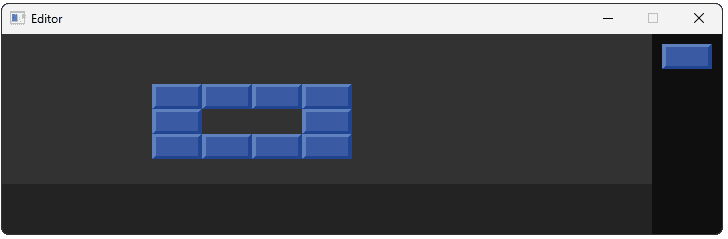
// ...Running our program, we should now see we can easily position our actors in an organized grid:
One Actor Per Grid Position
Our editor now snaps actors to a grid, but it still allows multiple actors to occupy the same grid cell. For many tile or grid-based games, this is undesirable; each cell should hold at most one actor. We need to enforce this constraint.
The desired behavior is: when an actor is dropped onto a grid cell, any actor already present in that cell should be removed first. However, if the user simply clicks an actor and releases (effectively dropping it back into its original cell), we shouldn't delete and replace it.
To implement this, we'll add a helper function to the Level class specifically for deleting an actor at a given grid position, with an exception for the actor being dropped.
Let's declare DeleteAtPosition() in the public section of Level.h. The Unless parameter will hold a pointer to the actor currently being dragged/dropped, preventing it from deleting itself if dropped in its own previous location.
src/Editor/Level.h
// ...
namespace Editor {
// ...
class Level {
public:
// ...
void DeleteAtPosition(
int x, int y, const Actor* Unless);
// ...
};
}Now, let's implement DeleteAtPosition() in Level.cpp. We need to search through our Actors vector to find if any actor's position matches the provided x and y.
We can use a traditional for loop with an index. Inside the loop, we'll get the position (ax, ay) of the current actor Actors[i]. We'll check if ax == x and ay == y. We'll check if the raw pointer Actors[i].get() is not equal to the Unless pointer.
If all conditions are true, we've found a different actor at the target location that needs to be removed. We use Actors.erase() to remove it and immediately break from the loop, as there can be at most one actor per position now.
src/Editor/Level.cpp
// ...
void Level::DeleteAtPosition(
int x, int y, const Actor* Unless
) {
for (size_t i{0}; i < Actors.size(); ++i) {
auto [ax, ay]{Actors[i]->GetPosition()};
if (ax == x && ay == y
&& Actors[i].get() != Unless
) {
Actors.erase(Actors.begin() + i);
break;
}
}
}Advanced: Using std::erase_if() and Lambdas
Solving this problem using the std::erase_if() and lambda approach we introduced in the previous lesson would look like this:
// ...
void Level::DeleteAtPosition(
int x, int y, const Actor* Unless
) {
std::erase_if(Actors,
[&](const ActorPtr& Actor){
auto [ax, ay]{Actor->GetPosition()};
return
ax == x &&
ay == y &&
Actor.get() != Unless;
}
);
}Note that the std::erase_if() function is only available in C++20 and later.
Replacing Actors
Finally, we integrate the deletion logic into the drop handling process. In Level::HandleDrop(), right after calculating the target grid coordinates GridX, GridY, we need to call our new deletion function.
We'll add our call to DeleteAtPosition() to ensure that, before we either clone DragActor to (GridX, GridY) or move DragActor to (GridX, GridY), any other actor currently occupying that cell is removed.
The DragActor pointer is passed as the Unless argument, preventing self-deletion when moving an actor back to its original cell or just clicking it.
src/Editor/Level.cpp
// ...
void Level::HandleDrop(Actor* DragActor) {
DragActor->SetIsVisible(true);
if (!HasMouseFocus()) {
return;
}
float MouseX, MouseY;
SDL_GetMouseState(&MouseX, &MouseY);
auto [GridX, GridY]{
SnapToGridPosition(
int(MouseX), int(MouseY)
)
};
DeleteAtPosition(GridX, GridY, DragActor);
}If we compile and run our program, we should now verify that, when we drop an actor into a grid position, any other actor that was previously in that grid position gets replaced.
Complete Code
Complete versions of the files we updated are provided below:
Files
Summary
This lesson transitioned our level editor from freeform placement to a structured grid-based system. We implemented grid snapping for precise alignment and enforced a rule allowing only one actor per grid cell, replacing any existing actor upon dropping a new one.
Key steps:
- Defined grid parameters in configuration.
- Used fixed-width integers (
Uint8) for grid dimensions to prepare for serialization. - Implemented a
SnapToGridPosition()function using integer division math: . - Updated
ActorTooltip::PositionWindow()to snap the tooltip to a grid when it is dragged within the level. - Modified
Level::HandleDrop()to use snapped coordinates and ignore the drag offset. - Added
Level::DeleteAtPosition()to remove existing actors from a target cell before placing a new one. - Integrated the deletion call into
HandleDrop()to enforce single occupancy per cell.
In the next lesson, we'll tackle saving the level layout to a file, allowing us to persist our designs.
Saving Levels
Implement footer buttons and binary serialization to save and load your custom game levels to disk.