Version Control with Git and Submodules
Learn the basics of Git for version control, including initializing repositories, making commits, and managing project dependencies with submodules.
A source control management (SCM) system, also known as a version control system (VCS), is a tool that tracks and manages changes to files over time. It allows multiple developers to work on the same codebase simultaneously, keeping a complete history of every change
In this lesson, we'll introduce the most popular verson control system system: Git.
Installing Git
Git is a fundamental tool for modern software development. It might already be on your system, especially if you followed the setup steps in the previous chapter on macOS or Linux, or installed Visual Studio or MSYS2's developer tools on Windows.
You can check whether git is installed and accessible using the command:
git --versiongit version 2.45.1.windows.1On Windows
The easiest way to get Git on Windows is to install Git for Windows from the official website:
- Go to https://git-scm.com/downloads/win.
- The download should start automatically. Run the installer.
- The installer has many options. For beginners, the default selections are perfectly fine. Just click "Next" through all the steps.
This will install git.exe and make it available in both the standard Command Prompt and PowerShell.
On MSYS2
If you installed the mingw-w64-ucrt-x86_64-toolchain in the previous lesson, Git should already be installed. If not, you can install it from the MSYS2 terminal with pacman:
pacman -S gitOn macOS
The xcode-select --install command we ran in the last lesson also installs Git. If for some reason it's missing, you can install it with Homebrew:
brew install gitOn Linux (Debian/Ubuntu)
The build-essential package doesn't always include Git. You can install it with apt:
sudo apt install gitInitializing a Repository
The first step in putting a project under source control is to initialize a Git repository. A repository (or "repo") is the database that Git uses to store the entire history of your project.
To initialize a Git repository, we navigate to our project's root directory in the terminal and run the git init command.
git initThis command creates a new, hidden subdirectory named .git. This single folder contains all the information Git needs: its configuration, the log of all changes, and the snapshots of your files. You almost never need to touch the contents of this folder directly.
Initialized empty Git repository in D:/Projects/Game/.git/Our project is now a Git repository.
Git GUIs
We're interacting with Git on the command line here as it works across all platforms. However, for day-to-day usage, most people prefer interacting with source control through a graphical user interface.
Most IDEs include Git integrations, or support plugins that include that capability. There are also free standalone tools for working with Git - the official Git site lists most of the popular options.
Committing Files
The core foundation of source control is the ability to create "snapshots" of our code at any given time. As we make changes, we can "save" our changes at key points.
Git remembers the state of our code at every snapshot, and allows us to revert to that state as needed. These snapshots are called "commits":
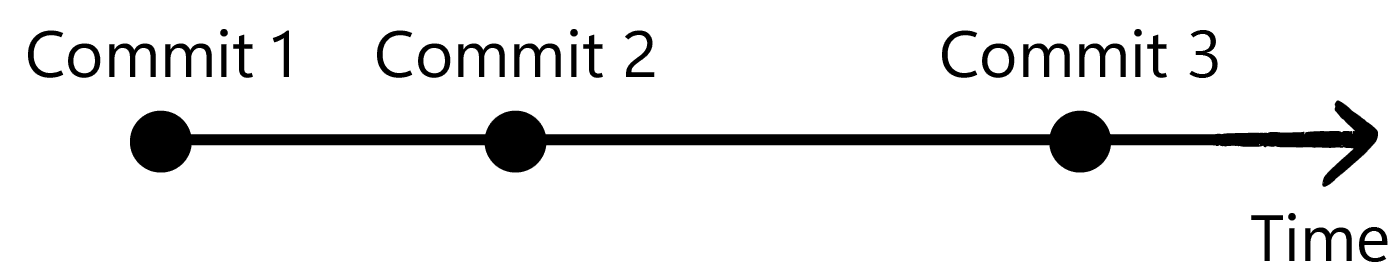
We can create a commit in two steps:
- We specify which files should be included in the commit (this is called "staging").
- We commit the staged files, providing a description of what our changes do. This might be a description of the new feature we added, or the bug we fixed.
Git can automatically detect which files have changed since the last commit. To see this list, we can use the git status command.
git statusLet's add our first file to the project. Before git status can report any changes, it will report that our new repository is empty, and we have nothing to commit.
On branch master
No commits yet
nothing to commit (create/copy files and use "git add" to track)Adding Files
A README.md file is a standard way to provide a description of our project. Most hosting services, like GitHub, will prominently display the contents of this file on our project's home page.
Let's create one now. The .md extension means the file uses Markdown, a simple syntax for formatting text.
README.md
# My Game
This is a project for my first SDL3 gameNow that we've created a file, let's see what git status tells us.
git statusOn branch master
No commits yet
Untracked files:
README.mdGit has detected a new file, README.md, but it's listed as "Untracked". This means Git sees the file, but isn't yet tracking its history.
To tell Git to start tracking this file and include it in our next commit, we use the git add command. This process is called staging.
git add README.mdIf we run git status again, we'll now see that our README.md is "staged" and ready to be committed:
git statusOn branch master
No commits yet
Changes to be committed:
new file: README.mdAdding All Files
Commonly, we'll want Git to stage all of the changes we've made to all files. We can do this by passing . to git add:
git add .Creating a Commit
With our files staged, we're ready to create our first snapshot using the git commit command. Every commit should have a message, which we provide with the -m flag. This message should be a short, descriptive summary of the changes we made:
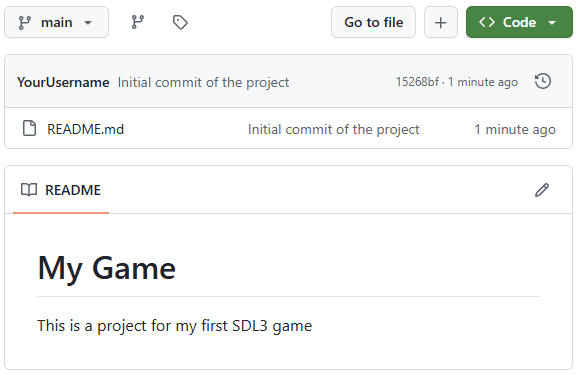
git commit -m "Initial commit of the project"The commit is now saved to your local repository's history. The output will confirm the commit was created and list a summary of the files included.
[master (root-commit) f36aa31] Initial commit of the project
1 file changed, 0 insertions(+), 0 deletions(-)
create mode 100644 README.mdRemote Repositories
Currently, our Git repository and history are stored only on our machine. To share our code and collaborate with others, it needs to be stored somewhere they can access it. This is the job of a remote repository.
Most teams use third-party services like GitHub, GitLab, or Bitbucket for hosting their remote repositories. For this course, we'll use GitHub, the most popular choice.
Authenticating with GitHub
After creating a free GitHub account, you need to authenticate your computer or development environment with your GitHub profile.
This means that, when your computer attempts to upload code, GitHub can verify that the request is coming from you.
The typical way of setting this up is to create and upload an SSH key to your profile. The GitHub documentation walks you through the process.
Creating Remote Repositories
Once our account is set up and authenticated, we can create the remote version of our repository by completing the form at https://github.com/new
Once it's created, GitHub will provide you with a URL for your new repository (e.g., https://github.com/Username/Game.git).
We need to "link" our local repository to this remote repository. Most services, including GitHub, will provide the exact command for this after you create the repository on their site. It will be something like this:
git remote add origin git@github.com:username/Game.gitIt's possible for a single local repository to have multiple remote repositories so, to tell them apart, we are required to name our remotes.
Most projects have only a single remote, and the universal convention is to call this remote origin. This is what we did in the previous command.
Pushing Code
With the remote configured, we can upload (or "push") our local commits to GitHub using the git push command. Before pushing our changes, GitHub also recommends renaming our branch from the default name of "master" to "main", and our repository page provides the command to do this:
git branch -M mainWe cover branches in more detail later. For now, after renaming our branch, we can push our code for the first time. GitHub also provides the command for this in our repository page:
git push -u origin mainThe first time we push, we use the -u flag to tell Git to link your local main branch with the main branch on the origin remote.
If everything is set up and authenticated correctly, we should get confirmation that our changes have been pushed:
Enumerating objects: 3, done.
Counting objects: 100%, done.
Compressing objects: 100%, done.
Writing objects: 100%, done.
To https://github.com/Username/Game.git
* [new branch] main -> main
Branch 'main' set up to track remote branch 'main' from 'origin'.If you now refresh your repository's page on GitHub, you'll see all your code has been uploaded and is available to anyone with access to your repository.
Git Submodules
A submodule is essentially a Git repository embedded inside another Git repository. It allows us to keep a specific commit of an external project (like SDL) as part of our own project's history.
Let's add the three SDL libraries we need as submodules. These commands tell Git to clone the repositories from GitHub and place them into a vendor/ directory within our project.
git submodule add https://github.com/libsdl-org/SDL.git vendor/SDLgit submodule add https://github.com/libsdl-org/SDL_image.git vendor/SDL_imagegit submodule add https://github.com/libsdl-org/SDL_ttf.git vendor/SDL_ttfAfter these commands run, you'll see a new .gitmodules file in your project, and the vendor directory will be populated with the source code of the SDL libraries.
Recursive Submodules
We've now added various SDL libraries as dependencies for our project. However, these SDL libraries also have dependencies.
Fortunately, these dependencies are also declared as git submodules in the SDL repositories, so we can download them all using a single terminal command:
git submodule update --init --recursiveThis should take a few minutes to complete, at which point we should see a load of new libraries in /vendor/SDL_image/external and /vendor/SDL_ttf/external.
After we add the submodules, or make any large changes to our project, we should create a git commit. Let's check the status:
git statusOn branch main
Changes to be committed:
(use "git restore --staged <file>..." to unstage)
new file: .gitmodules
new file: vendor/SDL
new file: vendor/SDL_image
new file: vendor/SDL_ttfGit has automatically staged the new .gitmodules file and the references to our new submodules. Let's commit them:
git commit -m "Add SDL libraries as submodules"Remember to push our code to our remote repository regularly. This ensures we're backing up our work in case something goes wrong with our local machine:
git pushSummary
In this lesson, we introduced version control with Git.
We started by installing Git on our respective operating systems and learned how to initialize a new repository with git init. We covered the fundamental two-step process of creating a snapshot of our code: staging changes with git add and saving them permanently with git commit.
We then explored how to collaborate and back up our code using remote repositories on GitHub. This involved linking our local repo to a remote one and "pushing" our commits to the cloud.
Finally, we introduced a useful feature for managing dependencies: Git submodules. By adding SDL3, SDL_image, and SDL_ttf as submodules, we've made our project self-contained, ensuring that anyone can build it with the exact same library versions.
Building Projects with CMake
Learn how to install and use CMake, the industry-standard build system for C++, to configure and build cross-platform projects.