Creating an SDL3 Project
Learn how to create a complete, cross-platform SDL3 project using CMake.
In the previous lessons, we've assembled all the pieces of a C++ development environment: a compiler, the Git version control system, and the CMake build system generator.
Now, it's time to put them all together.
In this lesson, we will expand our CMakeLists.txt file to contain everything we need for an SDL3 project. This file will contain all the instructions CMake needs to:
- Find and build our SDL3 libraries from the Git submodules we added.
- Build the C++ source code that we write.
- Link everything together to create our first runnable SDL3 application.
By the end, you'll have a complete, automated build process that works on Windows, macOS, and Linux.
Setting Output Directories
By default, CMake places compiled outputs in different locations depending on the generator being used. Executables might end up in one folder, while shared libraries (.dll, .so, .dylib) end up in another.
To keep things simple, we'll tell CMake to put all of these final outputs in the same, predictable location. One way we can set this up is by defining two variables:
CMAKE_RUNTIME_OUTPUT_DIRECTORY: This controls where executables (.exe) and runtime libraries (.dll) are placed.CMAKE_LIBRARY_OUTPUT_DIRECTORY: This controls where other libraries (.so,.dylib) are placed.
We'll set both of these to the same path:
CMakeLists.txt
cmake_minimum_required(VERSION 3.23)
project(
MyGame
VERSION 1.0
DESCRIPTION "My first SDL3 Game"
LANGUAGES CXX
)
set(CMAKE_CXX_STANDARD 20)
set(CMAKE_CXX_STANDARD_REQUIRED ON)
set(
CMAKE_RUNTIME_OUTPUT_DIRECTORY
"${CMAKE_BINARY_DIR}/$<CONFIGURATION>"
)
set(
CMAKE_LIBRARY_OUTPUT_DIRECTORY
"${CMAKE_BINARY_DIR}/$<CONFIGURATION>"
)This example is using two variables that CMake provides:
${CMAKE_BINARY_DIR}refers to the directory where we generate our build, which we've configured in our presets to be the/builddirectory.$<CONFIGURATION>is a special "generator expression" that CMake replaces with the current build type (e.g.,Debug,Release).
This ensures that our compiled files for a debug build will end up in build/Debug, and release builds in build/Release, keeping everything organized.
Adding an Executable
Our CMakeLists.txt file now has some basic configuration, but it doesn't know what it's supposed to build. We need to define a "target". The most common target is an executable.
We can do this with the add_executable() command:
CMakeLists.txt
cmake_minimum_required(VERSION 3.23)
project(MyGame
VERSION 1.0
DESCRIPTION "My first SDL3 Game"
LANGUAGES CXX
)
set(CMAKE_CXX_STANDARD 20)
set(CMAKE_CXX_STANDARD_REQUIRED ON)
set(
CMAKE_RUNTIME_OUTPUT_DIRECTORY
"${CMAKE_BINARY_DIR}/$<CONFIGURATION>"
)
set(
CMAKE_LIBRARY_OUTPUT_DIRECTORY
"${CMAKE_BINARY_DIR}/$<CONFIGURATION>"
)
add_executable(MyGame
src/main.cpp
)This command defines a new target, an executable named MyGame. We tell it that this target only includes a single source file for now - src/main.cpp. We'll create a minimalist version of this file for now:
src/main.cpp
int main(int, char**) {
return 0;
}Setting RPATH (Linux / macOS)
On Windows, when you run an executable, the operating system automatically looks for required .dll files in the same directory as the executable. Our CMAKE_RUNTIME_OUTPUT_DIRECTORY and CMAKE_LIBRARY_OUTPUT_DIRECTORY variables are placing our executables and libraries in the same location so, on Windows, we're all set.
However, on Linux and macOS, this is not the case.
When our MyGame application starts, the operating system needs to find the SDL shared library files (.so on Linux, .dylib on macOS). By default, it only searches in standard system-wide locations.
Since our SDL libraries are in our build/Debug directory, the OS won't find them, and our program will fail to launch with a "library not found" error.
To fix this, we need to embed a special instruction in our executable called an RPATH (Run-time Search Path). This tells the operating system additional places to look for libraries.
We can set this property in CMake, and apply it only for Apple and other Unix-like systems:
CMakeLists.txt
cmake_minimum_required(VERSION 3.23)
project(
MyGame
VERSION 1.0
DESCRIPTION "My first SDL3 Game"
LANGUAGES CXX
)
set(CMAKE_CXX_STANDARD 20)
set(CMAKE_CXX_STANDARD_REQUIRED ON)
set(
CMAKE_RUNTIME_OUTPUT_DIRECTORY
"${CMAKE_BINARY_DIR}/$<CONFIGURATION>"
)>
set(
CMAKE_LIBRARY_OUTPUT_DIRECTORY
"${CMAKE_BINARY_DIR}/$<CONFIGURATION>"
)
add_executable(MyGame
src/main.cpp
)
if(APPLE)
set_target_properties(MyGame PROPERTIES
INSTALL_RPATH "@executable_path;@loader_path"
BUILD_WITH_INSTALL_RPATH TRUE
MACOSX_RPATH TRUE
)
elseif(UNIX)
set_target_properties(MyGame PROPERTIES
INSTALL_RPATH "$ORIGIN"
BUILD_WITH_INSTALL_RPATH TRUE
)
endif()This if(), elseif(), and endif() construct is is the CMake equivalent of a C++ if () {} else if () {} block.
Note that the order of the APPLE and UNIX checks is important in this logic. APPLE platforms are UNIX, but UNIX platforms are not necessarily APPLE, so an if(UNIX) check would be true for both.
An alternative way to target non-Apple Unix platforms would be if(UNIX AND NOT APPLE).
Within our conditional blocks, we set up the required configuration:
set_target_properties(): This lets us change advanced properties of a target.INSTALL_RPATH: This sets the RPATH.$ORIGIN,@executable_path, and@loader_pathare special variables recognized by different platforms that means "the same directory as the executable". This is exactly where our SDL libraries will be thanks to theCMAKE_LIBRARY_OUTPUT_DIRECTORYvariable we set earlier.BUILD_WITH_INSTALL_RPATH: CMake allows us to create installation rules to package our software for shipping to users. Setting this variable toTRUEensures theINSTALL_RPATHwe configured is also applied to our build output, not just the installation output. We could get the same result by setting bothBUILD_RPATHandINSTALL_RPATHif preferred.
Adding SDL Libraries using add_subdirectory()
Now, we need to tell CMake how to build the SDL libraries that we added as submodules. The add_subdirectory() command is perfect for this. It instructs CMake to look into a specific directory for another CMakeLists.txt file and process it as part of the current build.
Since all the SDL libraries are themselves CMake projects with their own CMakeLists.txt files, this makes the process much easier.
We'll also set a variable called SDLTTF_VENDORED to ON. SDL_ttf's CMakeLists.txt will check for this variable and, if it is enabled, will build its dependencies from the source code we downloaded in the previous section. This is presented as an option as many systems will already have these text-rendering libraries available, so building them is often unnecessary. Feel free to remove this setting if it's not needed on your environment - we enable it here just to maximize compatibility.
Let's add all of these dependencies to our CMakeLists.txt:
CMakeLists.txt
cmake_minimum_required(VERSION 3.23)
project(
MyGame
VERSION 1.0
DESCRIPTION "My first SDL3 Game"
LANGUAGES CXX
)
set(CMAKE_CXX_STANDARD 20)
set(CMAKE_CXX_STANDARD_REQUIRED ON)
set(
CMAKE_RUNTIME_OUTPUT_DIRECTORY
"${CMAKE_BINARY_DIR}/$<CONFIGURATION>"
)
set(
CMAKE_LIBRARY_OUTPUT_DIRECTORY
"${CMAKE_BINARY_DIR}/$<CONFIGURATION>"
)
add_executable(MyGame
src/main.cpp
)
if(APPLE)
set_target_properties(MyGame PROPERTIES
INSTALL_RPATH "@executable_path;@loader_path"
BUILD_WITH_INSTALL_RPATH TRUE
MACOSX_RPATH TRUE
)
elseif(UNIX)
set_target_properties(MyGame PROPERTIES
INSTALL_RPATH "$ORIGIN"
BUILD_WITH_INSTALL_RPATH TRUE
)
endif()
# Specify that we want to build SDL_TTF's dependencies
set(SDLTTF_VENDORED ON)
# Set a variable for our vendor directory
set(VENDOR_DIR "${PROJECT_SOURCE_DIR}/vendor")
# Add the SDL libraries from our submodules
add_subdirectory(${VENDOR_DIR}/SDL)
add_subdirectory(${VENDOR_DIR}/SDL_image)
add_subdirectory(${VENDOR_DIR}/SDL_ttf)We've optionally used an additional set() command to create a variable that stores where our submodules are - the /vendor subdirectory of our project root.
Unlike SDLTTF_VENDORED, this VENDOR_DIR has no special significance - we just add it so our later add_subdirectory() commands can use it. As with C++ code, introducing CMake variables is a good practice if we need to refer to that value in multiple places.
With these changes, when CMake processes the add_subdirectory() commands, it will visit each of those directories, execute their respective CMakeLists.txt files, compiling the libraries and incorporating them into our build.
Linking Libraries
With the libraries configured, the final step is to link our executable target to the SDL libraries it will be using.
The add_subdirectory() commands will also have creates special targets that we can now link against our executable. For these libraries, the targets are named SDL3::SDL3, SDL3_image::SDL3_image, and SDL3_ttf::SDL3_ttf. These targets automatically contain all the information CMake needs to let our executable use the libraries:
CMakeLists.txt
cmake_minimum_required(VERSION 3.23)
project(
MyGame
VERSION 1.0
DESCRIPTION "My first SDL3 Game"
LANGUAGES CXX
)
set(CMAKE_CXX_STANDARD 20)
set(CMAKE_CXX_STANDARD_REQUIRED ON)
set(
CMAKE_RUNTIME_OUTPUT_DIRECTORY
"${CMAKE_BINARY_DIR}/$<CONFIGURATION>"
)
set(
CMAKE_LIBRARY_OUTPUT_DIRECTORY
"${CMAKE_BINARY_DIR}/$<CONFIGURATION>"
)
add_executable(MyGame
src/main.cpp
)
if(APPLE)
set_target_properties(MyGame PROPERTIES
INSTALL_RPATH "@executable_path;@loader_path"
BUILD_WITH_INSTALL_RPATH TRUE
MACOSX_RPATH TRUE
)
elseif(UNIX)
set_target_properties(MyGame PROPERTIES
INSTALL_RPATH "$ORIGIN"
BUILD_WITH_INSTALL_RPATH TRUE
)
endif()
set(SDLTTF_VENDORED ON)
set(VENDOR_DIR "${PROJECT_SOURCE_DIR}/vendor")
add_subdirectory(${VENDOR_DIR}/SDL)
add_subdirectory(${VENDOR_DIR}/SDL_image)
add_subdirectory(${VENDOR_DIR}/SDL_ttf)
target_link_libraries(MyGame
SDL3::SDL3
SDL3_image::SDL3_image
SDL3_ttf::SDL3_ttf
)The target_link_libraries() command connects everything together:
- We specify our target,
MyGame. - Finally, we list the library targets we want to link against:
SDL3::SDL3,SDL3_image::SDL3_image, andSDL3_ttf::SDL3_ttf.
And that's it! This complete CMakeLists.txt file is all we need to build our project on any platform.
We can now attempt to configure our project using the same command we covered in the previous lesson from our project root:
cmake --preset defaultThis will take a while as it scans our system and sets up our /build directory.
Error: No CMAKE_ASM_NASM_COMPILER could be found
Some of the libraries that SDL depends on, particularly for loading image formats like JPG and PNG, include performance-critical code written in assembly language. To compile this code, CMake needs an assembler program. The most common one is NASM (The Netwide Assembler).
This error means CMake searched for an assembler on your system but couldn't find one.
The solution is to install NASM and make it available to CMake. The official NASM website at nasm.us provides installers for a range of platforms.
Next, you need to make it available to CMake. You have two options:
- Add the NASM installation directory to your system's PATH environment variable. This makes
nasmavailable to all tools on your system and is the best long-term solution. You will need to restart your terminal for the change to take effect. - Tell CMake where to find it directly in your
CMakeLists.txt. This is a quick fix for a single project. You can append the path to your NASM installation to theCMAKE_PREFIX_PATHvariable, which is a list of directories where CMake looks for programs. Make sure you replaceD:/NASMwith the actual path to where you installed it:
CMakeLists.txt
cmake_minimum_required(VERSION 3.23)
project(
MyGame
VERSION 1.0
DESCRIPTION "My first SDL3 Game"
LANGUAGES CXX
)
set(CMAKE_CXX_STANDARD 20)
set(CMAKE_CXX_STANDARD_REQUIRED ON)
list(APPEND CMAKE_PREFIX_PATH "D:/NASM")
set(
CMAKE_RUNTIME_OUTPUT_DIRECTORY
"${CMAKE_BINARY_DIR}/$<CONFIGURATION>"
)
set(
CMAKE_LIBRARY_OUTPUT_DIRECTORY
"${CMAKE_BINARY_DIR}/$<CONFIGURATION>"
)
add_executable(MyGame
src/main.cpp
)
if(APPLE)
set_target_properties(MyGame PROPERTIES
INSTALL_RPATH "@executable_path;@loader_path"
BUILD_WITH_INSTALL_RPATH TRUE
MACOSX_RPATH TRUE
)
elseif(UNIX)
set_target_properties(MyGame PROPERTIES
INSTALL_RPATH "$ORIGIN"
BUILD_WITH_INSTALL_RPATH TRUE
)
endif()
set(SDLTTF_VENDORED ON)
set(VENDOR_DIR "${PROJECT_SOURCE_DIR}/vendor")
add_subdirectory(${VENDOR_DIR}/SDL)
add_subdirectory(${VENDOR_DIR}/SDL_image)
add_subdirectory(${VENDOR_DIR}/SDL_ttf)
target_link_libraries(MyGame
SDL3::SDL3
SDL3_image::SDL3_image
SDL3_ttf::SDL3_ttf
)A Minimalist SDL3 Application
Finally, let's update the src/main.cpp file that our CMakeLists.txt is referencing. This program will initialize all three SDL libraries, create a window, and run a basic loop to keep the window open until the user closes it:
src/main.cpp
#include <SDL3/SDL.h>
#include <SDL3/SDL_main.h>
#include <SDL3_image/SDL_image.h>
#include <SDL3_ttf/SDL_ttf.h>
int main(int, char**) {
SDL_Init(SDL_INIT_VIDEO);
SDL_Window* Window{SDL_CreateWindow(
"Hello Window", 800, 300, 0
)};
SDL_GetWindowSurface(Window);
SDL_UpdateWindowSurface(Window);
bool IsRunning = true;
SDL_Event Event;
while (IsRunning) {
while (SDL_PollEvent(&Event)) {
if (Event.type == SDL_EVENT_QUIT) {
IsRunning = false;
}
}
}
SDL_DestroyWindow(Window);
SDL_Quit();
return 0;
}We'll explain every line of this program in the next chapter, but for now, we can just copy and paste it into our source file so we can ensure our build is working.
Building the Program
With our CMakeLists.txt complete and our src/main.cpp file in place, we have everything we need. We can now ask CMake to build the entire project.
From your project's root directory, run the build command we learned in the previous lesson:
cmake --build --preset defaultThe first build of our program can take several minutes, as it also needs to build the SDL libraries and all of their dependencies.
However, future builds will be much faster. Build systems keep track of what code has changed between builds, and will only rebuild things that would have been affected by those changes.
LNK1104 Error: cannot open file m.lib
This is a linker error that can sometimes occur on Windows
The LNK1104 error means the linker was told to find a library named m.lib but couldn't. This is the C math library. Some of SDL's dependencies need this library, and the SDL CMake build scripts try to detect if it needs to be linked.
In some environments, this detection can fail, causing CMake to add a link to a library that doesn't exist or isn't needed.
We can fix this by telling the SDL build script to not look for this library. We can add a variable to our CMakeLists.txt, wrapped in an if(WIN32) block so it only affects Windows builds.
This command forcefully sets the MATH_LIBRARY variable that the SDL scripts look for to an empty string, effectively disabling the problematic check:
CMakeLists.txt
cmake_minimum_required(VERSION 3.23)
project(
MyGame
VERSION 1.0
DESCRIPTION "My first SDL3 Game"
LANGUAGES CXX
)
set(CMAKE_CXX_STANDARD 20)
set(CMAKE_CXX_STANDARD_REQUIRED ON)
set(
CMAKE_RUNTIME_OUTPUT_DIRECTORY
"${CMAKE_BINARY_DIR}/$<CONFIGURATION>"
)
set(
CMAKE_LIBRARY_OUTPUT_DIRECTORY
"${CMAKE_BINARY_DIR}/$<CONFIGURATION>"
)
add_executable(MyGame
src/main.cpp
)
if(APPLE)
set_target_properties(MyGame PROPERTIES
INSTALL_RPATH "@executable_path;@loader_path"
BUILD_WITH_INSTALL_RPATH TRUE
MACOSX_RPATH TRUE
)
elseif(UNIX)
set_target_properties(MyGame PROPERTIES
INSTALL_RPATH "$ORIGIN"
BUILD_WITH_INSTALL_RPATH TRUE
)
endif()
if(WIN32)
set(MATH_LIBRARY "" CACHE STRING "" FORCE)
endif()
set(SDLTTF_VENDORED ON)
set(VENDOR_DIR "${PROJECT_SOURCE_DIR}/vendor")
add_subdirectory(${VENDOR_DIR}/SDL)
add_subdirectory(${VENDOR_DIR}/SDL_image)
add_subdirectory(${VENDOR_DIR}/SDL_ttf)
target_link_libraries(MyGame
SDL3::SDL3
SDL3_image::SDL3_image
SDL3_ttf::SDL3_ttf
)This is safe because modern Windows compilers link the necessary math functions automatically, so an explicit link isn't required.
Improving Build Speeds
Our build system won't rebuild the SDL libraries unnecessarily if we haven't changed their code. We won't be modifying the SDL source code in this course, so our build system will only rebuild them if we delete our /build directory.
However, with slower generators and on slower systems, checking that all of the library source files haven't changed might still take 20 seconds or more. This can be annoying when you're trying to quickly iterate and test behaviors, or if you're trying to debug some issue.
A simple way to speed up our builds is to allow them to run in parallel. We can do this by setting a "jobs" value in the build preset we're using.
It doesn't matter what the exact value is. Setting it to around the same number of cores or threads your CPU has is reasonable, and will make builds much faster:
CMakePresets.json
{
"version": 3,
"configurePresets": [{
"name": "default",
"binaryDir": "build",
"generator": "Visual Studio 17 2022"
}],
"buildPresets": [{
"name": "default",
"configurePreset": "default",
"jobs": 24
}]
}Running the Program
If the build process completed without errors, our executable is ready to run!
You can find it inside the build directory, in a sub-directory that matches the build configuration. For our setup, this will be build/Debug.
The file will be named MyGame.exe on Windows, or simply MyGame on macOS and Linux.
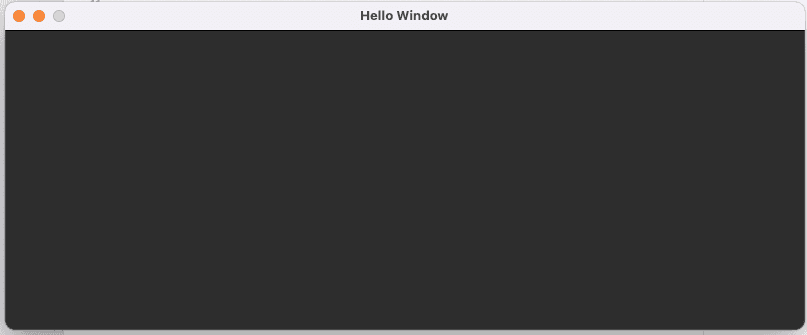
You can run it directly from your terminal or by double-clicking it in your file explorer. A blank window with the title "Hello Window" should appear on your screen:
Remember, you can stage, commit, and push your changes to keep your progress tracked and backed up:
git add .git commit -m "Set up SDL3"git pushSummary
In this lesson, we brought together all the tools from the previous chapters to create a fully functional, cross-platform SDL3 project.
We wrote a complete CMakeLists.txt file from scratch, learning the most essential CMake commands along the way:
cmake_minimum_required()andproject()to define our project's metadata.add_subdirectory()to find and build our SDL3, SDL_image, and SDL_ttf libraries directly from our Git submodules.add_executable()to define our final application target from our C++ source files.target_link_libraries()to connect our application to the SDL libraries, letting CMake handle all the complex include paths and linker flags for us.
Finally, we wrote a minimal C++ application that initializes all the necessary libraries, creates a window, and runs a basic event loop, demonstrating the fundamental structure of an SDL program.
Our development environment is now fully configured and automated. We are ready to start building!
Creating a Window
Learn how to create and customize windows using SDL3, covering initialization, window management, and handling properties.