Deployment with GitHub Releases
Learn to automate the release process using a GitHub Actions workflow that builds, packages, and publishes artifacts to a GitHub Release
This is it. The final lesson. We've journeyed from the absolute fundamentals of the C++ build process to creating a sophisticated, multi-platform build system. We've automated testing, analysis, and packaging. Now, we'll automate the final step: deployment.
Deployment is the process of making your software available to end-users. There are many ways we could do this - perhaps we sell our software on our website, or distribute it in some online marketplace.
In this example, we'll publish it as part of our GitHub repository. A GitHub Release is a formal, versioned snapshot of your project, complete with release notes and downloadable files (our packaged artifacts).
Distributing via GitHub Releases is a fairly common approach, particularly for tools that are intended to be used for other developers. For example, we've been downloading spdlog using package managers, but their official releases are published on GitHub.
In this lesson, we will create a GitHub Actions workflow that builds, tests, packages, and drafts a new release for our software.
The Manual Release Process
Before we automate, let's understand the manual process. This builds a mental model of what our workflow will be doing for us.
Step 1: Create and Push a Git Tag
A Git tag is a permanent marker that points to a specific commit. It's the standard way to label a version in your project's history. The convention is to use a version number, often prefixed with a v.
Let's say we're ready to release version 1.0.0 of our Greeter application. From our project's root directory, we would run:
git tag v1.0.0This creates a tag on our current commit. To make the tag visible to GitHub, we need to push it to the remote repository:
git push origin v1.0.0Step 2: Draft the Release on GitHub
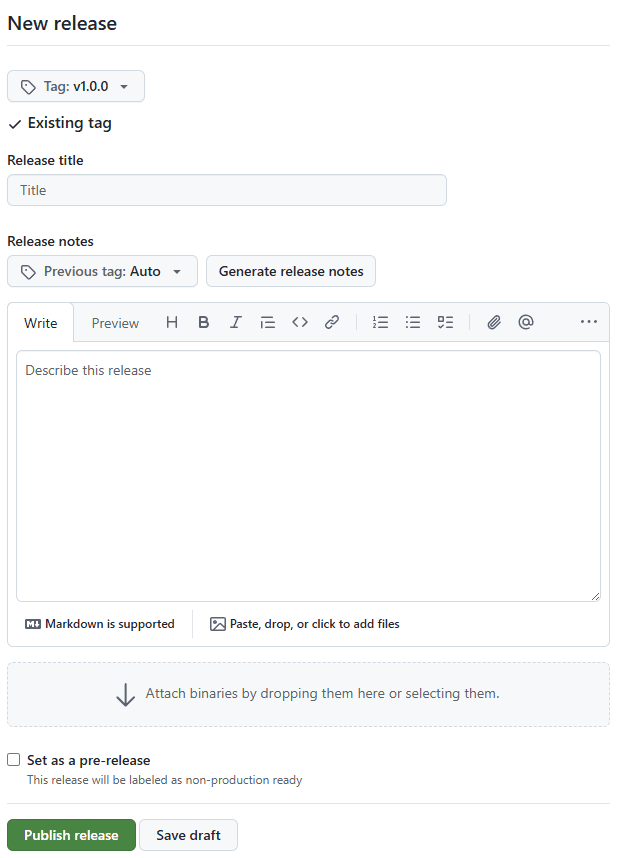
With the tag pushed, we can go to our repository's page on GitHub, click on the "Releases" link on the right-hand side, and then click "Draft a new release".
This brings up a form where we can:
- Choose a tag: Select the
v1.0.0tag we just pushed. - Write release notes: This is where you'd write a summary of the changes since the last release (a changelog).
- Attach binaries: This is where we would manually drag and drop the
.zipand.msifiles generated by CPack.
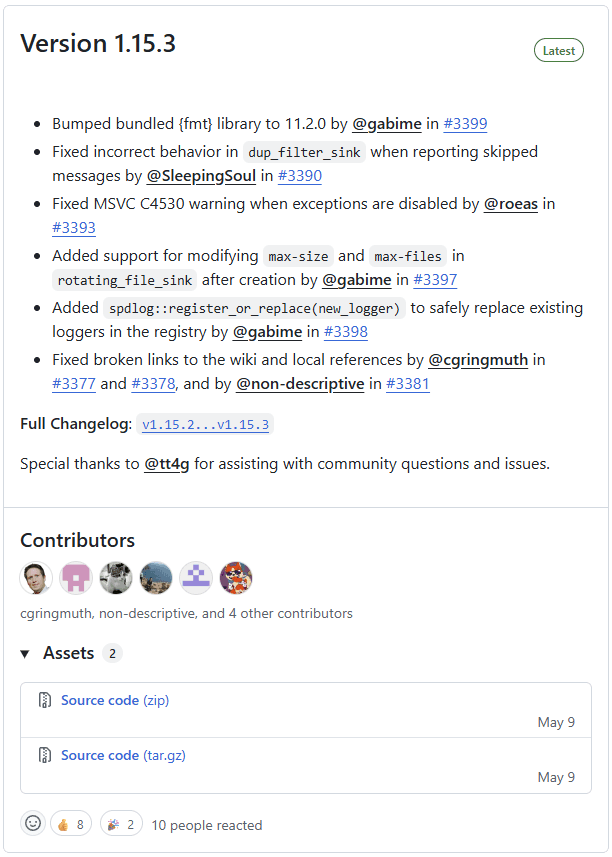
Once we click "Publish release," we have a complete, public release page that users can visit to download our software. This manual process works, but it's tedious and error-prone. Let's automate it.
Automating Releases with GitHub Actions
We'll create a new, separate workflow specifically for releases. This keeps our CI logic (which runs on every pull request) separate from our deployment logic (which only runs when we explicitly push a new version tag).
Let's create a new file at .github/workflows/release.yml.
The Tag Trigger
Our CI workflow used an on: pull_request trigger. For our release workflow, we'll use a different trigger: on: push: tags.
.github/workflows/release.yml
name: Release
on:
push:
tags:
- 'v*' # Run only when a tag starting with 'v' is pushed
# ...This configuration tells GitHub Actions: "Run this workflow only when a Git tag is pushed to the repository, and only if that tag's name starts with a v."
This ensures the workflow doesn't run on normal code pushes, only on deliberate version tags.
Permissions
Actions we use in a GitHub workflow have some restrictions on what they can do in our repository. For our previous CI workflow, we didn't need to intervene here. The actions in that workflow only needed to read access to our code, and that is included by default.
However, to create a release, this new workflow will need the ability to write to our repository. We can modify the permissions that actions within a workflow have by setting the permissions key:
.github/workflows/release.yml
name: Release
on:
push:
tags:
- 'v*' # Run only when a tag starting with 'v' is pushed
permissions:
contents: write
# ...The Release Workflow
This workflow will be structured into two distinct, dependent jobs:
- A
buildjob: This job will essentially do the same thing as our previous CI job. It will run in parallel across multiple operating systems, compiling our code, run the tests as a final quality check, package the artifacts using CPack, and store those packages for the next stage. - A
releasejob: This job will only run after all the parallel build jobs have succeeded. It will collect all the packages from the different platforms, create a single new Release on our GitHub repository, and upload each package as a downloadable asset to that release.
This two-job structure is a standard pattern in CI/CD. It separates the concerns of building (which is platform-specific and can be parallelized) from the concern of publishing (which is a single, central action).
The build Job
Let's start by defining the build job in our new workflow file, which is substantively the same as our previous job.
In real projects, these jobs tend to deviate slightly, as release builds usually have different requirements from a CI build whose only purpose is to determine if a PR is safe to merge.
But, in our simple project, our release build can be exactly the same as our CI build:
.github/workflows/release.yml
name: Release
on:
push:
tags:
- "v*"
permissions:
contents: write
jobs:
# This is identical to the job in ci.yml
build:
strategy:
matrix:
os: [ubuntu-latest, windows-latest, macos-latest]
runs-on: ${{ matrix.os }}
steps:
- name: Check out code
uses: actions/checkout@v4
- name: Set up vcpkg
uses: lukka/run-vcpkg@v11
- name: Configure CMake
run: cmake --preset release
- name: Build project
run: cmake --build --preset release
- name: Run tests
run: ctest --preset release
- name: Package Libraries
run: cpack --preset dev-zip
- name: Upload Libraries
uses: actions/upload-artifact@v4
with:
name: Greeter-Development-${{ matrix.os }}
path: build/Greeter-*-Development.zip
- name: Package Application
if: matrix.os == 'windows-latest'
run: cpack --preset windows-release-installer
- name: Upload Application
if: matrix.os == 'windows-latest'
uses: actions/upload-artifact@v4
with:
name: Greeter-Installer-${{ matrix.os }}
path: build/Greeter-*.msiThe release Job
Once our build jobs are complete across all 3 platforms (matrix.os), we need one more job to actually create the release. It gathers the artifacts generated from the previous jobs, and performs the public-facing actions of creating the release and uploading those assets.
The complete job is below, and we'll walk through its two steps in the next sections:
.github/workflows/release.yml
name: Release
on:
push:
tags:
- "v*"
permissions:
contents: write
jobs:
build:
# ... (unchanged from above)
release:
needs: build
runs-on: ubuntu-latest
steps:
- name: Download all build artifacts
uses: actions/download-artifact@v4
with:
path: artifacts
- name: Create GitHub Release
uses: softprops/action-gh-release@v2
with:
name: Release ${{ github.ref_name }}
body: |
Automated release of ${{ github.ref_name }}.
Add a description to this draft
files: |
artifacts/**/*.zip
artifacts/**/*.msi
generate_release_notes: true
append_body: true
draft: true
prerelease: falseThe needs: build key establishes a dependency, guaranteeing that the release job will not start until all jobs in the build matrix have finished successfully.
We don't need a strategy matrix here, as we only want to create a single release for each run of this workflow. We could use any runner that has the tools we need. A Linux runner like ubuntu-latest tends to be the default choice for platform-agnostic tasks like this, as they're cheaper than Windows/macOS runners.
Step 1: Download All Artifacts
The first step in our release job is to collect all the packages that the build jobs created. The actions/download-artifact action does this for us. With the default settings, it downloads all artifacts from the current workflow run:
# In jobs: -> release: -> steps:
- name: Download all build artifacts
uses: actions/download-artifact@v4
with:
path: artifactsThe path: artifacts input tells the action to place all downloaded artifacts into a single parent directory named artifacts. Inside, it will create subdirectories for each artifact, matching the names we gave them in the upload step. Our file system on the runner will look something like this:
artifacts/
├─ package-windows-latest/
│ ├─ Greeter-1.0.0-win64.zip
│ └─ Greeter-1.0.0.msi
├─ package-ubuntu-latest/
│ └─ Greeter-1.0.0-Linux.zip
└─ package-macos-latest/
└─ Greeter-1.0.0-Darwin.zipThe official documentation for actions/download-artifact is available here.
If we want to understand what's going on in our runner, we can add additional steps purely to provide status updates in our workflow log. This can be particularly helpful when we need to debug things.
For example, after our actions/download-artifact step, we could list the contents of our artifacts/ directory using a simple step that runs the find command:
- name: Display artifact structure
run: find artifactsStep 2: Create the GitHub Release
With our artifacts downloaded and in our runner's /artifacts directory, we can create the actual release on GitHub. We'll use the softprops/action-gh-release action for this:
# In jobs: -> release: -> steps:
- name: Create GitHub Release
uses: softprops/action-gh-release@v2
with:
draft: true
name: Release ${{ github.ref_name }}
body: |
Automated release of ${{ github.ref_name }}.
Add a description to this draft
append_body: true
files: |
artifacts/**/*.zip
artifacts/**/*.msi
generate_release_notes: true
prerelease: falseThe full documentation for softprops/action-gh-release is available here. In our example, we used the following options:
draft: Creating a draft release means our workflow won't immediately make our release public. It gives us the opportunity to review and edit its output before we publish it for everyone to see.name: The title for our release. Thegithub.ref_namecontext variable contains just the tag name itself (e.g.,v1.0.0), which we use to create a friendly title like "Release v1.0.0".body: This is where we would describe our release. What new features did we add? What bugs did we fix? In this case, we've just added some placeholder content, which we can replace using the GitHub UI whilst our release is still in draft. We discuss ways to automate this later.append_body: This setting is relevant if we push the same tag multiple times, meaning this workflow would be updating a release that already exists. Usingappend_bodymeans thebodyof the updated release (the placeholder content in this workflow) won't overwrite the release notes we might have added added to the existing release.files: The list of files we want included in the release. We can specify exact file names or, in this case, globbing patterns to select files that match a pattern. Theartifacts/subdirectory we're using here corresponds to thepathwe set in the previous step.generate_release_notes: GitHub includes the ability to automatically generate release notes, based on the PRs that have been merged to this branch since the previous release. Documentation on how this works, and how we can configure it, is available here.prerelease: GitHub includes the ability to flag releases as "prereleases". This indicates to users that the release is not production ready, but provided if they want to test or experiment with upcoming features. We're setting this tofalsehere, but we can edit it through the GitHub UI once our draft release is created.
The Full Automated Release in Action
Once we've committed and pushed our release.yml worfklow to our remote repository, drafting a new release is extremely quick.
When a version is deemed ready for release, we simply create and push a version tag:
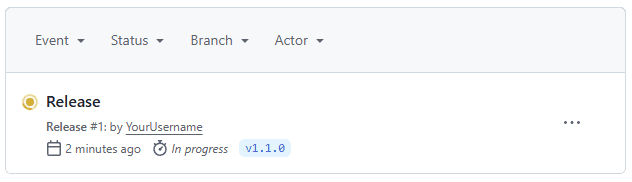
git tag v1.1.0git push origin v1.1.0GitHub Actions detects the new tag and triggers the Release workflow. We can see this from the "Actions" tab of our repository:
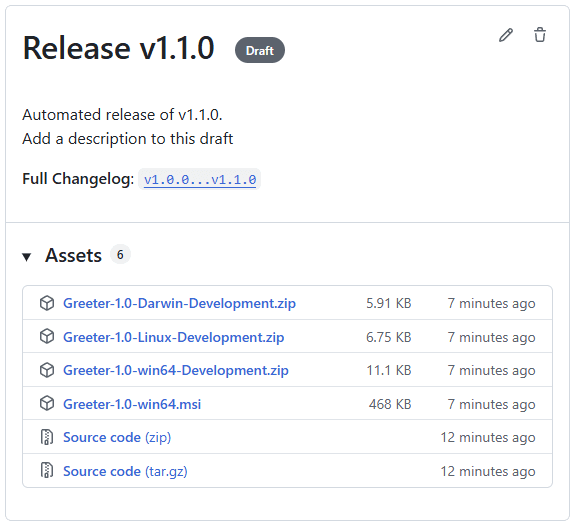
When it completes, a new, fully-populated draft release appears on the repository's "Releases" page, ready for us to review, edit and publish:
Course Summary
Congratulations! You have reached the end of this course.
We began in Chapters 1 and 2 by dissecting the fundamental C++ build process. We moved from raw compiler and linker commands to understanding the need for project organization and a build system.
In Chapters 3 through 5, we were introduced to CMake. We learned its core language - variables, lists, and control flow - and, most importantly, the modern, target-centric philosophy. We learned to think of our projects not as a list of files, but as a dependency graph of targets with properties.
Chapters 6 through 9 taught us how to manage the complexities of real-world development. We handled different platforms, architectures, and build configurations. We learned how to integrate external dependencies using find_package() and FetchContent, and then introduced package managers like vcpkg and Conan. We also introduced CMake Presets as the primary way we issue commands, streamlining our workflow.
In Chapters 10 through 13, we moved beyond compilation to cover common production requirements. We integrated code generators with custom commands, created developer utilities with custom targets, and built a quality assurance pipeline with automated testing, memory sanitization, performance benchmarking, and static analysis.
Finally, in this chapter, we placed our code under version control with Git and built a complete Continuous Integration and Continuous Delivery (CI/CD) pipeline. We automated our builds, tests, packaging, and, in this final lesson, our releases.
A solid build system is the bedrock of any successful software project, and you are now equipped with the knowledge to build that foundation. Thank you for taking this course!