Bounding Boxes
Discover bounding boxes: what they are, why we use them, and how to create them
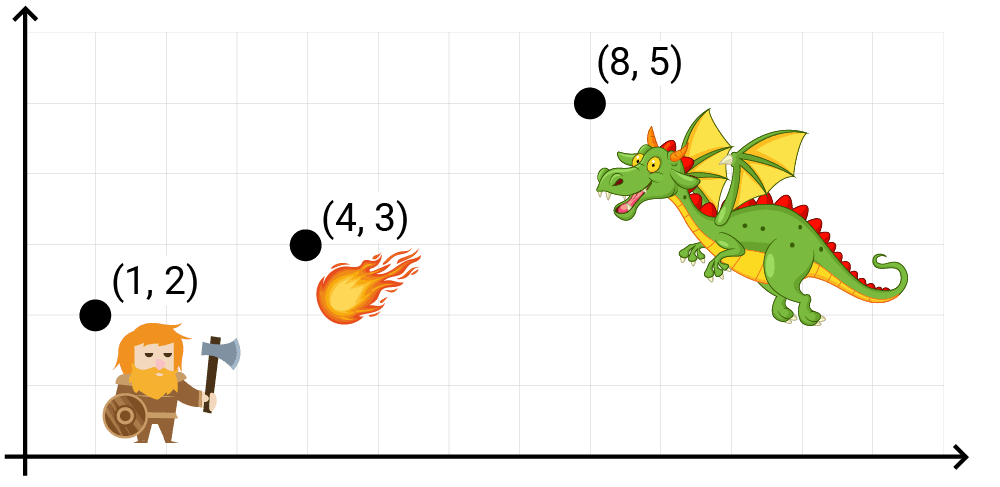
So far, our game objects exist effectively as single points (Vec2 Position). While great for movement, it's not enough for interactions like checking if a projectile hits a character.
This lesson tackles that by introducing bounding boxes - simple rectangular shapes that represent the space an object occupies. We'll focus on Axis-Aligned Bounding Boxes (AABBs), implement a BoundingBox class using SDL_FRect, add it to our GameObject, and learn how to draw these boxes for debugging purposes.
In the next lesson, we'll learn how to use these bounding boxes to detect when they intersect, and some practical reasons why that is useful.
Finally, we'll end the chapter by revisiting our physics system and using our new bounding boxes to let our objects physically interact with each other.
Bounding Boxes / Volumes
Let's imagine we want to add an enemy to our game that can fire projectiles that our player needs to dodge. When our player's character is represented by a simple point in space, we can't easily determine if a projectile hit them:
Unfortunately, detecting which objects in our scene are colliding with each other is not something we can do directly. In real-world games, each object can have a complex shape comprising thousands of pixels (or vertices, in a 3D game) and our scene may have thousands of objects. Understanding how all of these complex shapes might be interacting on every frame is unreasonably expensive.
To help with this, we use bounding volumes. These are much simpler shapes that "bound" (or contain) all the components of a more complex object. They're not visible to players but, behind the scenes, we use them to understand how the objects in our scene are interacting.
The most common bounding volume we use is a bounding box, which is a simple rectangle in 2D, or a cuboid in 3D:
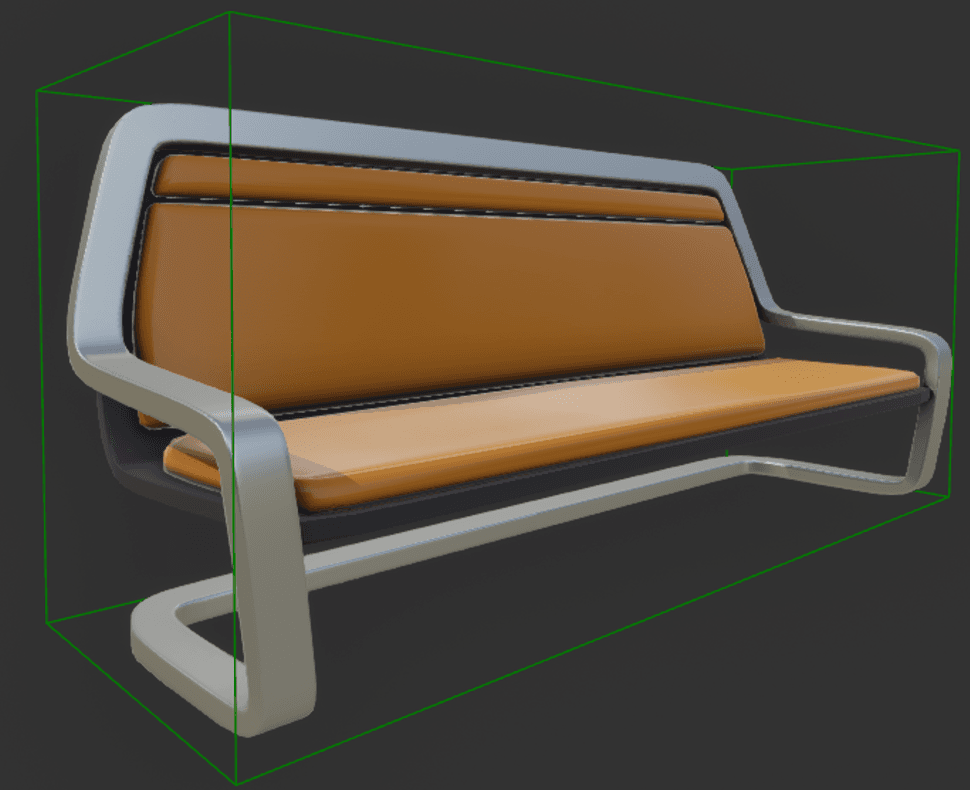
A bounding box rendered in Unreal Engine
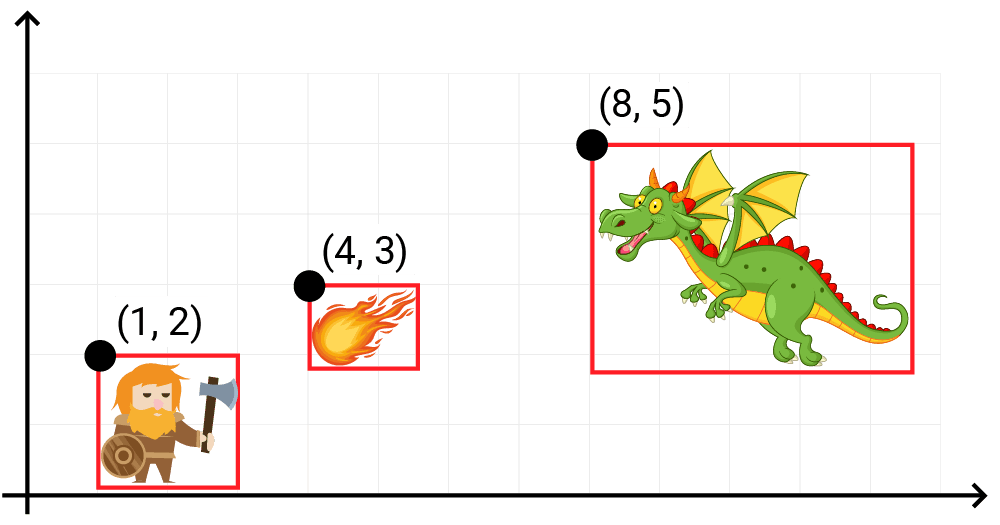
Now, to understand if our player was hit by a fireball, we just need to do the much simpler calculation of checking whether two rectangles are overlapping:
Axis-Aligned Bounding Boxes (AABBs)
In 2D games, bounding boxes are simple rectangles. Axis-aligned bounding boxes, or AABBs, are boxes whose edges are parallel to the axes of our space. More simply, we can think of AABBs as being rectangles that have not been rotated:
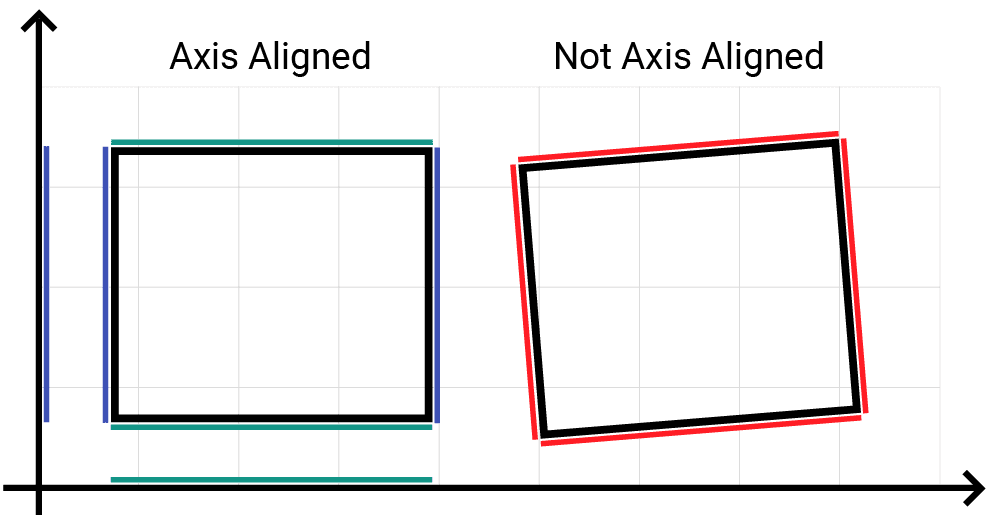
A bounding box that can be rotated is typically called an oriented bounding box, or OBB.
AABBs are friendlier and faster to work with than OBBs as the lack of rotation simplifies a lot of the calculations required to determine things like whether two bounding boxes intersect.
AABBs are also easier and more memory-efficient to represent, requiring only four scalar values in 2D, or six in 3D.
There are two main ways to represent an AABB in a two-dimensional space:
- The top-left corner of the box, its width, and its height. These values are typically labelled , , , and .
- The top-left corner and bottom-right corner of the box. These use values typically labelled , , , and .

As we've seen, SDL_Rect uses the first of these conventions, with members called x, y, w, and h. Often, we need to use both conventions within the same program, but it's relatively easy to convert one to the other.
We can calculate the bottom right corner () of an SDL_Rect through addition:
If we have a box defined by , , , and values, we can calculate its width and height through subtraction:
Implementing AABBs
Our bounding boxes are defined using floating-point coordinates, so we'll represent them using an SDL_FRect. This works in the same way as an SDL_Rect except that the x, y, w, and h values are stored as float values instead of int:
src/BoundingBox.h
#pragma once
#include <SDL3/SDL.h>
class BoundingBox {
public:
BoundingBox(const SDL_FRect& InitialRect)
: Rect{InitialRect} {}
private:
SDL_FRect Rect;
};We'll also add a SetPosition() method to move our bounding box by setting the x and y values of the SDL_FRect:
src/BoundingBox.h
#pragma once
#include <SDL3/SDL.h>
#include "Vec2.h"
class BoundingBox {
public:
BoundingBox(const SDL_FRect& InitialRect)
: Rect{InitialRect} {}
void SetPosition(const Vec2& Position) {
Rect.x = Position.x;
Rect.y = Position.y;
}
private:
SDL_FRect Rect;
};Let's update our GameObject class to give each object a BoundingBox. Our GameObject instances already have a Position variable that can be used to set the top-left corner of the bounding box. We also need to specify its width and height, so let's add those as constructor parameters:
src/GameObject.h
// ...
#include "BoundingBox.h"
// ...
class GameObject {
public:
GameObject(
const std::string& ImagePath,
const Vec2& InitialPosition,
float Width,
float Height,
const Scene& Scene
) : Image{ImagePath},
Position{InitialPosition},
Scene{Scene},
Bounds{SDL_FRect{
InitialPosition.x, InitialPosition.y,
Width, Height
}}
{}
// ...
private:
// ...
BoundingBox Bounds;
};Once we've calculated our object's new Position at the end of each Tick() function, we'll notify our bounding box:
src/GameObject.h
// ...
class GameObject {
public:
// ...
void Tick(float DeltaTime) {
ApplyForce(GetFrictionForce(DeltaTime));
ApplyForce(GetDragForce());
Velocity += Acceleration * DeltaTime;
Position += Velocity * DeltaTime;
Acceleration = {0, 9.8f * PIXELS_PER_METER};
Clamp(Velocity);
// Don't fall through the floor
if (Position.y > 200) {
Position.y = 200;
Velocity.y = 0;
}
Bounds.SetPosition(Position);
}
// ...
};Finally, let's update our scene to include the width and height of our objects. In this case, we'll just provide values that roughly match the size of the character within the image we're rendering:
src/Scene.h
// ...
class Scene {
public:
Scene() {
Objects.emplace_back(
"dwarf.png",
Vec2{
2 * PIXELS_PER_METER,
4 * PIXELS_PER_METER
},
1.9f * PIXELS_PER_METER,
1.7f * PIXELS_PER_METER,
*this
);
}
// ...
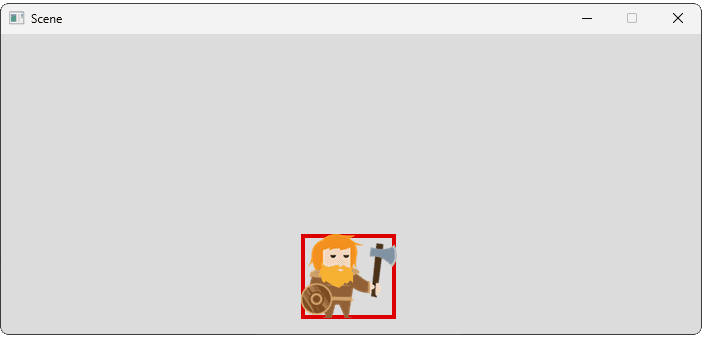
};We've used 1.9 and 1.7 for the width and height of this object, but how do we know it's accurate? It would be helpful if we can see our bounding box to get a visual confirmation, so let's add that next.
Drawing Bounding Boxes
Normally, bounding boxes are not rendered to the screen but, when developing a complex game, it's useful to have that capability to help us understand what's going on.
We'll add a Render() function to our BoundingBox class. It needs an SDL_Surface* to draw on.
First, however, drawing our rectangle onto our surface using SDL_FillSurfaceRect() will require an SDL_Rect (integers), but our BoundingBox stores an SDL_FRect (floats). We need a helper to convert and round the coordinates.
Let's add a static helper to BoundingBox.h:
src/BoundingBox.h
// ...
#include <cmath>
class BoundingBox {
public:
// ...
static SDL_Rect Round(const SDL_FRect& Rect) {
return {
static_cast<int>(std::round(Rect.x)),
static_cast<int>(std::round(Rect.y)),
static_cast<int>(std::round(Rect.w)),
static_cast<int>(std::round(Rect.h))
};
}
private:
SDL_FRect Rect;
};Now let's implement Render() in a new BoundingBox.cpp file.
Rendering Border Edges
We need to draw the outline of our bounding box. SDL3's SDL_FillSurfaceRect() can be used to draw filled rectangles.
Unlike previous examples, we don't want the full area of our rectangle to be filled with a solid color. Instead, we just want to draw it as a rectangular border, which we'll render in red:
To do this, we can simply draw four thin rectangles representing the top, bottom, left, and right edges. We'll convert our Rect to pixels, calculate the 4 rectangles representing each edge of our border, and fill them using 4 calls to SDL_FillSurfaceRect().
The top and left edges are simple:
- The top-left corner of both edge rectangles match the top-left corner of our bounding box (
x, y). - The top edge spans the width of our bounding box (
w) and we set its height to whatever thickness we want the border to be. - The left edge spans the height of our bounding box (
h) and we set its width to match our thickness
We can use this, alongside the usual rectangle-rendering techniques we covered previously, to draw our top and left edges:
src/BoundingBox.cpp
#include <SDL3/SDL.h>
#include "BoundingBox.h"
void BoundingBox::Render(SDL_Surface* Surface) {
// Get pixel format details for color mapping
const auto* Fmt{SDL_GetPixelFormatDetails(
Surface->format
)};
Uint32 LineColor{SDL_MapRGB(
Fmt, nullptr, 220, 0, 0)};
SDL_Rect Rounded{Round(Rect)};
auto [x, y, w, h]{Rounded};
int LineWidth{4};
SDL_Rect Top{x, y, w, LineWidth};
SDL_Rect Left{x, y, LineWidth, h};
SDL_FillSurfaceRect(Surface, &Top, LineColor);
SDL_FillSurfaceRect(Surface, &Left, LineColor);
}For the rectangle representing the right edge, it's horizontal position needs to be based on the top-right edge of our bounding box, which will be at position (x + w, y).
However, if we draw our edge starting at x + w, that means we'll be drawing it slightly outside of our bounding box. We can intevene here to reduce this horizontal position by our LineWidth:
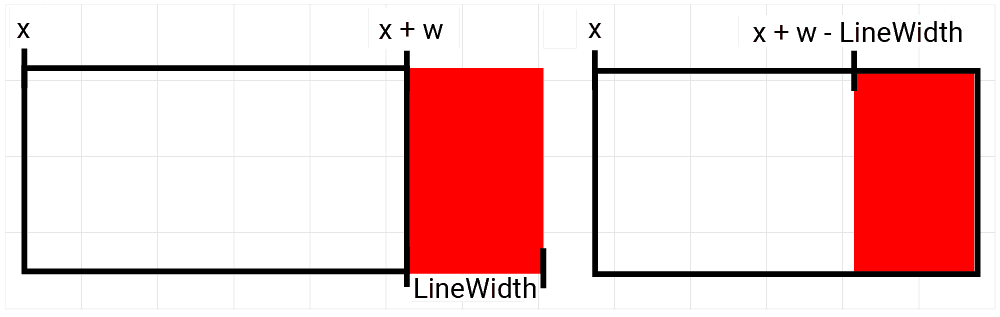
For similar reasons, our bottom border would be drawn below the bounding box, starting at (x, y + h). We can can perform a similar intervention, moving it up by reducing it's horizontal y by the LineWidth:
src/BoundingBox.cpp
#include <SDL3/SDL.h>
#include "BoundingBox.h"
void BoundingBox::Render(SDL_Surface* Surface) {
// Get pixel format details for color mapping
const auto* Fmt{SDL_GetPixelFormatDetails(
Surface->format
)};
Uint32 LineColor{SDL_MapRGB(
Fmt, nullptr, 220, 0, 0)};
SDL_Rect Rounded{Round(Rect)};
auto [x, y, w, h]{Rounded};
int LineWidth{4};
SDL_Rect Top{x, y, w, LineWidth};
SDL_Rect Left{x, y, LineWidth, h};
SDL_Rect Bottom{x, y + h - LineWidth, w, LineWidth};
SDL_Rect Right{x + w - LineWidth, y, LineWidth, h};
SDL_FillSurfaceRect(Surface, &Top, LineColor);
SDL_FillSurfaceRect(Surface, &Left, LineColor);
SDL_FillSurfaceRect(Surface, &Bottom, LineColor);
SDL_FillSurfaceRect(Surface, &Right, LineColor);
}Don't forget to add the declaration to BoundingBox.h:
src/BoundingBox.h
// ...
class BoundingBox {
public:
// ...
void Render(SDL_Surface* Surface);
private:
// ...
};Finally, we need to update our GameObject class to call the Render() method on our bounding box. This rendering isn't included in our shipped project - it is only used as an internal helper, so we want an easy way to remove it from our build later.
In this example, we do this using the preprocessor, which will only include our function call if the DRAW_DEBUG_HELPERS directive is set. Normally, this would be toggled on or off through our build system, but in this case we'll just #define it in the same file for demonstration:
src/GameObject.cpp
#include <SDL3/SDL.h>
#include "GameObject.h"
#include "Scene.h"
#define DRAW_DEBUG_HELPERS
void GameObject::Render(SDL_Surface* Surface) {
Image.Render(Surface, Position);
#ifdef DRAW_DEBUG_HELPERS
Bounds.Render(Surface);
#endif
}If we run our program, we should now see our character's bounding box drawn, and its position updates as our character moves:
If our box is not positioned or sized correctly, we just need to update the arguments we're using to construct the SDL_FRect:
src/GameObject.h
// ...
class GameObject {
public:
GameObject(
const std::string& ImagePath,
const Vec2& InitialPosition,
float Width,
float Height,
const Scene& Scene
) : Image{ImagePath},
Position{InitialPosition},
Scene{Scene},
Bounds{SDL_FRect{
InitialPosition.x, InitialPosition.y,
Width, Height
}}
{}
// ...
};Complete Code
A complete version of our BoundingBox class is included below. We have also provided the GameObject and Scene classes with the code we added in this lesson highlighted.
To keep things simple and focused on the new content, we've also removed the friction and drag calculations from previous lessons.
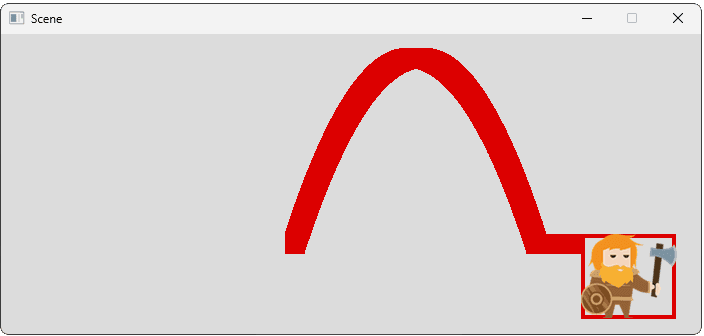
For reference, the GameObject.cpp file also includes the code to draw the positional indicators shown on the screenshots, but we cover this in more detail later:
Files
Summary
In this lesson, we introduced axis-aligned bounding boxes (AABBs) as a simple way to represent the space occupied by game objects. We created a BoundingBox class using SDL_FRect to store its position and dimensions in screen space, integrated it into our GameObject, and updated the bounding box's position each frame.
We also implemented a rendering function to draw the bounding box outlines for debugging. Key Takeaways:
- Bounding Boxes: Simple shapes (like rectangles) used to approximate complex object boundaries for efficient interaction checks.
- AABBs: Axis-Aligned Bounding Boxes; rectangles that aren't rotated, simplifying calculations.
- Representation: AABBs can be defined by top-left corner and dimensions (
x,y,w,h).SDL_FRectuses floating-point values, suitable for pixel coordinates. - Implementation: We created a
BoundingBoxclass storing anSDL_FRectand added it toGameObject. - Updating: The bounding box position must be updated whenever the
GameObject's position changes. - Rendering: Drawing bounding boxes involves rounding floating-point coordinates to integers and drawing lines (using filled rects) along the edges.
Intersections and Relevancy Tests
Optimize games by checking object intersections with functions like SDL_HasRectIntersection().