Odds and Ends: 10 Useful Techniques
A quick tour of ten useful techniques in C++, covering dates, randomness, attributes and more
This lesson is a quick tour of some topics we explored at the end of our introductory course. It is not intended for those who are entirely new to programming. Rather, the people who may find it useful include:
- those who have completed our introductory course, but want a quick review
- those who are already familiar with programming in another language, but are new to C++
- those who have used C++ in the past, but would benefit from a refresher
It summarises several lessons from our introductory course. Those looking for more thorough explanations or additional context should consider completing Chapters 9 and 10 of that course.
Intro to C++ Programming
Become a software engineer with C++. Starting from the basics, we guide you step by step along the way
Resizable Arrays (std::vector)
The C++ standard library's version of a dynamic, resizable array is available as a std::vector after including the <vector> header.
Below, we create a vector containing 5 elements - the integers from 1 to 5.
#include <vector>
std::vector MyVector{1, 2, 3, 4, 5};When we're providing the vector with initial values, as in the above example, the compiler can determine what type of vector it needs to create. In this case, it was a vector to store int objects.
When we're not initializing the vector with values, the compiler can't infer that. So, we must provide the type of value it will eventually contain, within < and > tokens:
#include <vector>
std::vector<int> MyVector;The < and > syntax indicates that we're dealing with a template, which we cover in the advanced course.
Accessing Vector Elements
There are four main ways to access elements of a vector:
- The
front()method accesses the first element - The
back()method accesses the last element - Passing an index to the
[]operator or theat()method accesses the element at that index. Indices start at0, so the second element is at index1, the third at index2, and so on;
#include <iostream>
#include <vector>
std::vector MyVector{1, 2, 3, 4, 5};
int main(){
std::cout
<< "1st Element: " << MyVector.front()
<< "\n2nd Element: " << MyVector[1]
<< "\nLast Element: " << MyVector.back();
MyVector[0] = 100;
std::cout
<< "\n\nNew 1st Element: "
<< MyVector.front();
}1st Element: 1
2nd Element: 2
Last Element: 5
New 1st Element: 100We can add items to the end of the vector using emplace_back(). A new object of the type our vector is storing will be created. Arguments passed to emplace_back() will be sent to an appropriate constructor for that type.
The pop_back() method deletes the last element.
#include <iostream>
#include <vector>
std::vector MyVector{1, 2, 3, 4, 5};
int main(){
MyVector.emplace_back(6);
std::cout << "Last Element: "
<< MyVector.back();
MyVector.pop_back();
std::cout << "\nLast Element: "
<< MyVector.back();
}Last Element: 6
Last Element: 5The number of elements in the vector is available via the size() method, and we can iterate over all elements using a range-based for loop:
#include <iostream>
#include <vector>
std::vector MyVector{1, 2, 3, 4, 5};
int main(){
std::cout
<< "Iterating "
<< MyVector.size() << " elements: ";
for (const int& Number : MyVector) {
std::cout << Number << ' ';
}
}Iterating 5 elements: 1 2 3 4 5Similar to functions, elements are passed into range-based for loops by value. As shown above, we can change that to pass-by reference or const reference, in the usual way.
We cover range-based for loops, vectors, and other containers in significantly more detail in the advanced course.
Compile Time Constants using constexpr
Beyond marking a variable as const, we can mark it as constexpr.
const float Gravity{9.8f};A constexpr variable is one that has a value that is known at compile time. Compile time constants give us a small performance improvement at run time.
The compiler can also call functions at compile time, as long as the function's return value is a constexpr, and all of the values it requires (such as the function parameters) are known at compile time:
int GetRuntimeResult(){ return 1 + 2; }
constexpr int GetCompileTimeResult(
int x, int y
){ return x + y; }
// Error initializing variable
// - GetRuntimeResult does not return a constexpr
constexpr int Res1{GetRuntimeResult()};
// This is fine - function returns constexpr and
// all parameters are known at compile time
constexpr int Res2{GetCompileTimeResult(1, 2)};
// This is fine - parameters are still known at
// compile time since x is a constexpr
constexpr int x{1};
constexpr int Res3{GetCompileTimeResult(x, 2)};
// Error calling function - parameters are not
// known at compile time as y is not a constexpr
int y{2};
constexpr int Res4{GetCompileTimeResult(y, 2)};Compilers can often detect compile time constants automatically, so we often acquire those performance gains anyway.
But, by marking a variable a constexpr, the compiler will make sure that the value can be determined at compile time, and will throw an error otherwise.
We can even create objects at compile time, using constexpr constructors. We'll explore this, and many more compile-time operations throughout the course.
User Input in the Terminal Using std::cin
Similar to std::cout, which outputs text to the terminal, we have std::cin from which we can get user input.
Typically, we'd do this by using the std::getline function, passing the std::cin stream, as well as a string within which we will store what the user typed:
#include <iostream>
#include <string>
int main(){
std::string UserInput;
std::cout << "Enter some text: ";
std::getline(std::cin, UserInput);
std::cout << "You entered: " << UserInput;
}Our program will pause at the std::getline call, waiting for our user to type some text and hit enter. What they typed will be stored within the UserInput variable we passed to the function, which we then log out:
Enter some text: Hello
You entered: HelloWe cover streams in a lot more detail in the advanced course.
Dates, Times, and Durations using <chrono>
The standard library includes an implementation of dates, times, and durations called Chrono.
The functionality is available by including <chrono> and is then found within the std::chrono namespace.
Durations
A duration is a basic span of time, such as 2 years, 6 weeks, or 10 seconds.
Objects to represent durations can be created using std::chrono::duration.
std::chrono::duration A;We have helper functions like std::chrono::weeks and std::chrono::hours to define them:
#include <chrono>
int main(){
using namespace std::chrono;
duration A{weeks(2)};
duration B{hours(5)};
}Durations include intuitive operators. For example, we can combine and manipulate durations using arithmetic operations:
#include <chrono>
int main(){
using namespace std::chrono;
duration A{minutes(1) + seconds(30)};
A += minutes(1);
}We can also compare durations using boolean operations:
#include <chrono>
int main(){
using namespace std::chrono;
duration A{minutes(2) + seconds(30)};
bool MyBoolean{A > minutes(2)}; // true
}Duration literals are available within the std::chrono_literals namespace. This allows us to create a std::chrono::duration representing 3 hours, for example, by simply writing 3h. More examples are below:
#include <chrono>
int main(){
using std::chrono::duration;
using namespace std::chrono_literals;
// hour, minute, second
duration A{1h + 2min + 3s};
// millisecond, microsecond, nanosecond
duration B{A + 4ms + 5us + 6ns};
}Clocks and Time Points
To represent a point in time, we generally need to use a clock from which to derive it. There are many options, and we can create our own.
But the most common choice will simply be the user's system clock, managed by their operating system.
The system_clock has a now() method, for retrieving the current point in time:
#include <chrono>
int main(){
using std::chrono::time_point;
time_point CurrentTime{
std::chrono::system_clock::now()
};
}duration and time_point objects interact in intuitive ways. For example, we can modify a time point using a duration:
#include <chrono>
int main(){
using namespace std::chrono;
time_point ThreeWeeksAgo{
system_clock::now() - weeks(3)
};
}We can also generate durations by comparing time points:
#include <chrono>
#include <thread>
int main(){
using namespace std::chrono;
time_point StartTime{
system_clock::now()
};
std::this_thread::sleep_for(seconds(5));
time_point EndTime{
system_clock::now()
};
duration RunningTime{
EndTime - StartTime
};
}This was a bare minimum introduction to <chrono>. More detail and examples, including how we print durations and time points to the terminal, are available in our dedicated lesson:
Dates, Times and Durations
Learn the basics of the chrono library and discover how to effectively manage durations, clocks, and time points
Randomness
Generating randomness in C++ typically involves three components:
1. Seeder
A seeder generates a random initial value. The standard library provides a seeder called std::random_device, within the <random> header.
2. Engine
An engine takes a value returned from a seeder and uses it to seed an algorithm that can quickly generate further random numbers, based on the initial seed.
A common algorithm for this is Mersenne Twister. An implementation of this is available within <random> as std::mt19937
3. Distribution
Finally, we take the random numbers coming from our engine and distribute them into our desired range. There are three components to this:
- The format we want the random output to be. For example, we typically want integers
- The range we want the output to be in - for example, we perhaps want a number in the 1-10 range
- The way we want our output to be distributed within this range. For example, we might want each number to be equally likely to be chosen - this is called a uniform distribution. Or we may want numbers in the middle of the range to be chosen more often than those at the extremes - this is called a normal distribution.
The standard library has a range of distributions we can use. Below, we put everything together, to generate random integers in a uniform distribution:
#include <iostream>
#include <random>
namespace Random{
std::random_device Seeder;
std::mt19937 Engine{Seeder()};
int Int(int Min, int Max){
std::uniform_int_distribution D{Min, Max};
return D(Engine);
}
}
int main(){
std::cout << Random::Int(1, 10) << '-';
std::cout << Random::Int(1, 10) << '-';
std::cout << Random::Int(1, 10) << '-';
std::cout << Random::Int(1, 10) << '-';
std::cout << Random::Int(1, 10);
}8-9-4-2-4Our dedicated lesson on Randomness in C++ includes significantly more detail:
Random Number Generation
This lesson covers the basics of using randomness, with practical applications
Structured Comments and JavaDoc
If we format our code comments in a specific way, they can be understood by other systems. This can allow us to generate automatic code documentation, or improve the development experience inside IDEs.
The exact format we need to use to make this happen depends on our tooling, but most tools implement a style similar to JavaDoc.
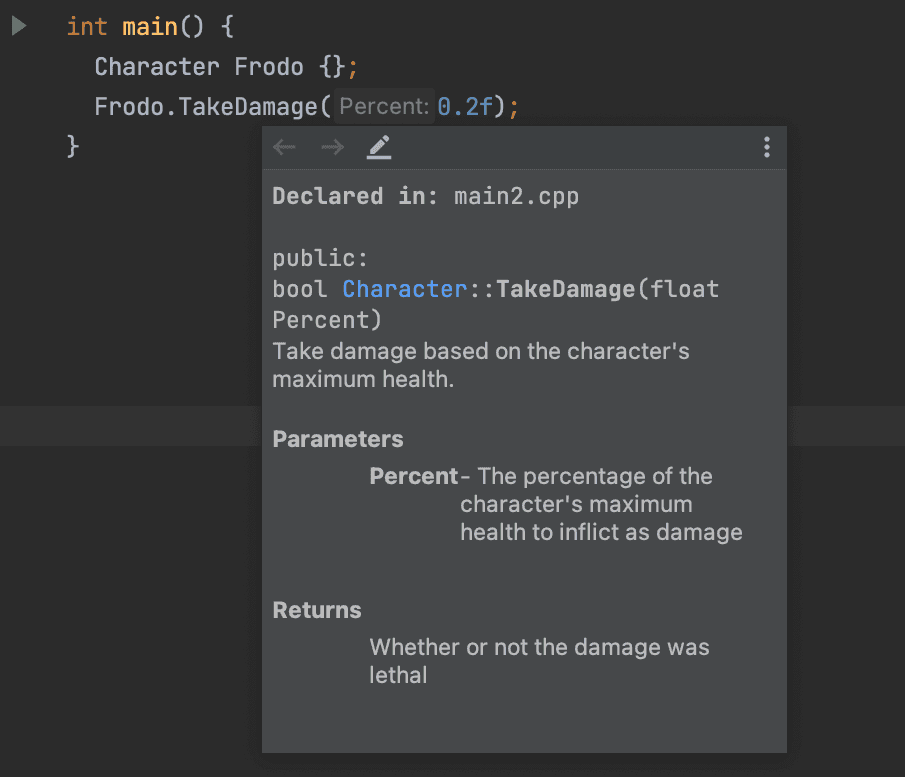
A JavaDoc comment starts with /** and includes a range of predefined symbols that begin with an @ to specify certain properties or features of our code. Documenting a function with JavaDoc could look something like this:
/**
* Take damage based on the character's
* maximum health.
*
* @param Percent - The percentage of the
* character's maximum health to inflict
* as damage
*
* @return Whether or not the damage was lethal
*/
bool TakeDamage(float Percent){
//...
};Within tools that understand this syntax, we may now be able to see this documentation any time we try to use the function:
More examples are available within the DoxyGen (a popular C++ documentation generator) website here.
Attributes
Attributes are small statements in our code, wrapped in [[ and ]] that can give other developers or the compiler some guidance.
There are many attributes we can use, and our options vary from compiler to compiler. Below, we'll include examples of three that are commonly supported and useful:
[[deprecated]]
We can mark a function as [[deprecated]], to discourage its use. This is most commonly used when we're creating code that is being used by other developers, and we'd like to delete some class or function.
But suddenly deleting functionality that is widely used is disruptive to those developers, so we typically first mark it as deprecated for a period of time before removing it. This gives them time to switch to an alternative:
[[deprecated]]
void SomeFunction(){};
// We can pass additional information
[[deprecated(
"Consider using BetterFunction() instead"
)]]
void AnotherFunction(){};
int main(){
SomeFunction();
AnotherFunction();
}Developers can still use deprecated functions, but will get warnings:
'SomeFunction' is deprecated
'AnotherFunction' is deprecated:
Consider using BetterFunction() instead[[nodiscard]]
Imagine we write a function that has the sole effect of returning a value. If that function is called, and the return value is discarded, that is likely to be a misunderstanding of how our function works.
We can protect against this by adding the [[nodiscard]] attribute:
[[nodiscard]]
int Add(int x, int y){ return x + y; }
int main(){
// Not doing anything with the return value
Add(1, 2);
}warning: Ignoring return value of function
declared with 'nodiscard' attribute[[likely]] and [[unlikely]]
The [[likely]] and [[unlikely]] attributes interact with conditional logic. They are ways we communicate that a specific branch is likely or unlikely to be taken, based on our knowledge of the product we're building.
This documents our assumptions for other developers, but compilers may also be able to use these attributes in order to make the final project more performant, by optimizing around the likely execution path.
void HandleEvent(Event& E){
// Mouse events are significantly more
// common than window resize events
if (E.Type == Mouse) [[likely]] {
// ...
} else if (E.Type == WindowResize) {
// ...
}
}Code Formatting and ClangFormat
Whilst C++ is fairly agnostic with regard to white space, laying out our code in a readable way is important for developers.
Most IDEs can automatically format our code for us, based on configuration options that we can change within the settings.
When working in a team, it is common for these settings to be shared across all the developers, so we structure our code in the same way.
A standardized way to define code formatting rules for C++ is ClangFormat, which is also supported by many IDEs.
Typically, this involves creating a file called .clang-format (note the initial .) in the root directory of our project.
A minimal .clang-format file will simply import predefined settings, created by companies like Google, Microsoft, or Mozilla
BasedOnStyle: GoogleWe can override specific rules to suit our preferences. For example, we can mostly Microsoft's rules, but override some of the rules like this:
BasedOnStyle: Microsoft
IndentWidth: 2
ColumnLimit: 60A full list of all the settings and what they mean are available in the official ClangFormat documentation
Static Analysis
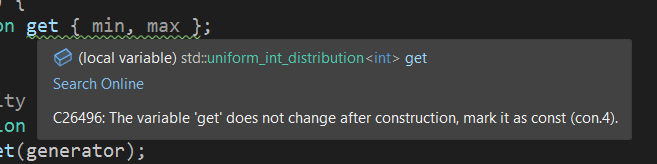
Static analysis tools are designed to review the code we write and provide suggestions on how it can be improved.
For example, suggestions can include:
- detecting
#includedirectives or variables that we never use - detecting variables or functions that we could mark as
const - detecting header files for which we have forgotten to define header guards.
Many IDEs and compilers have some limited functionality along these lines. Below, we show an example from Visual Studio:
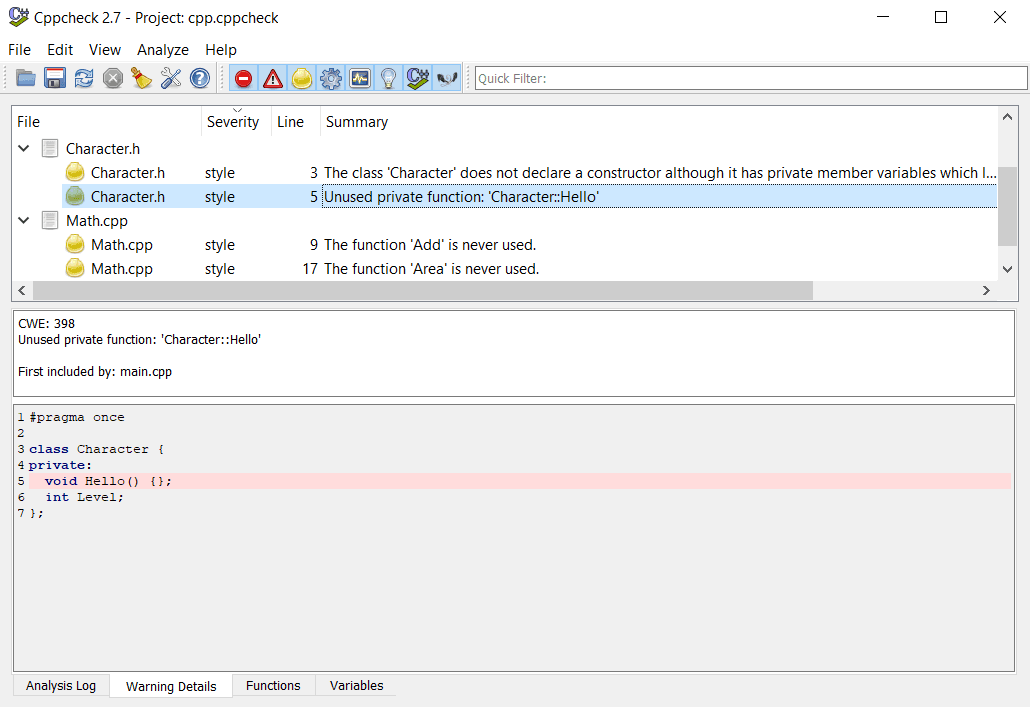
However, standalone tools are also available that tend to be much more thorough. A popular free option is Cppcheck
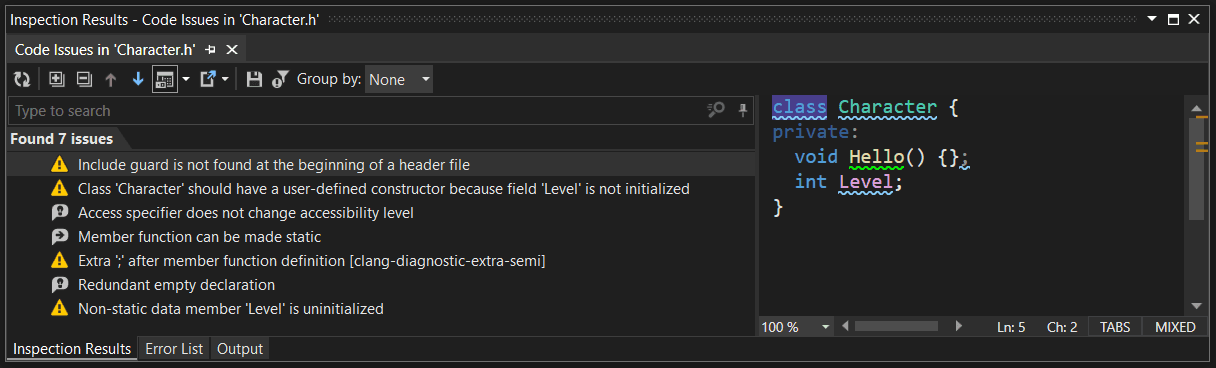
A popular commercial option is Resharper
Summary
This lesson provided a quick overview of useful C++ techniques and features. The key things we covered include:
- Using
std::vectorfor resizable arrays - Defining compile-time constants with
constexpr - Getting user input with
std::cinandstd::getline - Working with dates, times, and durations using
<chrono> - Generating random numbers with
<random> - Documenting code using structured comments and JavaDoc
- Utilizing attributes like
[[deprecated]],[[nodiscard]],[[likely]], and[[unlikely]] - Formatting code consistently with ClangFormat
- Improving code quality with static analysis tools
Installing vcpkg on Windows
An introduction to C++ package managers, and a step-by-step guide to installing vcpkg on Windows and Visual Studio.